Use related objects, repeated values, and galleries
Repeated related objects
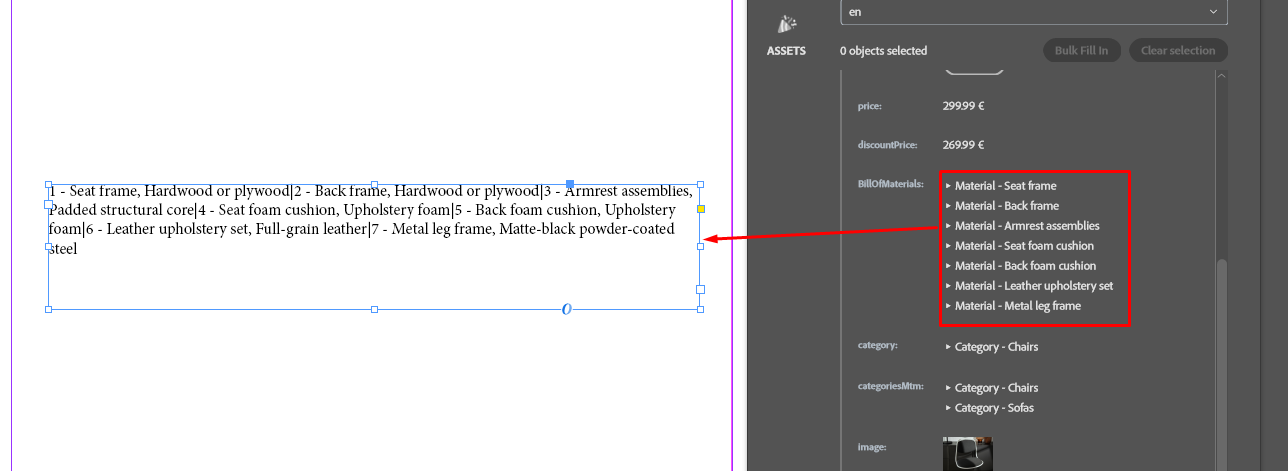
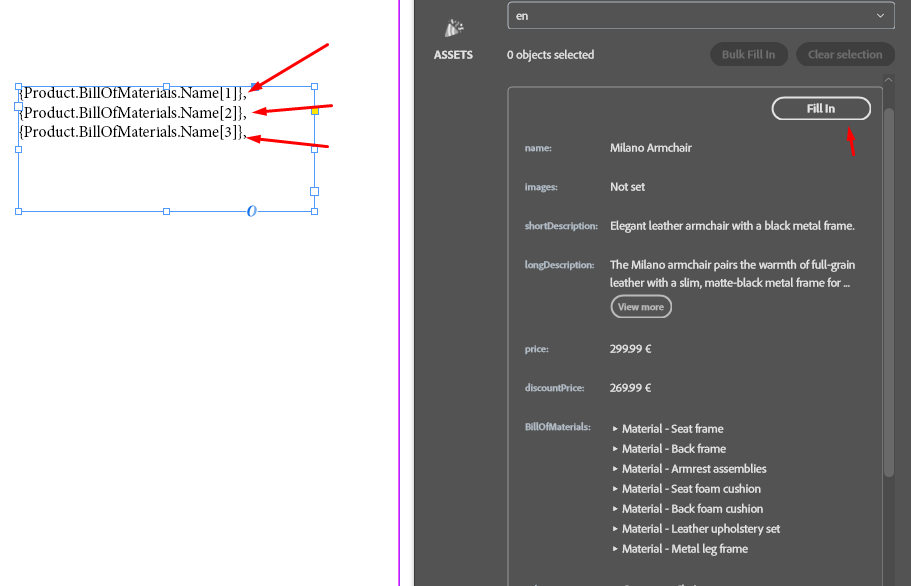
If a Product is linked to several items, put a placeholder for the related field in a text frame and use Fill in to insert their values in Pimcore relation order. Add [line...] to keep all items on one line or [nextrow...] to put each item on a separate row. Characters after line or nextrow and before ] form a delimiter between items: for example, [line;] separates values with a semicolon and [line ] separates them with a space. The delimiter is not appended after the final item. To select just one related item, use a 1-based index such as [1] for the first or [2] for the second.
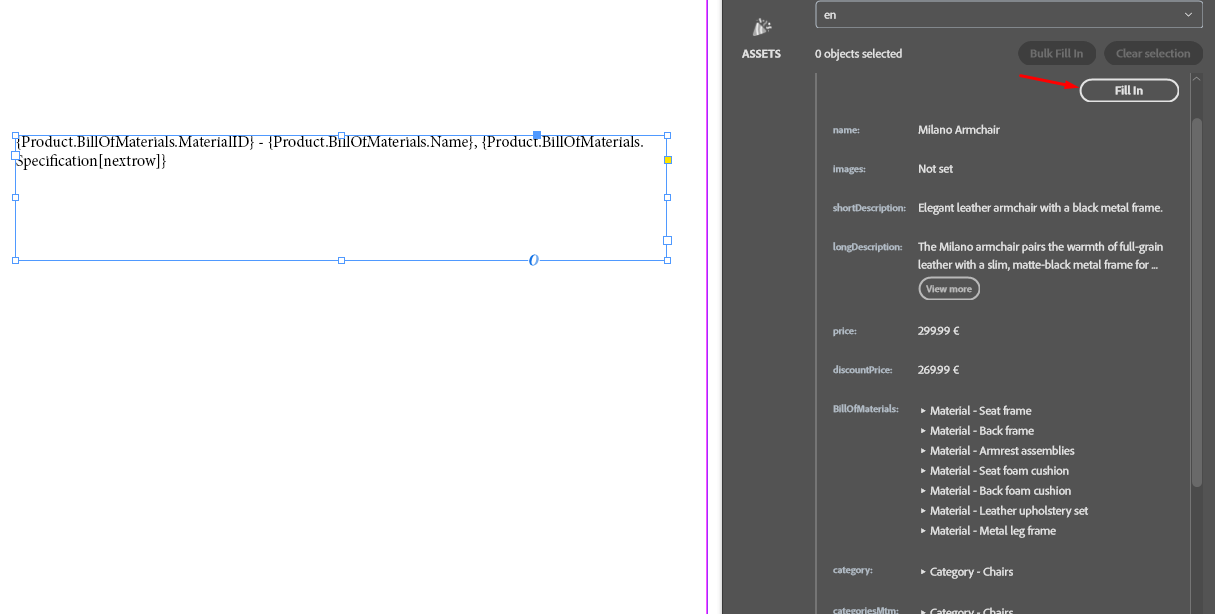
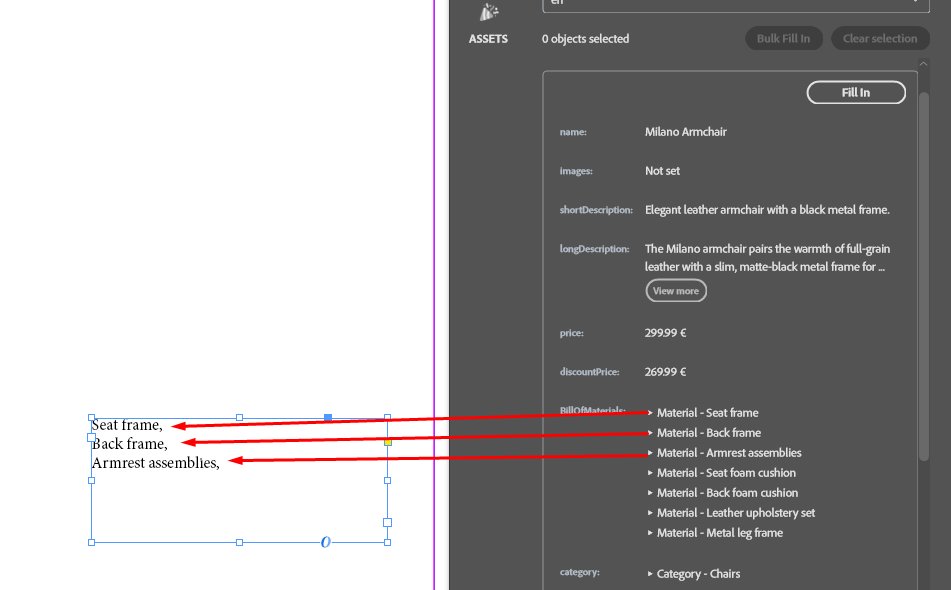
The screenshots show the Milano Armchair Product and its BillOfMaterials relation. Its first three Material entries are Seat frame, Back frame, and Armrest assemblies; four more follow. Use the field names shown in your plugin.
| What to put in a text frame | What it produces after Fill in |
|---|---|
{Product.BillOfMaterials.Name[1]}, {Product.BillOfMaterials.Name[2]} | Seat frame, Back frame |
{Product.BillOfMaterials.Name[line|]} | Seat frame|Back frame|Armrest assemblies|…|Metal leg frame |
{Product.BillOfMaterials.Name[line ]} | Seat frame Back frame Armrest assemblies … Metal leg frame |
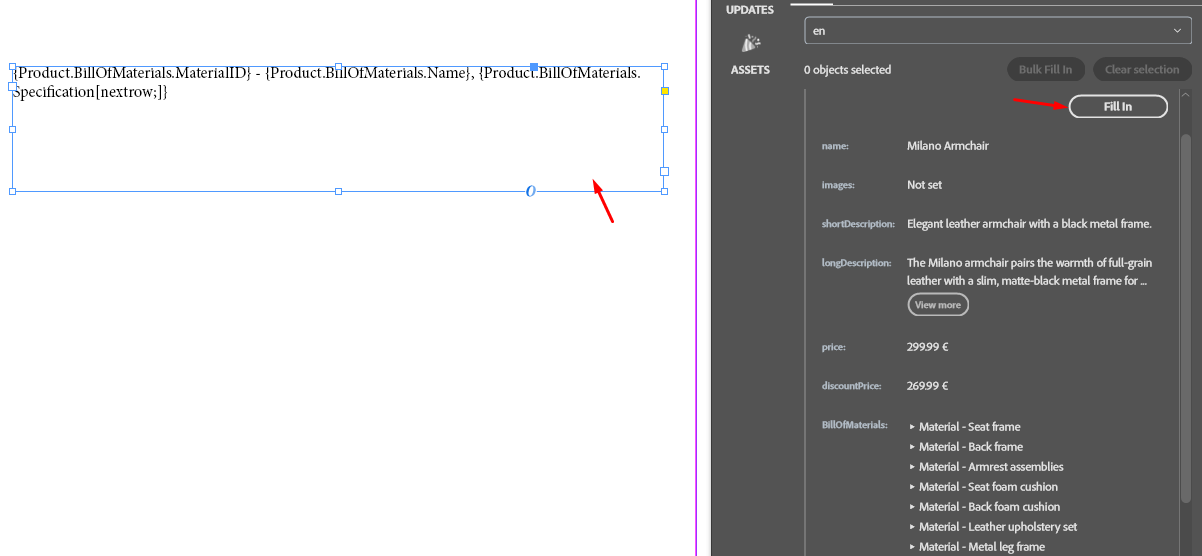
{Product.BillOfMaterials.Name[nextrow;]} | Seven rows: Seat frame; / Back frame; / … / Metal leg frame (no trailing ;). |
For a single repeated field, {Product.BillOfMaterials.Name[nextrow;]} puts the material names on separate rows; {Product.BillOfMaterials.Name[line|]} keeps them on one line separated by |. The delimiter is not added after the last item.
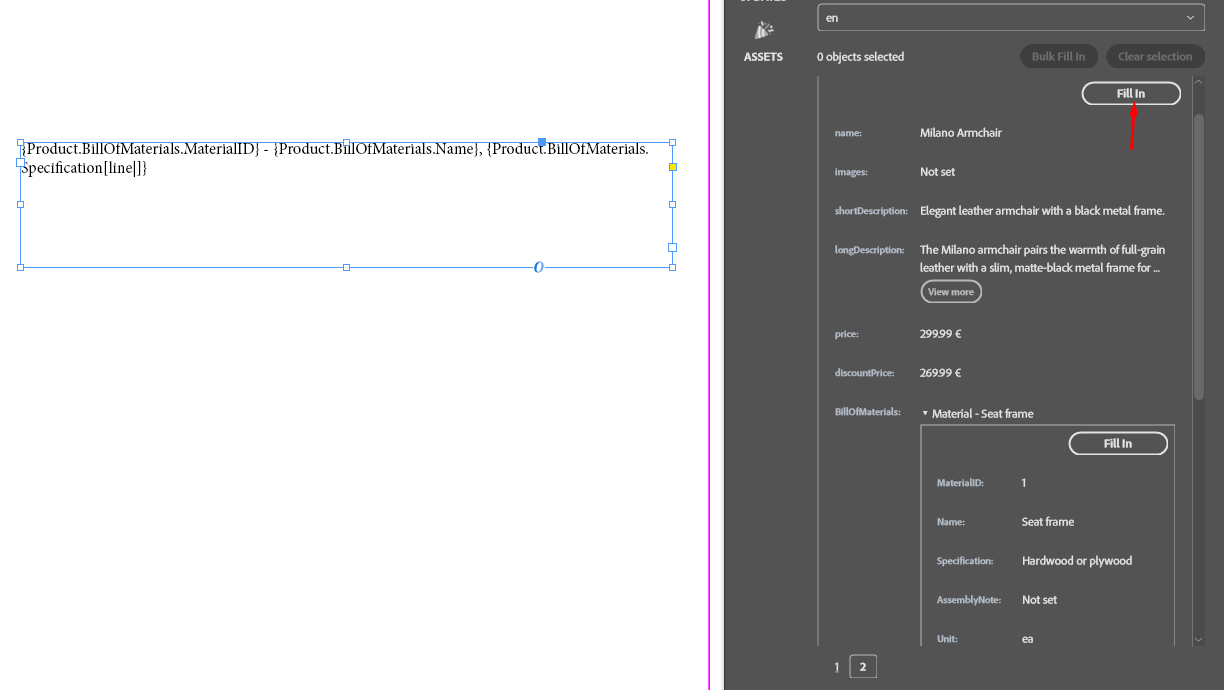
To repeat several fields of each material, put them together in one text frame and add the directive to the last field of the repeated entry. In the screenshots, MaterialID, Name, and Specification are used:
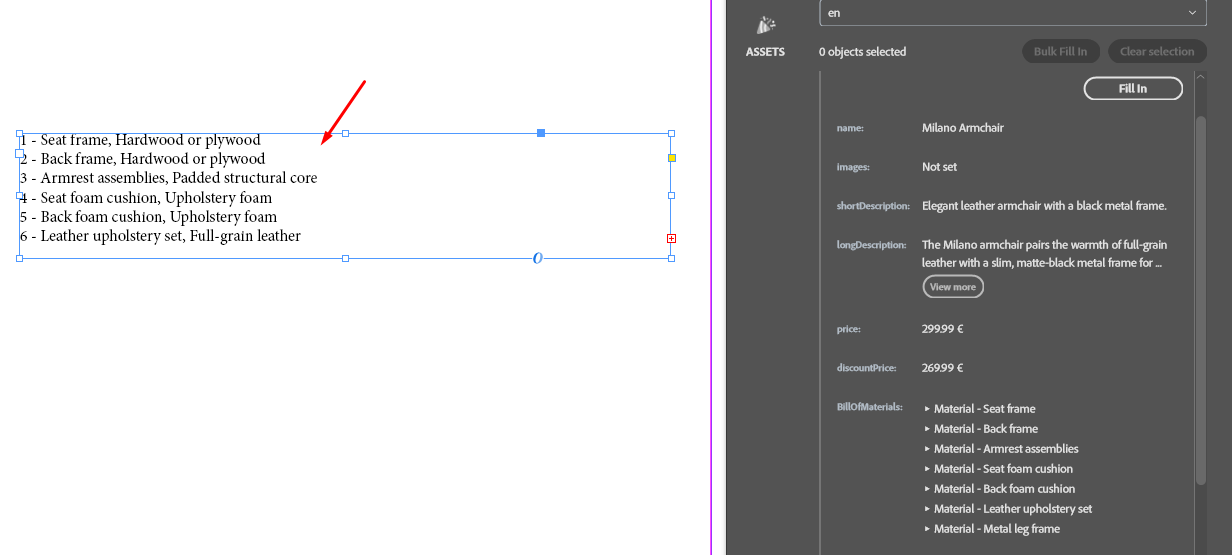
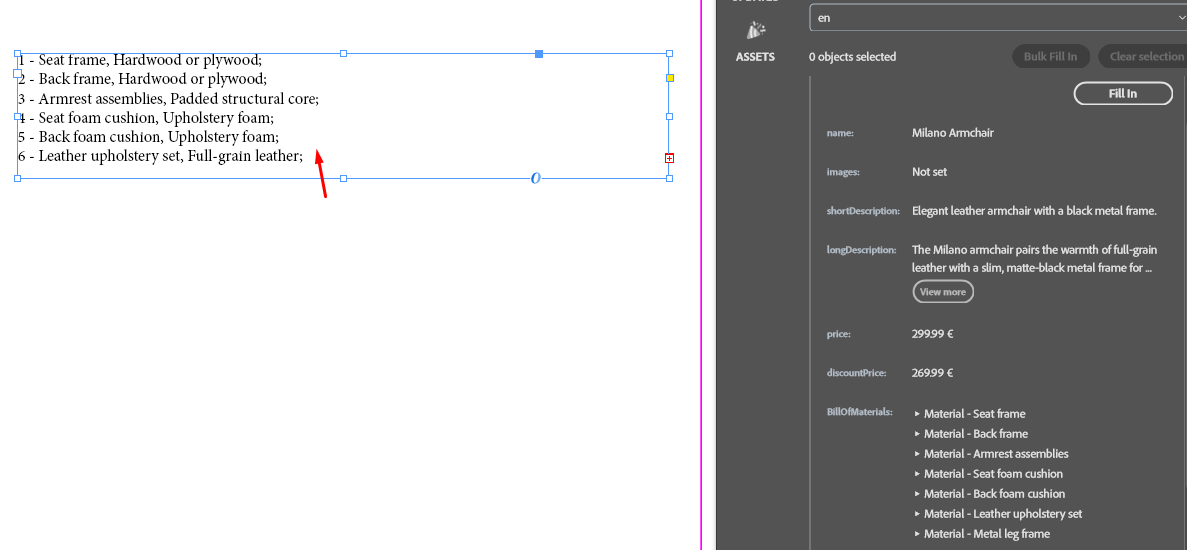
{Product.BillOfMaterials.MaterialID} - {Product.BillOfMaterials.Name}, {Product.BillOfMaterials.Specification[nextrow;]}The filled text looks like this (with line breaks, and no semicolon after the last row):
1 - Seat frame, Hardwood or plywood;
2 - Back frame, Hardwood or plywood;
3 - Armrest assemblies, Padded structural core;
4 - Seat foam cushion, Upholstery foam;
5 - Back foam cushion, Upholstery foam;
6 - Leather upholstery set, Full-grain leather;
7 - Metal leg frame, Matte-black powder-coated steel
Use [line|] on the last field instead to put complete entries on one line, separated by |, as in the screenshots. Copy the actual class, relation, and attribute names from your configuration.
Fill a styled table with related items
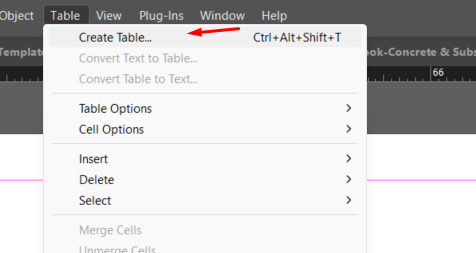
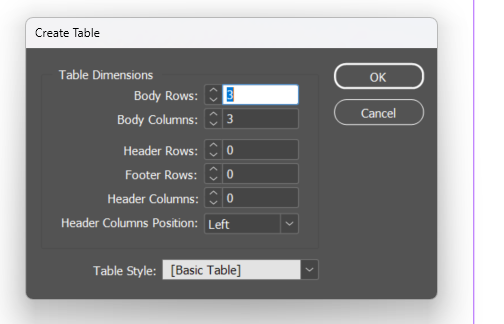
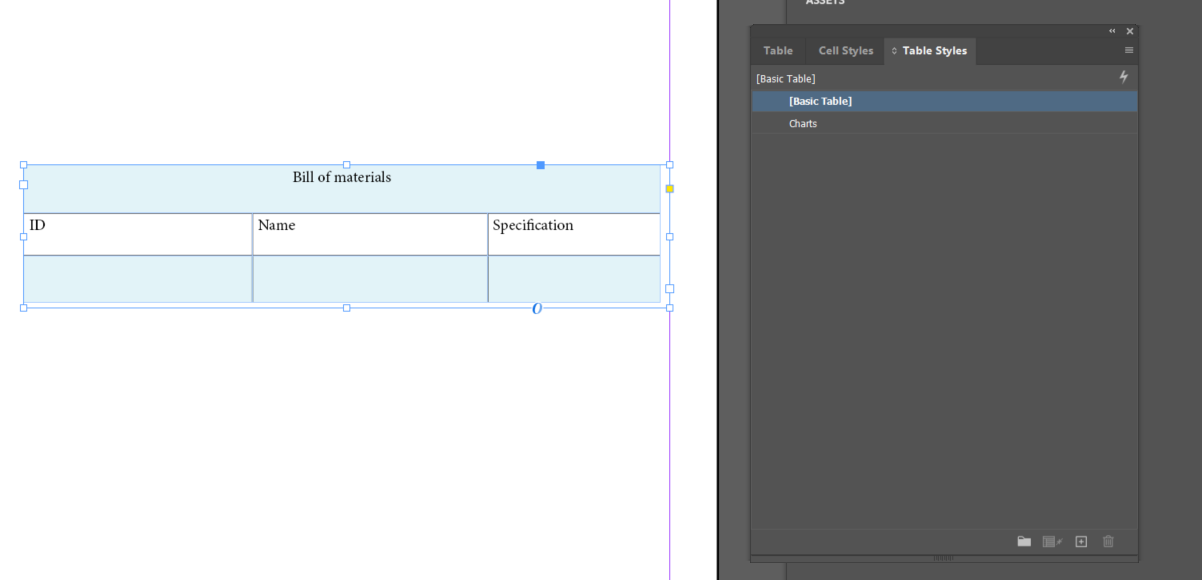
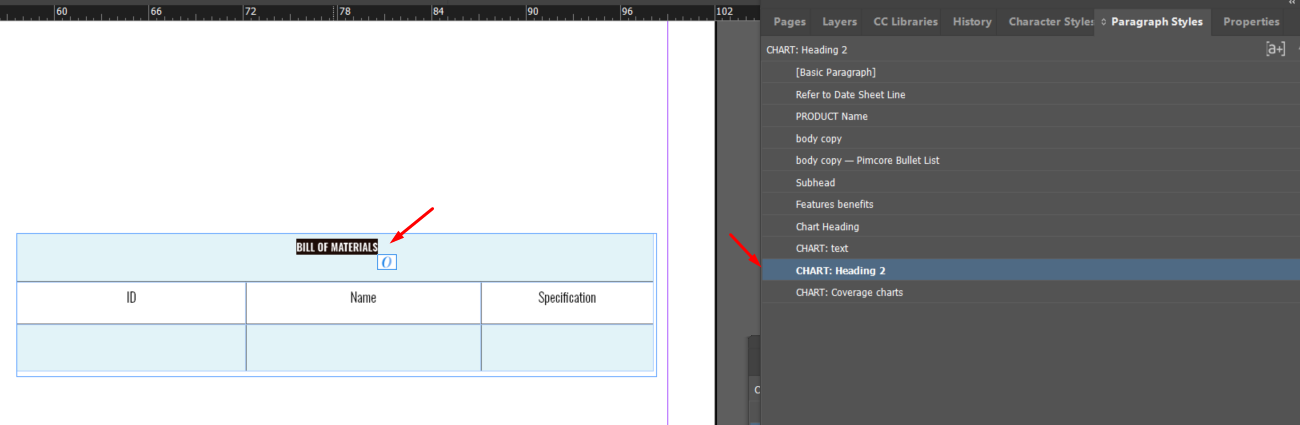
Use this option when a Product has related Items that you want to show in an InDesign table. Create and style the table in InDesign first: add your headings and one data row with the cell, paragraph, and character formatting you want the other data rows to use. The plugin fills your table; it does not replace it with a table imported from Pimcore.
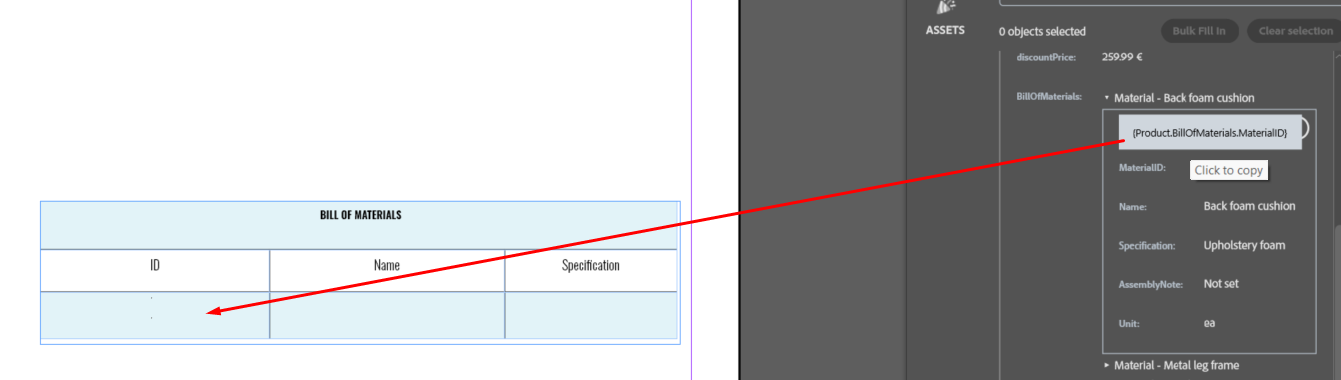
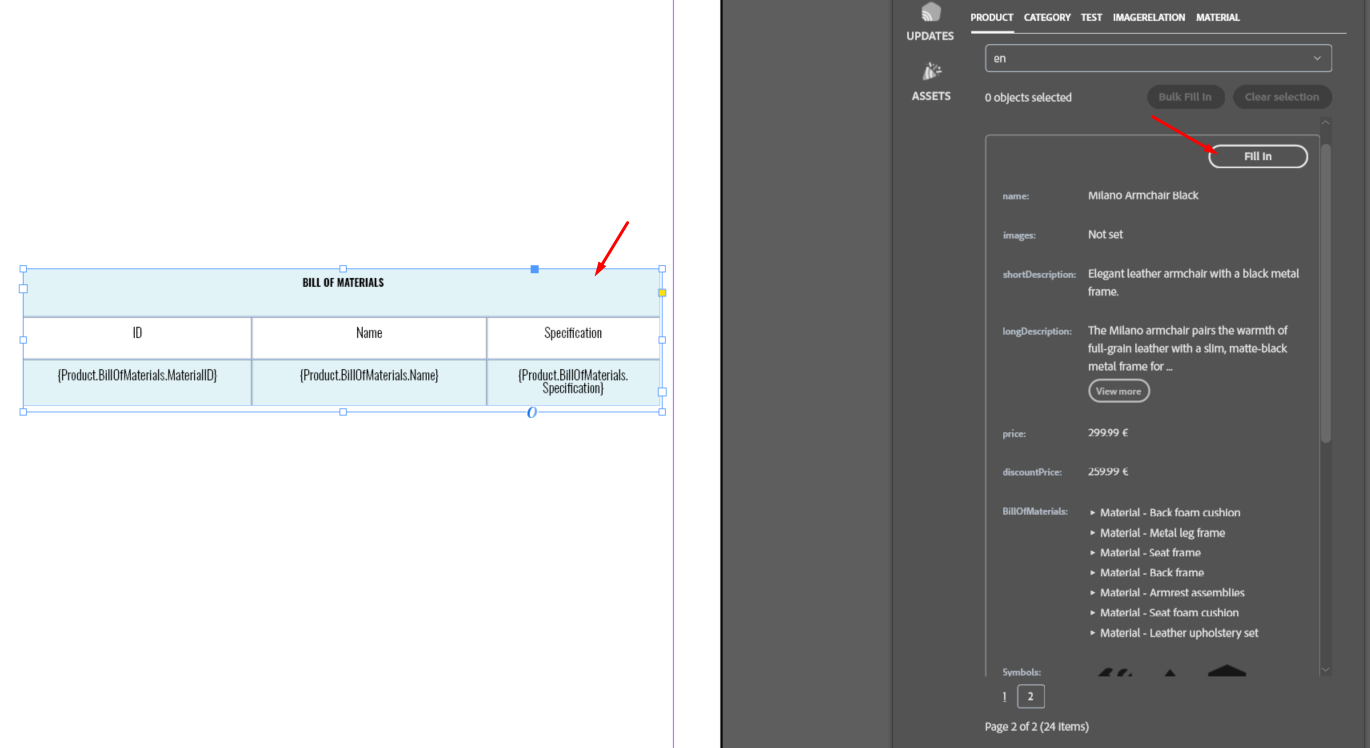
Place a placeholder for each Item attribute in the corresponding cell of the data row:
| Item ID | Size | Weight |
|---|---|---|
| {product.Item.ID} | {product.Item.Size} | {product.Item.Weight} |
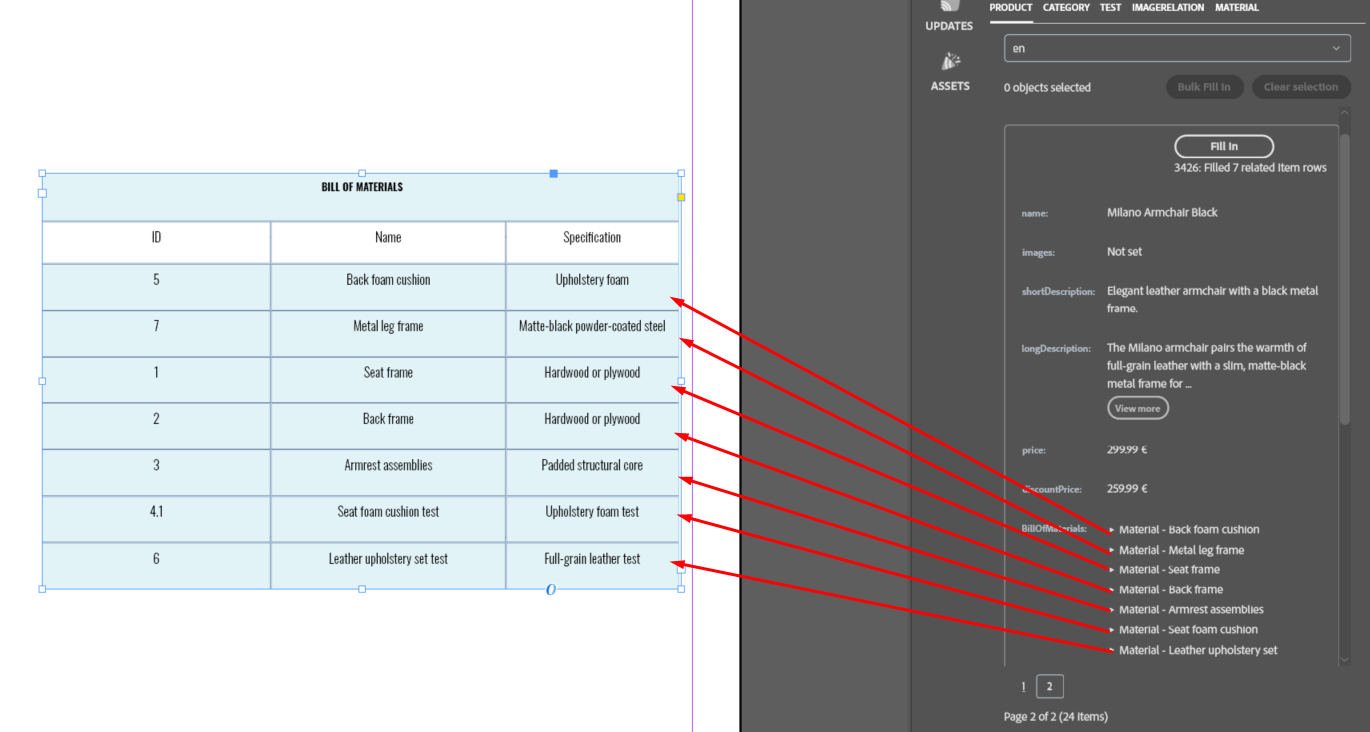
Select the Product and run Fill in. The first related Item fills the prepared row. The plugin adds one row for each remaining Item, in Pimcore relation order. Each added row inherits the formatting of the prepared data row, while the heading remains unchanged. Bulk Fill In also supports these tables: each Product’s table uses only Items related to that Product.
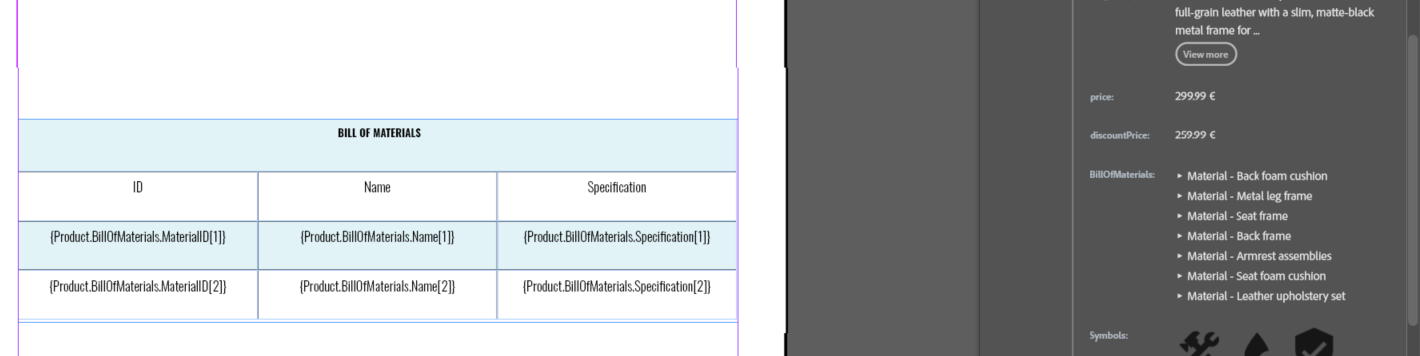
To fill specific Items without adding rows, prepare a row with indexed placeholders instead. For example, {product.Item.ID[1]}, {product.Item.Size[1]}, and {product.Item.Weight[1]} fill one row from the first related Item. A separately prepared row using [2] fills from the second Item. Indexes start at 1; use the same index in every cell of a row so that values from different Items are not mixed.
For example
| Item ID | Size | Weight |
|---|---|---|
| {product.Item.ID[1]} | {product.Item.Size[1]} | {product.Item.Weight[1]} |
| {product.Item.ID[2]} | {product.Item.Size[2]} | {product.Item.Weight[2]} |
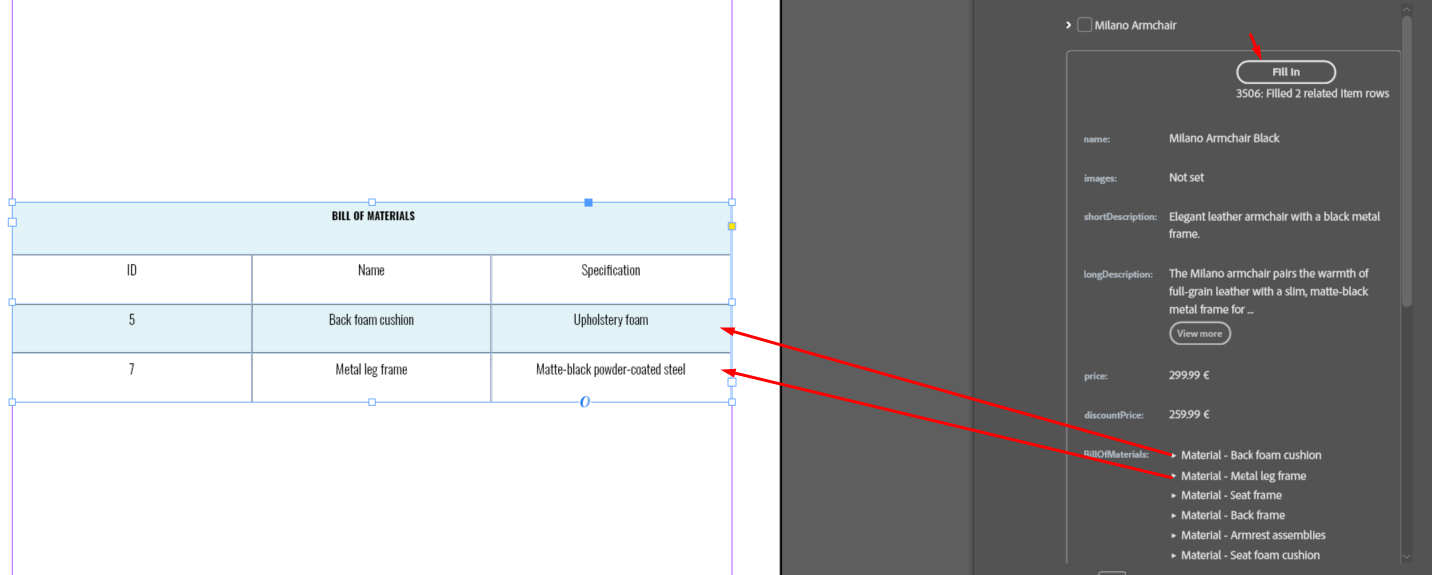
When an Item value or the Product’s Item relation changes, click Check for Updates and review the changes in UPDATES. Applying an individual update or Update All can update cell values and bring the generated rows into line with added, removed, or reordered Items. Your table styling and unrelated content remain in place. Saving and reopening the document preserves the connection needed for later updates; merely opening it does not change the table.
Screenshot to add later: a designer-styled table with one placeholder row, followed by the filled table with several related Items.
Galleries in text frames
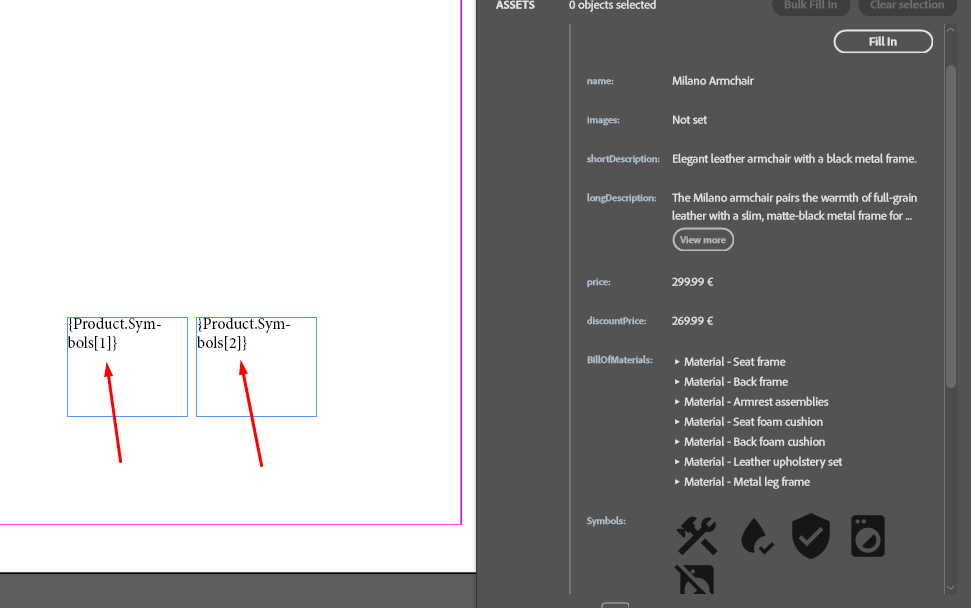
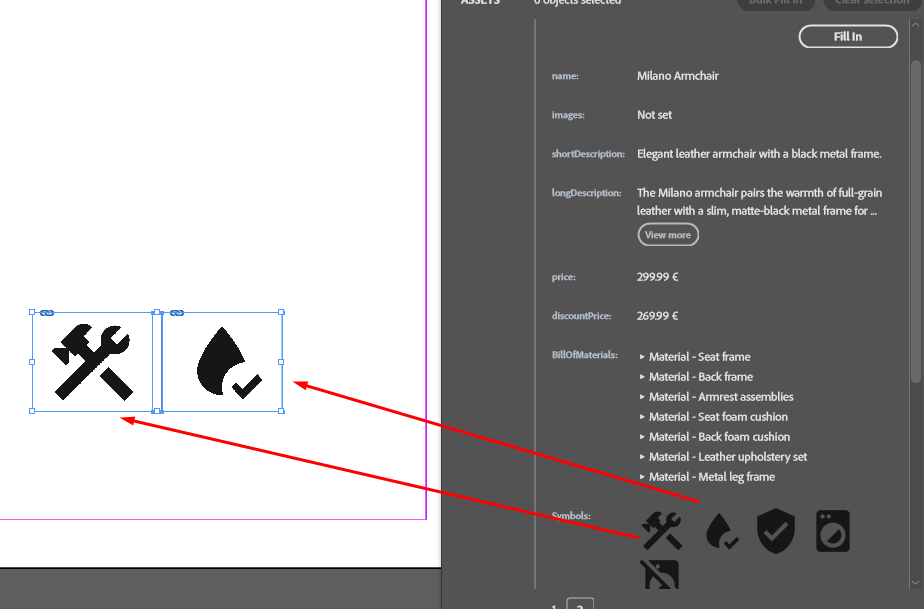
To place a specific gallery image, copy or enter an indexed gallery placeholder into a text frame. In the screenshots, {Product.Symbols[2]} places only the second symbol (the droplet icon); indices start at 1.
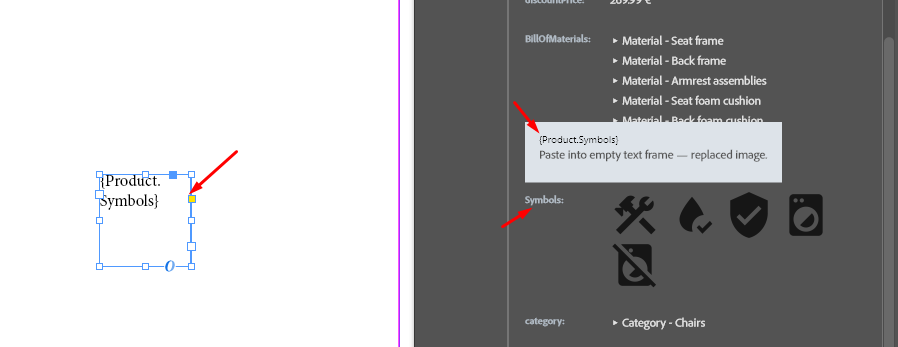
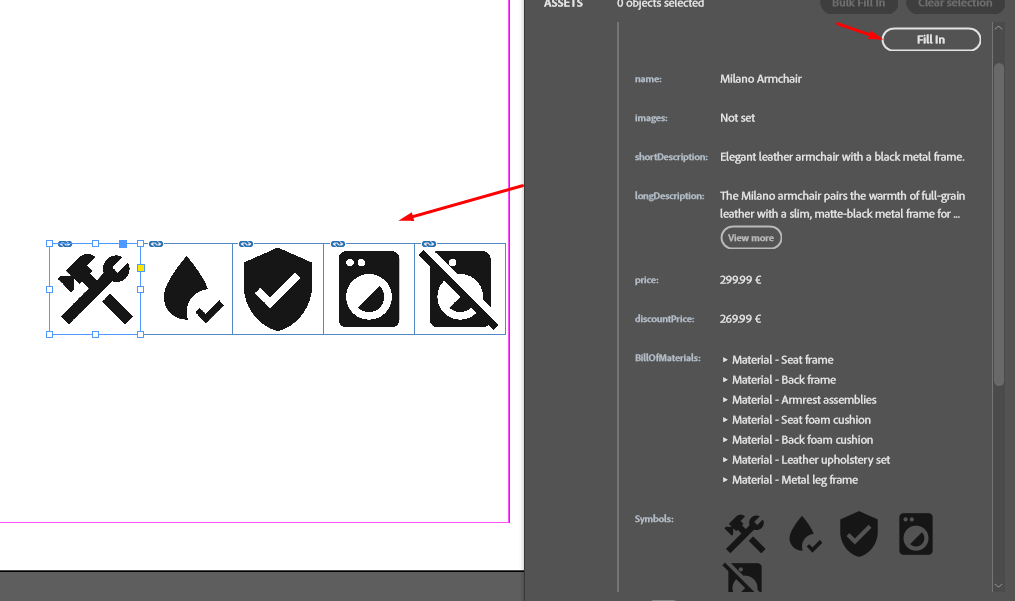
To place the whole gallery, use the unindexed placeholder {Product.Symbols} in a text frame and fill it. In the screenshots, the plugin places the five Symbols images in gallery order, creating adjacent frames from the placeholder position. You can move the resulting image frames to fit your design. When you later update a gallery, surviving frames keep their placement rather than returning to the original row. Review the page after adding or removing gallery images to make room for new frames as needed.
Gallery placeholders are for the text-frame workflow. To fill a single selected rectangle with an image attribute, use its OBJECTS thumbnail instead.