Support different screen sizes with a custom collection view layout
Supporting different screen sizes is often one of the biggest iOS challenges while developing an iOS app – until now!
We prepared a blog post where you can find tips on how to create a user interface that provides satisfactory UX on all devices from iPhones and all the way to iPads.
One of the possible approaches to this issue is creating different layouts for iPhones and for iPads. This approach offers great options for customizing design for different devices where we can utilize all of the potentials when using bigger devices.
However, this approach brings increased development time and another layer of complexity to our project in the shape of using multiple viewControllers.
Another option could be, if you have an app that is not primarily used on iPad and you do not care about all the potential bigger screens provide, writing adaptive layout.
With adaptive layout, we get a layout that works on devices of all sizes but on bigger screens some elements could be unnecessarily oversized or we could have large unused spaces on the screen. So this approach is definitely not a good solution for ecommerce apps development.
Here at Factory we have decided to take a different approach to this problem. We have decided to write our own custom collection view layout.
With custom collection view layout we have managed to use all of the potentials that bigger screens offer and all that without writing multiple layouts.
We have reduced development time using custom collection view layout and also the whole development process got a lot easier while greatly improving UX.
This approach works great when you need to support a wide range of device sizes and you need to make use of every pixel on the screen.
In the next few paragraphs, we are listing all the reasons why we decided to use a custom collection view layout on our ecommerce projects.
Before we move on to the next part of the post, just a quick reminder! We have already written articles revolving around iOS and iOS development so we advise you to check them out! As we’re discussing the development of an eCommerce mobile app – our blog post about creating a successful eCommerce app may be ideal for you! Before you launch your app, take notes – we have written a quick guide on submitting your mobile app to iTunes which we strongly recommend that you read!
Why custom collection view layout for your eCommerce app?
When developing an eCommerce app using all space available is of great importance. This is especially notable on category or product screen.
Thanks to the custom collection view layout on product screen we can get different positions of the elements on the screen and accomplish better UX because we are presenting information in a more readable and specialized way for that screen size. For that reason, we decided to create our own custom collection view layout.
If the idea of creating your own custom collection view layout sounds awesome – take a look at our article about creating custom scale view element in iOS! It will show you how to get a fully custom view that acts as a scrollable scale with only a simple implementation.
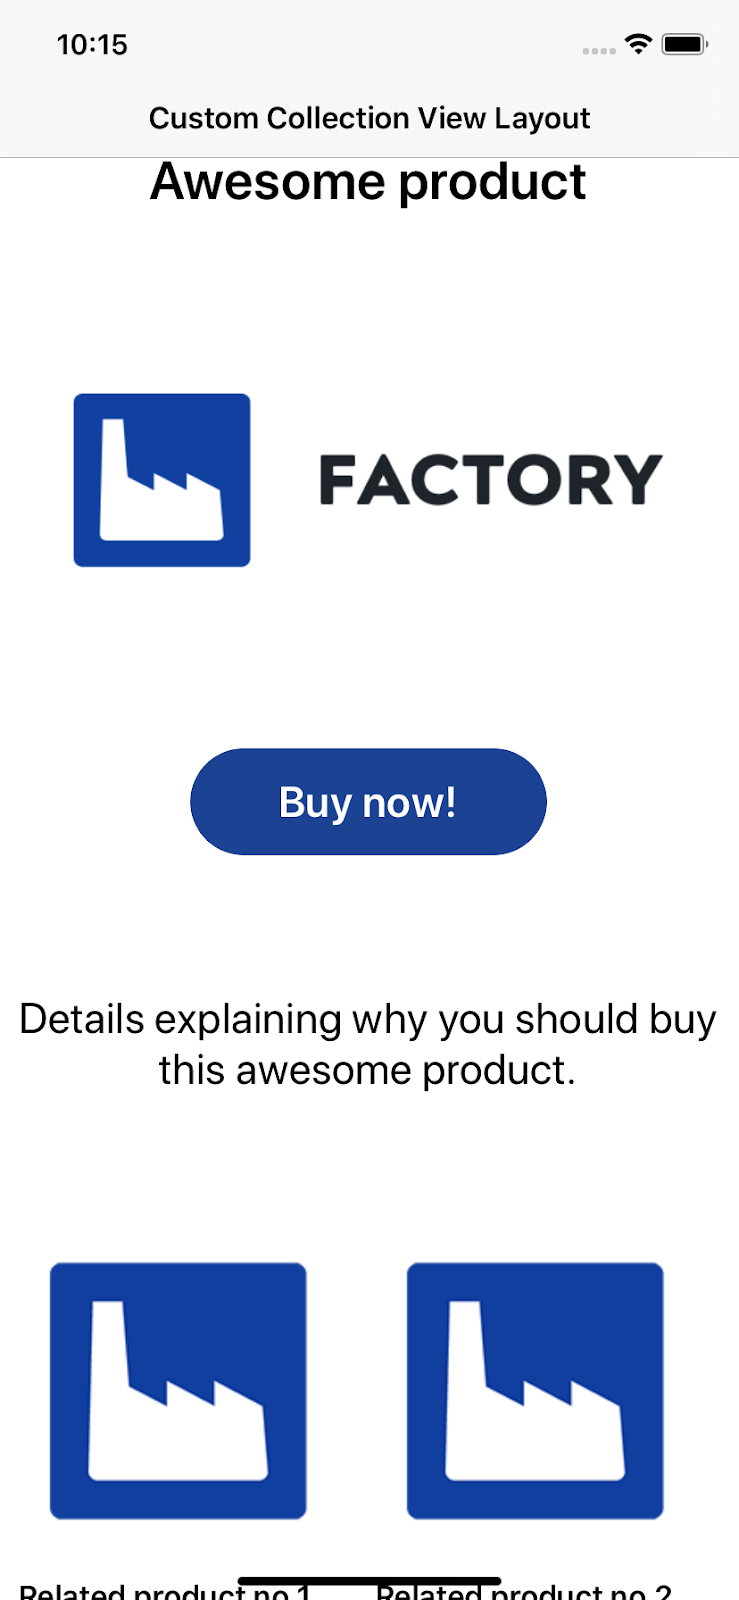
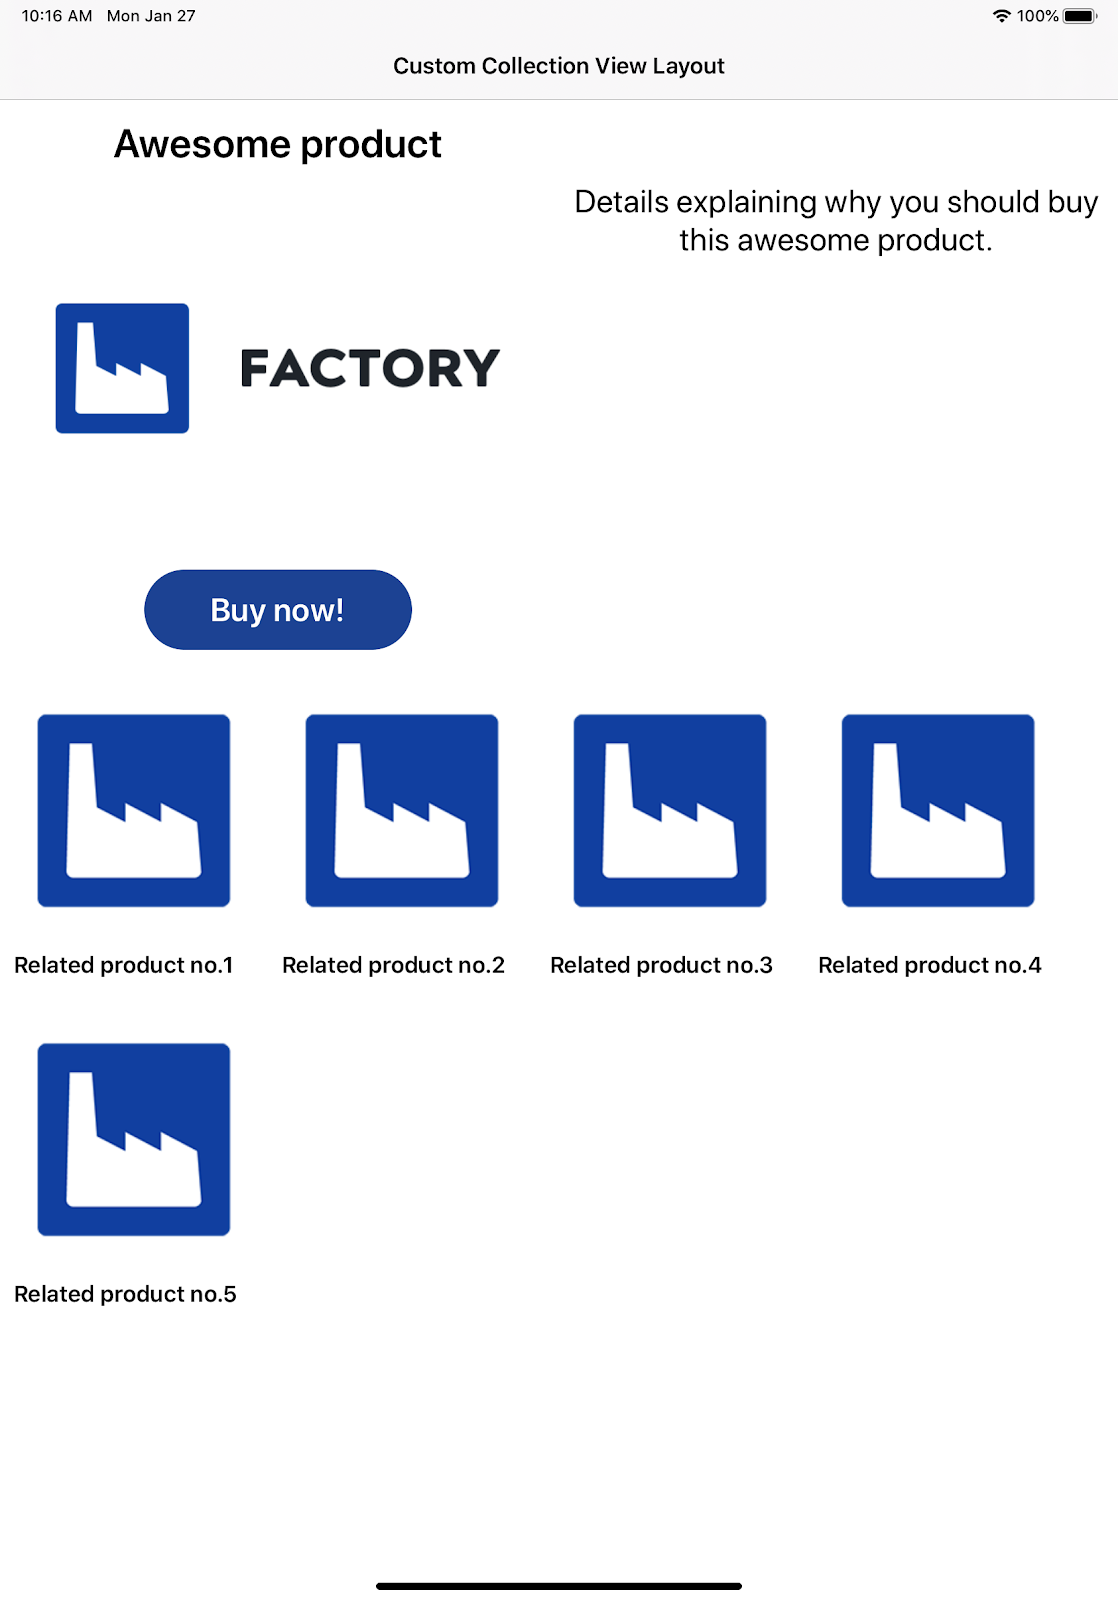
Below you can see the difference between layouts on iPhone and on iPad. It’s clear that the bigger screen is better used this way than it would be if the layout was just scaled to be bigger and fit the screen.
Take a look at the layout on the iPhone:
Take a look at the layout on the iPad:
Let’s dig deeper into how to create own layout while decreasing development time
For creating a layout that will decrease development time and at the same time look great on screens of all sizes we will be using the collection view layout.
Collection view manages ordered collection of data items and presents them using layout, in our case, it will be our custom layout. The main job of your collection view layout is to determine the placement of every item inside the collection view’s bounds and to report that information to the collection view when asked.
Wanna know more about the custom layout?
If you are interested in learning more about collection view and collection view layout we suggest checking out official Apple documentation where you will find every method that mention explained in depth. Apple offers in its documentation more on collection view layout so don’t hesitate to take a look! On their pages, you can also find an official guide for creating a custom layout!
How to actually create a custom collection view layout?
Let’s see how you can write the layout that arranges its views. Before we start writing our layout we need to set up a few things that we need for creating our layout. Let’s say that we want to display information in two columns and below we want to show related products.
First, we create an enum (Type of data in Swift) with all possible cases where we could position our items. Start case is the first column, end is the second column and inline is the case for related products that are displayed below columns of information about the current product.
We need a way to tell our layout which type of position to use for our items. Luckily for us, we can extend CollectionViewDelegate with a method that we will use for getting CollectionPosition for each item inside a collection view.
Inside our business logic where we create data that we give to a collection view, we need to make sure that every item in our screen data has preferred collection position.
Now, we can start writing our custom layout by creating our custom collection view layout class and subclassing UICollectionViewLayout.
For our use case, we will need some helper variables that will be used when calculating collection view size and for arranging items inside our layout.
We need estimated row height, estimated inline item width, number of columns so we know how to arrange our layout, content width and height that we will use for calculating collection view content size. The number of helpers and type of helpers will vary depending on your use case.
When writing a custom collection view layout we need to override collectionViewContentSize property where we store the size of the complete collection view. That property is needed so the collection view could know how much content it contains and how far it can scroll.
Next, we override the prepare method. We use it for all the calculations we need to create a collection view.
We need to create a subclass of UICollectionViewLayoutAttributes so our collection view could differentiate our new attributes (collection position)
Our layout attributes are stored inside a dictionary of indexPath and our CustomCollectionViewLayoutAttribute. We need those attributes stored because the next thing we need to do is override layoutAttributesForElements(in rect: CGRect) method which is used for returning attributes for items that are inside a certain rectangle.
Of course, while using a collection view we will encounter situations where our layout will be invalidated and we will need to recalculate our layout attributes. So the last thing we need to do is handle layout invalidation.
When this happens invalidateLayout(with Context:) method is called where we check if we need to recalculate our layout attributes based on our invalidation context and then we call super of this method.
We cast context into our custom invalidation context with added bool property invalidatedBecauseOfBoundsChange that we use for checking if we need to recalculate layout attributes.
And finally, we can use our custom collection view layout!
When we run our app on iPhone and iPad we can see a clear difference between layouts which means all of the hard work has paid off.
On our GitHub you can find complete code for custom collection view layout.
Go nuts with us!
We hope that we managed to show you all of the possibilities while writing your own custom collection view layout.
For our eCommerce apps, it was an ideal solution for decreasing development time while getting a layout that looks great on all screen sizes.
When first encountered, writing custom collection view layout can look scary and complex, but when you understand how collection view layout works your possibilities are endless.
We didn’t want to clog up this post with a bunch of complex code that would just confuse you, or maybe even repel you from writing it on your own.
Instead, we tried to generalize the way how collection view layout works and show you endless possibilities while using a custom collection view layout. We want to leave a remark that maybe examples that We have provided here are not perfect or silver bullet for every use case, but the point is to show you possibilities and potentially encourage one of you to try writing your own custom collection view layout.
If you have some examples you want to share with us, please send them to [email protected], we’re willing to update our blog post and create an even better blog post for creating a custom layout for different screen sizes!