Admin panel in Pimcore: Basic terms and processes you need to know
Whether you’re a developer exploring the realm of Pimcore or a user who’s in charge of the content of a Pimcore product, you are for sure familiar with the Pimcore admin.
As it is an entry point for content and product management, developers must understand all the functionalities available inside Pimcore admin profoundly.
Unfortunately, the user documentation for Pimcore contains some functionalities that are considered complex but lack a curricular and comprehensive guide.
Asking your friend Google won’t be of much help as it would be if you were searching for, i.e., WordPress administration panel tutorials.
Don’t get me wrong; there are many resources on Pimcore’s website regarding the modularity and use of every aspect Pimcore offers. But in a world that is still learning the necessary digital skills, we often forget that even the simplest software has its learning curve.
Our first independent encounters with new tools are always slow and sloppy without experienced help.
Taught by our developers’ learning path and our marketing teams’ troubles plus questions that our customers and leads ask us, we’ve decided to give you a mini-tutorial about using the Pimcore admin.
Although it’s an entry point for developers who wish to learn Pimcore, it’s meant to be user-oriented and user-friendly.
Let’s dive in 🙂
What is Pimcore?
Pimcore is an Open Source digital platform that aggregates, enriches, and manages enterprise data and provides up-to-date, consistent, and personalized experiences to customers.
In a seamlessly integrated platform, it offers a centralized solution for PIM, MDM, DAM, CDP, DXP/CMS, and digital commerce.
Although it’s often compared with other Content Management Systems, Pimcore offers so much more. You can try it out on their website and follow along with our tutorial.
Also, we’ve compared Pimcore vs. WordPress to help you identify the best platform for your business – check it out!
An important aspect while developing your website is having a professional Pimcore development agency and be able to share with them your custom elements which are specific for your admin panel, and also, your business needs.
This gives you a bunch of features that can be easily removed, reordered or edited – you can integrate your own business logic in a few steps.
What is the admin panel?
Pimcore’s admin panel is a user interface that determines the use of code written by developers and enables you to add the editable content you need.
Let’s login to the demo to see where that leads us.
If you have ever used WordPress or any similar CMS, you’ll probably recognize what role admin is intended to fulfill.
For those who didn’t experience work with different CMS systems, don’t worry, we’ve covered you up!
P.S. Find out more about Pimcore’s CMS and its benefits in one of our previous articles in Pimcore series!
The main idea behind Pimcore is that after developers do their part, administrators, especially non-technical people, end up with a system they can independently take care of.
It means, with Pimcore admin panel you can:
- Add and edit content of any kind to your website
- Hold and control your product data information
- Manage customers and automate customer service
- And many more!
Let’s get back to the Pimcore Admin panel and how to use it.
Exploring Admin Settings
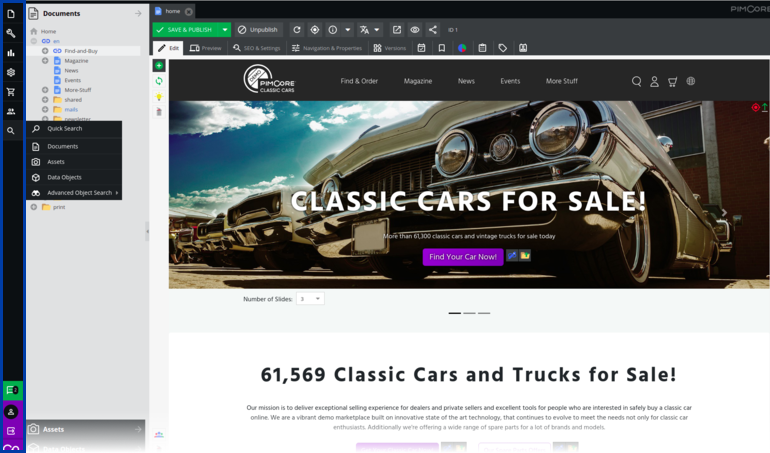
After login, the following structure is present:
The red-bordered content on the left is navigation, which is your always present tool referring to the whole website.
The first tab gives you general info and a type-specific search that works by ID and instantly opens the element with the searched ID.
An interesting feature is the Perspectives tab, which enables you to choose the type of content that you want to see. We’ll stick with the default one and walk through the basic options.

The accordion element contains different elements that enable you to switch between Documents, Assets, and Data Objects; which is the default mode in any Pimcore project.
Pimcore Documents
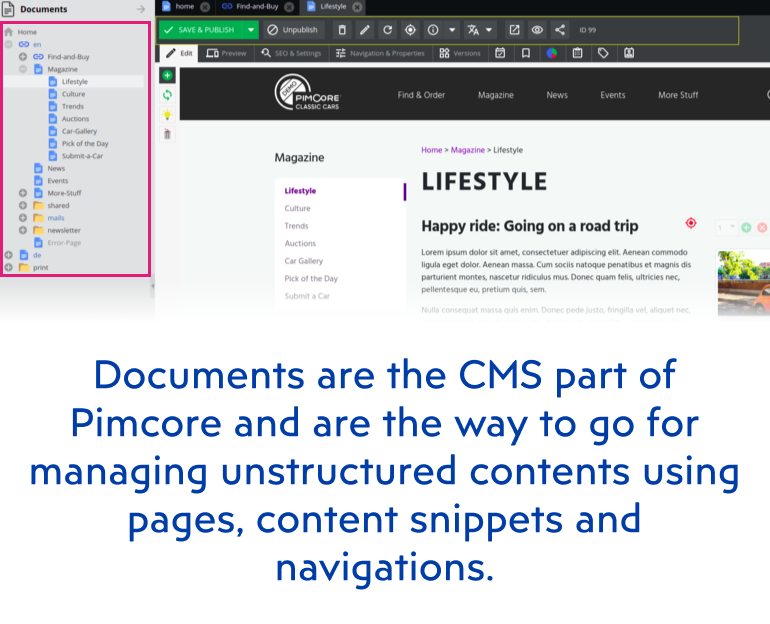
If you right-click on any of the documents inside the red borders of the last screenshot, you’ll create a new Document.
Document types are predefined by Pimcore and by a developer, so the editor doesn’t have to worry about controllers, actions, or templates.
You can check the currently defined types on Settings/Document types. As the documentation states, documents manage unstructured contents which are dependent on the editor’s input.
Before explaining anything more, go ahead and create a document, specifically: a Page.
Creating A New Document inside Pimcore Admin
I’ll create a Content-Page named Factory Stuff. Upon creation, my new Document will appear with a line-through.
It’s time to point out some stuff:
- There are different Document types. The one I’ve created is a Page
- Documents have a tree structure. The tree begins with a homepage, and the URL of our new Page will be the same as its path in the tree structure.
- There are different types of Documents. We’ll see more about that later.
The line-through in the document tree tells us that our Page doesn’t exist yet in the administration, not until we save it.
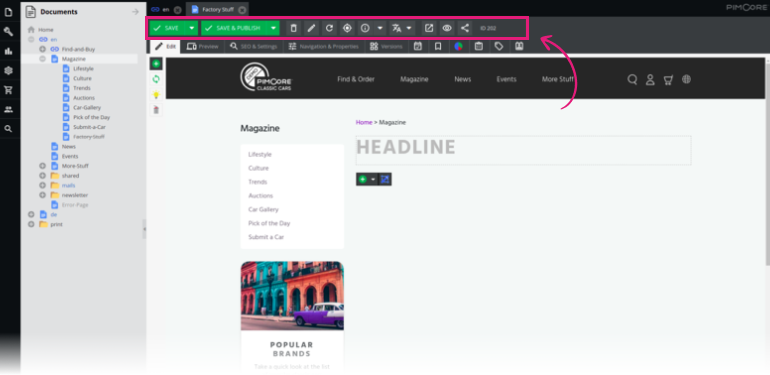
Let’s do that and notice the toolbar:

Our Document now exists, but only in administration.
If you try the toolbar options “Open preview” or “Open in a new window,” you won’t see anything until you publish your Document. (You can always undo it on the right-click context menu in the document tree)
For a person using only the Pimcore admin, the mere edition of the Document should be enough information.
From a developers’ perspective, few facts could be useful as a starting point: a Document displays information from the template it is linked to through a controller relevant for it. In the administration, this data is held inside the SEO & Settings tab.
Using Editables
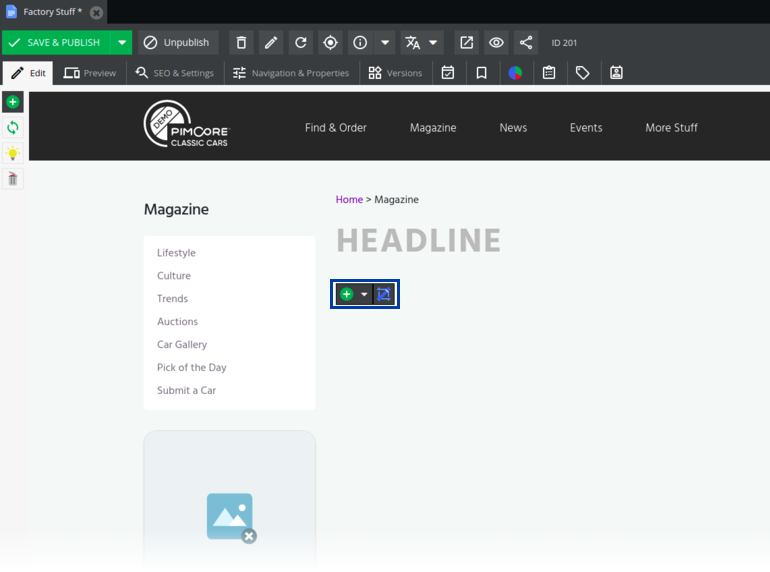
The unstructured content of a page is left to the editor to fill. On our current Page, the red-bordered plus sign tells us that right here, we can edit the content of the Page using editables.
Editables shown in the dropdown here are defined as possibilities in the template and we can change it in our code.
They enable the user to enter the content inside the page directly, but they limit the type of content allowed inside each fragment.
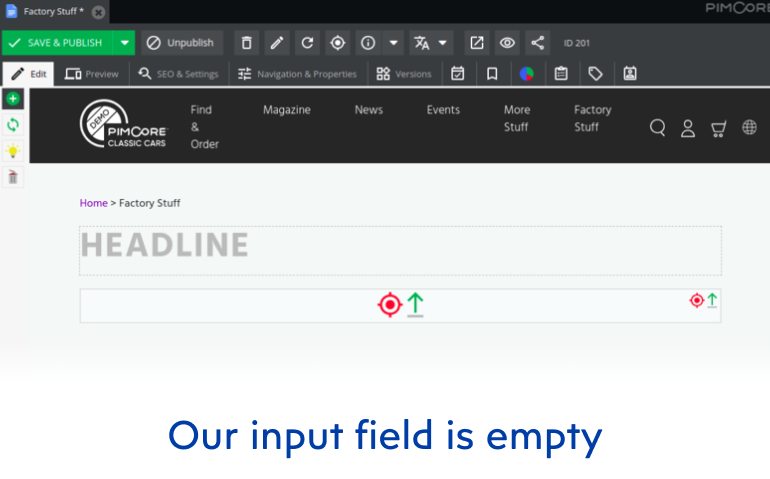
For example, the first editable on our Content-Page is the headline. This one defines the template (Content-Page ), so you will not be able to delete it.
The dashed border tells us the size of our input field, and the grey placeholder is our most crucial piece of information now: it tells us what kind of type goes inside which Editable.
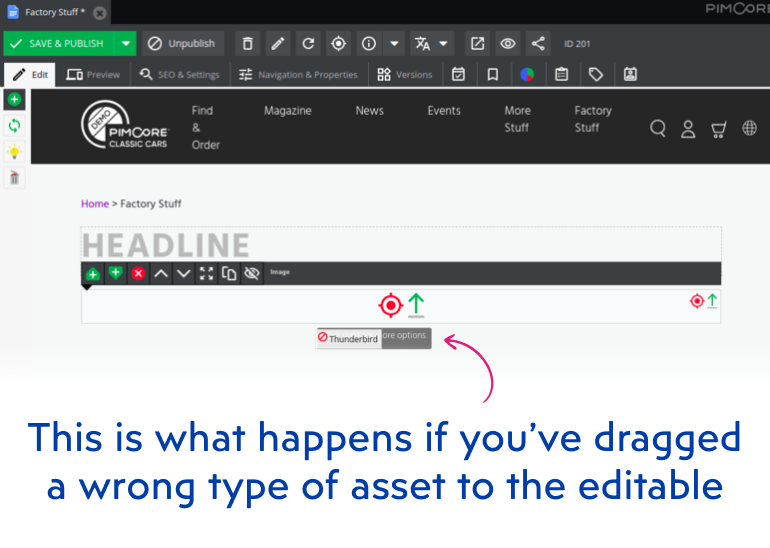
Let’s try this out and create an image Editable.
If you hover on Editable, you’ll see a menu of options connected to it:
– add more editables,
– deleting the existing one or,
– moving it up or down etc.
Although you now know that the chosen input is of type “Image”, you need to find that piece of information later.
Right-click on the input field and select Search.

Ok, now let’s try the classy drag & drop feature:
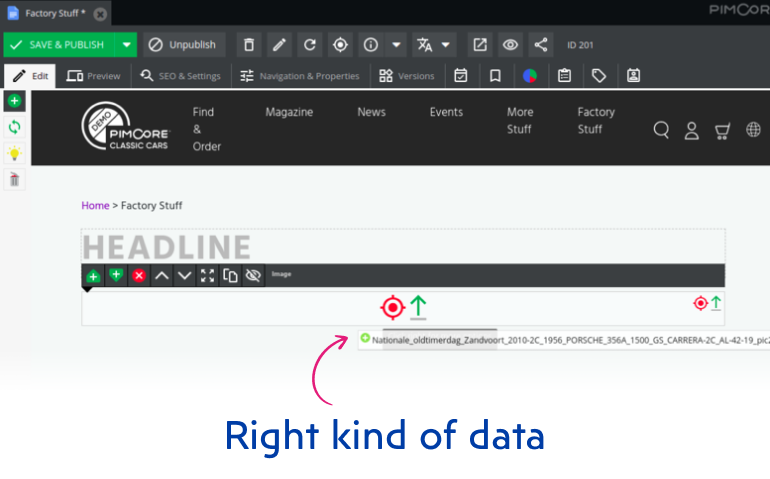
You’ll find the images in the Accordion/Asset section, where you’ll be storing all of them.
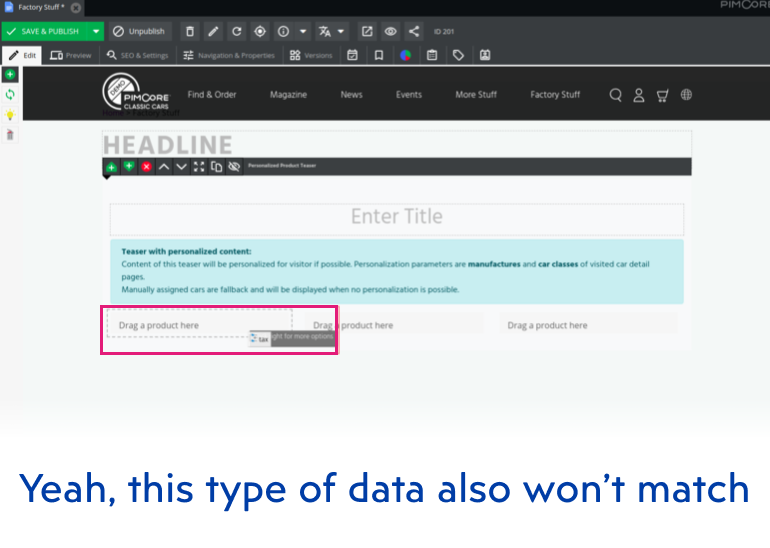
I suggest we try a more complex structure of an editable: I’ll pick Personalized Product Teaser. It is an editable composed of more components: an input for heading and product fields that require you to drag and drop a data object of type product.
We will create our own object later and use the existing object inside the Accordion/Data Objects. You don’t have to drag & drop, you can right-click to search for the exact data type that the placeholder asked for.
Don’t forget to save and publish before seeing your changes on the web.
Includes
Remember those different Documents types?
If you look at our Document, it has elements which you would probably want to edit, but can’t.
Includes are one type of fragments that repeat on the website. If you look at Documents/shared in our demo shop, you’ll find a sidebar snippet.
We use snippets so we can extract the content into a reusable container. It can be embedded in pages or nested into other snippets.
A snippet is edited in its Document exclusively, so you’ll only have to do it once. This is a principle Pimcore is prone to use, and the next section will show us more of it.
Data Objects
I’ll skip the Assets for now and lead you into the PIM aspect of Pimcore.
The idea of both holding and editing information in one place leads us to data objects, which are visual representations of data used and stored on your website.
An object is an instance of a class. These classes are defined based on the business logic necessary for the website. We’ll see objects in an example, so pick a car object – you’ll find them at Data Objects/Product Data/Cars.
As you can see from the tree structure, an object can have children represented by object variations.
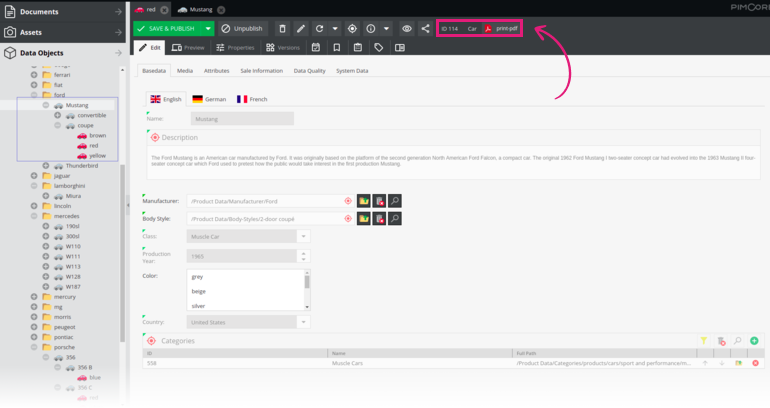
This is our car instance – the only place we store data about this object.
Whenever you need to use this data, you’ll drag and drop it, but you shall only edit it on this page inside the input fields. When the change is done inside the data object, the data will update on every place connected to the instance.
The language tabs enable you to make your product information available in multiple languages.
The Document tree’s structure begins with a language document that is considered best practice when building multi-language websites in Pimcore.
In a few easy steps, you can switch to another language on a page. The only thing you need to do is to add the data inside the object tab, and voila – you have your multilingual website!
Since my selected object is quite bulky in data, we could use some structure and guidance here.
The red-bordered area in the image is the place where you’ll find a unique identifier of an object, and next to it is the name of a class that the object inherits structure from. (If you’re looking at a color variation, spare a minute and click on the pdf label)
Since our product belongs to the Car class, I’ll look it up to see what to expect.
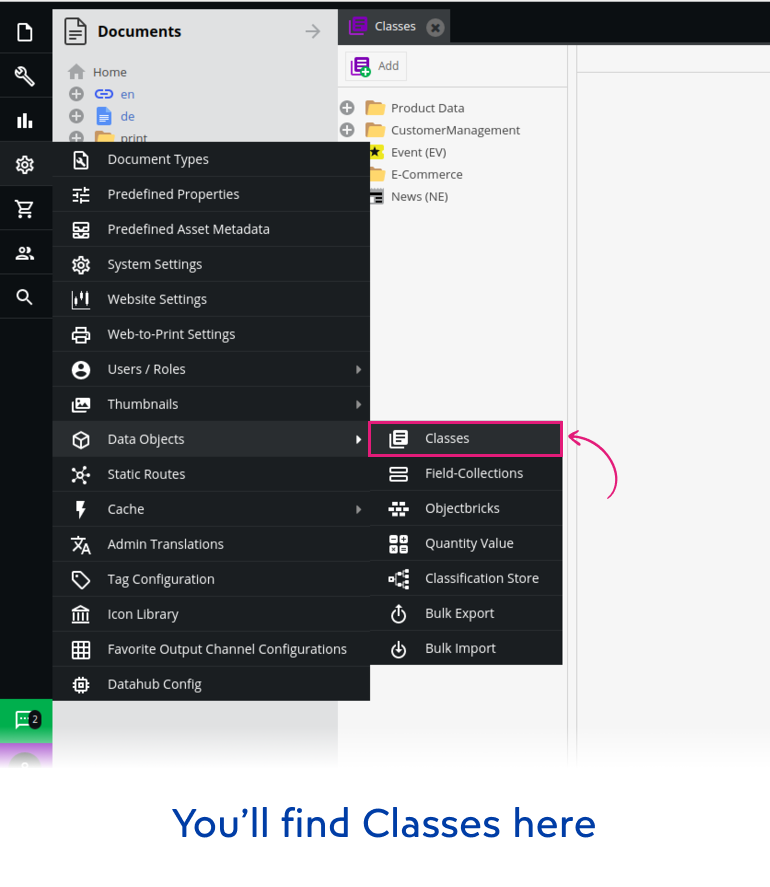
If we had a “meal” object in the Data Objects, its class may be the cookbook.
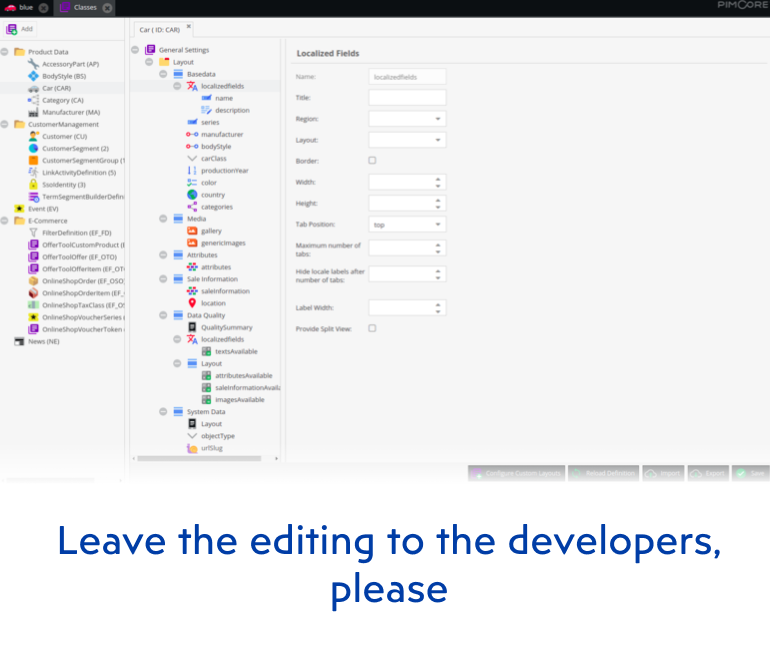
The layout element that comes as the first child in the object tree structure defines the way you’ll preview your products’ data.
Since this section is quite comprehensive, I’ll have to stop here and advise you to explore it on your own with the help of the documentation.
If you’re a developer, you’ll probably want to know more, and if you’re not, you should understand that any edit or delete action performed on classes could result in a partial or total crash of your web page.
Our classes build a specific structure and codependency of Data Objects. Remember that classes and their mutual relations are created and customized by the projects’ needs.
I must state that since Data objects are a part of the product information management section, there are many more possibilities regarding the Ecommerce functionality that would make this guide comprehensive.
How can the marketing team get clear data from Pimcore?
Pimcore is a perfect solution to handle a large amount of data.
Since big piles without organization mean nothing to the human eye, Data Objects will also have a tree structure that should resemble the tree structure seen in classes.
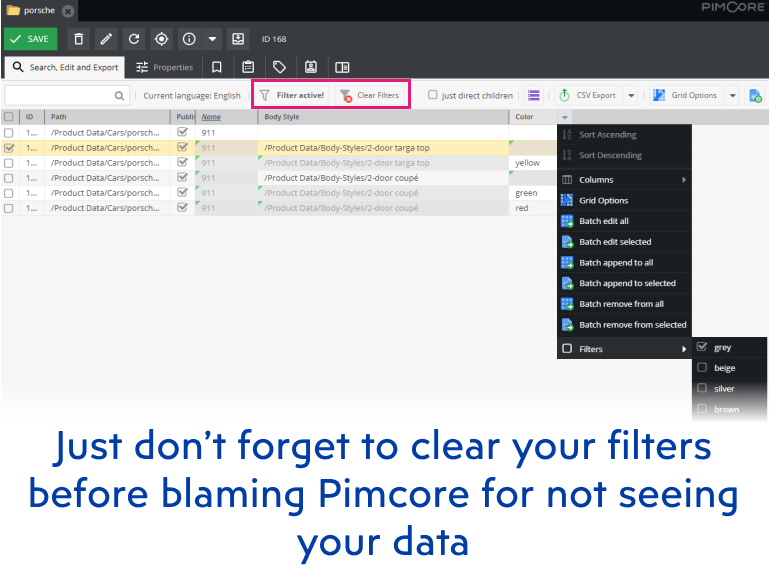
This enables you to take advantage of one great feature: the data object grid.
While clicking on particular objects will open their contents, clicking on folders containing the object will enable you to search for data.
The Grid Options allow you to search for data by any existing field defined in the class, filter the searched data, and even export it in formats like csv or xlsx .
You might be lost for a while, but your data won’t.
Stay advised that tree structure can also control how your data changes: editing a parent can trigger a change in parent children.
If I change the price on a car object, I won’t have to deal with changing prices on its color variations if we have previously defined the rules to handle those fields.
Also, changes we did in Pimcore admin affect the database, so deleting objects inside Pimcore will also perform an action on the database.
Images, videos, PDF-s in one place – how?
We’re entering the digital asset management aspect of Pimcore.
This is our unique place where we will upload images, videos, PDF-s, and other external content.
Later, we drag & drop assets to the desired location where it needs to be displayed. The full list of supported file types can be found inside the documentation.
Unfortunately, svg images are unsupported in the time of writing of this article. Don’t let this cause you any worries because Pimcore has its way of handling assets.
If we open an image saved inside the Assets folder, we’ll see an interface similar to the one Documents have.
The main idea of how assets work is to upload one high-quality image, which will then be handled by Pimcore. The image can be edited here, assigned metadata, and many more.
How to optimize images in Pimcore
Pimcore will save you a lot of effort when it comes to dealing with assets.
Follow after me through Settings/Thumbnails/Image Thumbnails.
What you’ll find here is a set of rules which define how an image will behave on different occasions.
Image thumbnailing is a transformation an image will pass through before displaying on the website; in other words, this is how Pimcore optimizes images.
Image thumbnail has a name by which you will call it inside the code. While you can choose the format of the image generated, the recommended format is webp.
As a result, you’ll get smaller, richer images that make the web faster.
The thumbnails also include transformations where you define the output image thumbnail.
CSS media queries handle all responsiveness on our website. After defining a valid media query, the set of transformations set there will apply to the media query range defined.
Since these actions assets are cropped, resized, and optimized, the uploaded image needs no further intervention apart from using the thumbnail codewise.
Translate text in a few easy steps
We have already mentioned how Pimcore handles multi-linguality from the Document tree structure.
Apart from localized fields in data objects, all textual content inside the code follows the practice from Symfony to always use keys or translations instead of content strings.
For a Pimcore admin user, this means that website text content can be edited in a few clicks if it’s not edited inside the Document.
If you go to Tools/Translations/Shared Translations, you’ll find all the translations your website uses.
The list contains keys that have existing translations, but also keys whose translations haven’t been created yet, but the page containing the keys has been previously opened.
In other words, translations created inside the code won’t appear in this list before you open the page containing the translations. However, you can always add it manually. Apart from adding, translations can also be filtered and exported.
I can’t say that we have covered all of the topics regarding the use of Pimcore admin. I hope we have alleviated the struggle of entering the world of Pimcore and given you some easy-to-follow examples.
Since this article is written from a developers’ perspective, we would like to point out our article about Pimcore’s personalization strategies.
P.S. To learn even more about Pimcore, check out our Pimcore knowledge base to find more Pimcore-related guides, tutorials, and articles!
That’s it for today’s article!
We hope you’ll find our guide to Pimcore’s Admin panel useful! Kudos to our Pimcore developer Mia for gathering all of this information in one article!
There is still much to learn regarding Pimcore and to make sure you have all the information you need – we’ll keep publishing articles that’ll assemble together like pieces of a puzzle.
A Pimcore puzzle – in this case.
Also, if you’re looking for an experienced Pimcore development partner to help with building your next business, feel free to reach out to us and let us know.
If you’ve got any questions regarding Pimcore and its modules, send us an email anytime!