Create your framework and contribute to iOS world: simple walkthrough
As an iOS development agency, we love to speak about new ideas when it comes to developing iOS apps and making better user experience and user interface in every mobile app.
In the third part of Making custom UISwitch, we are going to make a framework from the existing code.
P.S. If you missed our custom UISwitch part 1 and custom UISwitch part 2, we recommend to check it out!
To create a framework, we are going to use CocoaPods dependency manager.
What is CocoaPods?
CocoaPods is one of the most popular Swift dependency managers. It will resolve dependencies between libraries, fetch the resulting source code, then link it together in an Xcode workspace to build your project.
Other popular dependency managers are Carthage and Swift Package Manager.
Reasons why you should work with frameworks?
Working with frameworks has many benefits. Let’s look at our CustomUISwitch for example.
If we want to use it in a project, we need to add in „CustomSwitch“ file and „CustomThumbSwitch“ file to the project. If we made a change to our CustomUISwitch, we need to manually delete previous files and add new files to the project which is a pain – too many clicks.
If our „CustomSwitch” had any dependencies, we would need to download each one of them manually. These benefits are just to name a few of them, and there are many more.
With frameworks we can achieve:
- Code reusability
- Code encapsulation
- Code modularity
A framework is a hierarchical directory that encapsulates shared resources, such as a dynamic shared library, nib files, image files, localized strings, header files, and reference documentation in a single package.
To make it simpler, frameworks are static or dynamic libraries with reusable chunks of code and resources that we can import into our apps.
In this article, we are going to cover:
- Creating a new framework
- Writing PodSpec and Podfile for local development
- Testing of our framework
- Writing PodSpec and Podfile for pushing to CocoaPods Master Repo
Enough with definitions, let’s start with the process of creating a framework.
The process of creating a framework
Before we start, this article is going to cover the creation of a framework from already written code as mentioned in the introduction.
First, we are going to clone the project and create a folder structure for our framework.
Create two folders inside our cloned folder, Sources and Example. Sources folder is going to contain our framework code which we are going to take from our cloned project, while the Example folder is going to contain an example project where we test our framework.
This is a good practice because while developing a pod we have an example to test our code and see the behavior of our implementation.
CocoaPods has a built-in method which creates a similar folder structure with all of the required files when creating a framework. You can use it by running the following command in Terminal:
You are going to be asked a few questions:
- What platform you want to use
- What language you want to use
- Do you wish to include an example/demo application
- Which testing framework you are going to use
Create Cocoa touch framework
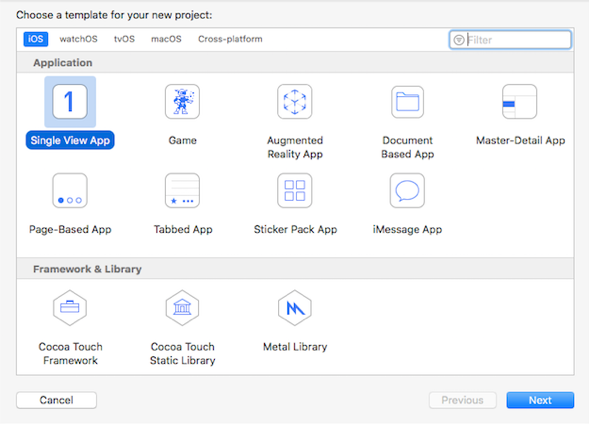
To create a new Cocoa Touch Framework, open Xcode and go to File > New > Project. Then under iOS tab select Cocoa Touch Framework.
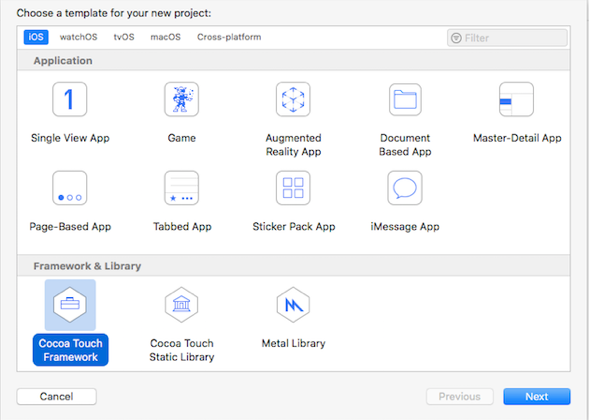
The most significant difference between Cocoa Touch Framework and Cocoa Touch Static Library is that a static library is a collection of compiled source files which is then linked directly into an app’s binary.
A framework is a standalone entity that contains a binary containing compiled code (along with any related resources) that is a standalone unit itself.
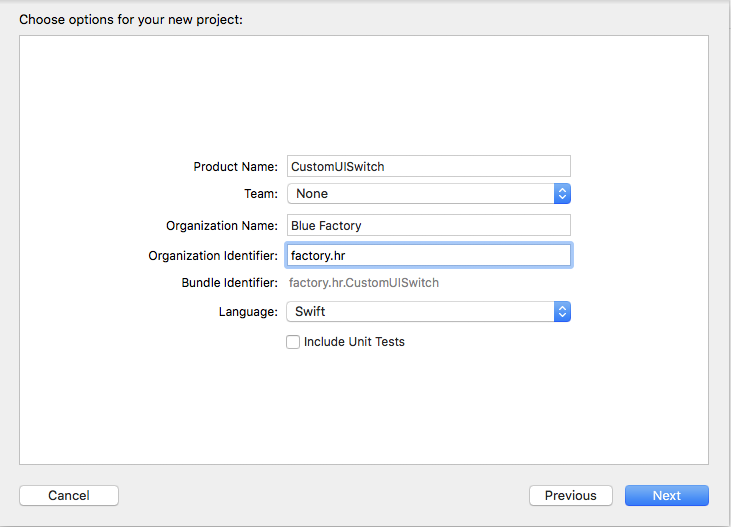
After selecting Cocoa Touch Framework, enter your frameworks name and other options. Save your project in the Sources folder you created in the begging. This project is going to contain our pods code.
Add files to populate framework
After creating the framework, we need to populate it with code which is going to give our framework functionality.
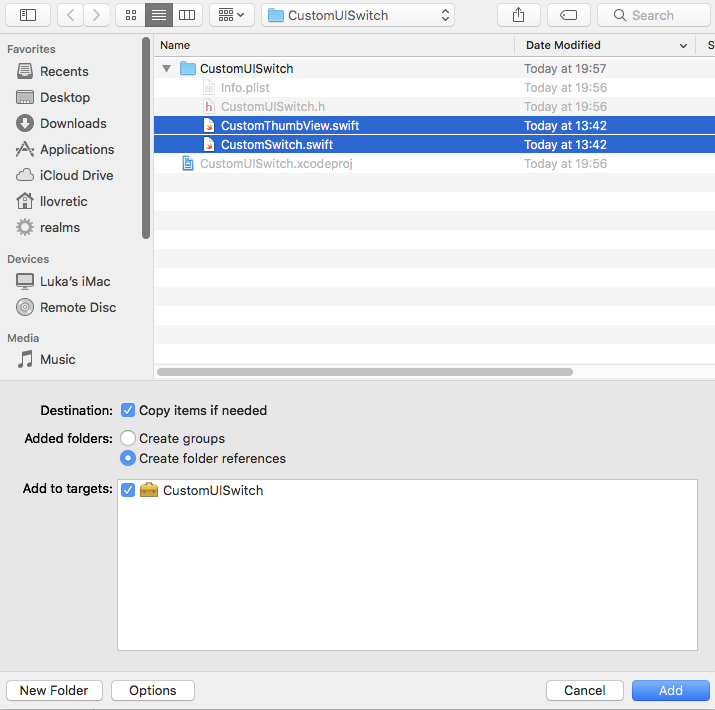
We are going to add classes for our UI element Switch to our sources folder. The files that we are going to add are “CustomSwitch” and “CustomThumbSwitch”.
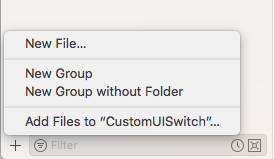
In our opinion, the best way to do it is first to copy the files into the frameworks folder. Once that is done, we need to add them to project via Xcode. In the bottom left corner of the Xcode, click “+” sign to add files to project. After we did that we completed creating our framework.
Create a license file
Every Pod needs to have a LICENSE file. CocoaPods is going to give you a warning if you don’t provide a license in your PodSpec file.
For this example, we are going to use the MIT License, but you can choose whatever license you required. To see the list of possible licenses go here. To create a license, open your favorite text editor and copy and paste the MIT License found here and save it as LICENSE.
Create Podscpec file
PodSpec file is a file that includes details about where the source files of the pod should be fetched from, what files to use and what files to ignore, as well as what setting to apply and other general metadata (name, version, summary, description and more).
To sum it up, PodSpec defines our actual pod. Without it, our CustomUISwitch is nothing more than a bunch of files. You can see the full list of specifications at CocoaPods.
To create a podspec file, navigate to the folder in terminal and run:
That will create a PodSpec file which we need to populate as follows:
- In here we specify basic information about the pod
- A license is required. If you don’t have a license, CocoaPods are going to present a warning during pod installation, and you also won’t be able to upload it to the CocoaPods master specs repo.
- In here we specify the location from where the source should be retrieved. Firstly, we are going to use :path => “Sources/” for local pod development. The most significant benefit of local pod development is that all our changes are going to be immediately applied, without the need to update it in any way. Later, we are going to change it to use our GitHub repository.
- In here we specify our source files, as well as our development language and more.
- Lastly, here we specify all framework and pod dependencies. CocoaPods is going to install all of these dependencies.
Create an example project to test your framework
Now, when our framework is ready, we are going to create an example project to test our UI element Switch. To create an example project, in Xcode go to File > New > Project. Then under the iOS tab select Single View App. Save your example project in the Example folder you created in the beginning.
Before we start to write code for our example, we need to initiate pods to our example project and write the podfile. To do that, navigate to example project folder in Terminal and write:
Now when our podfile is open, we will add a pod for local development as follows:
To test our framework, we will:
- Import it inside the View Controller
- Create one switch with some specific properties of your choosing
- Add created switch to the view hierarchy
- Constrain the element on to the view
To code looks as follows:
- Here we are importing the pod
- We are creating a Switch where we specify some of the Switch properties
- We are adding our Switch to view
- We are using NSLayoutConstraints to position our Switch on the view.
After we run our code, the result of the ON state of our Switch is:

while the result of the OFF state of our Switch is:

Publish Pod
After we tested our framework and we are satisfied with the functionalities and behaviors, we can publish our pod to Git.
Create a new repository which is going to host the pod. Under repository name write “Switch”, under description write “Switch is a pod that contains code for creating customizable UI Switch element”. Commit and push the code to the repository.
The most important thing is to tag your commit with pod version number. CocoaPods pod validation gives you a warning if you don’t include a tag in your podspec file.If your tag includes pods version number, you enable other users to use older versions of your pod easily.
Now, when we have our repository, we can add it to our PodSpec file. To do that we need to change spec.source in our PodSpec:
Next thing for us to do is to validate our PodSpec file. To do that, navigate to the root folder of our framework in Terminal and write:
After our PodSpec passed validation, we can push it to CocoaPods master spec repo. To publish our new library to CocoaPods for a public release you are going to register with Trunk and create a valid Trunk session on your current device. Create a session with the following command:
CocoaPods enables two types of deployment. One that makes your pod publicly available for other users to use and one that deploys to your private spec repo.
If you did everything correctly, you are going to get the following message:

Now it’s time to test published Pod
All that is left for us to do is to test our work in the example app. In the pod file of the example change from the pod for local development to our newly created pod.
Update pods, run the project to see if we have expected behavior!
That’s all folks!
We have created our pod. When we have the code from which we want to create a pod, the process is pretty straightforward and easy.
Building pods have many benefits. The most significant benefits are code reusability and shorten development time. Other than that you can contribute to iOS development world if you make your pods public.
Bonus tip for scrolling all over here:
If you made a mistake when submitting your pod with CocoaPods Trunk and you do not wish to make a new version, Trunk has delete option so you can do the following: