Learning Pimcore with practical examples for beginners
Pimcore has been established as one of the leading platforms for managing digital data. According to BuiltWith, Pimcore is used in more than 21 500 websites around the world on a growing trend.
Considering its desire to simplify the complexity of various software solutions with many benefits like:
- increasing overall digital experience
- ensuring digital interactions with customers
- building elastic cost structures and eliminating inefficiencies
it is not a surprise that our project requirements lead us to use it while providing Pimcore development for our worldwide clients.
As a new backend developer in the Factory’s Pimcore team, I spent some time introducing myself to the platform. In order to ease your Pimcore beginnings, in this post, I will share my Pimcore learning experience.

What is Pimcore?
To begin, I started by gathering high-level information about the system.
- What is Pimcore?
- What problems does it solve?
- How it differences from other similar systems?
By the statement from the official Pimcore documentation:
“Pimcore is the leading open source platform for managing digital data and a fully integrated software stack for Content management system, Digital asset management system, Product information management and Commerce.”
Considering its purpose, it is often compared to platforms like WordPress, Magento, or Shopify. Having familiarity with WordPress, I tried to compare them to get a better understanding of the Pimcore platform itself.
It resulted in a conclusion that, unlike WordPress, where you can build a basic site without a development notice, Pimcore is not an “out-of-the-box” solution. It is rather a platform, built for developers, to enable them a rapid application development by providing them a set of tools for building standard features of one CMS, DAM, PIM and Commerce solution.
For example, when creating an e-commerce system, usually you would build a data store to hold information about your products, you would provide an API on top of that, and, to allow managing the data, you would build an administration UI for the users.
Well, software like Pimcore will already have that functionality provided for you (and much more) so you can focus on building other custom features of your application.
Want to know more about the differences between Pimcore and WordPress, Drupal, or Sitecore? Continue to this – WordPress alternatives
ANY data management
Pimcore stands out as a platform that can manage any digital data. Before stepping into the real examples, it’s important to know about the three main parts of the digital content you manage with Pimcore: Documents, Assets, and Objects.
Documents
In simple words, documents represent pages. Following the well-known MVC pattern, each document can be associated with the desired controller, action, and template.
Assets
The purpose of the assets is quite self-explanatory. They store digital files, such as images, videos, pdfs, and others, with their corresponding metadata.
Objects
Objects allow management of the structured data, such as products, categories, customers, blog posts, etc. With the familiarity of object-orientated programming, the concept of objects should be relatively easy to understand.
Having a basic idea of the Pimcore platform, the next step was to try it out in practice.
Where to start while learning Pimcore?
Everything starts with the installation.
Requirements for the Pimcore installation, as well as the installation steps, are described in the Pimcore documentation.
In this section, I will share my installation process.
I’m using the WAMP stack having Windows 10, Apache (v2.4.37), MySql (5.7.24) and PHP (v7.2.14) installed. Following the instructions, I have installed Pimcore Advanced Demo Package using the Composer.
COMPOSER_MEMORY_LIMIT=-1 composer create-project pimcore/demo-ecommerce pimcore-demo
While waiting for the composer to do its thing, I created a database with utf8_mb4 collation which will be used by Pimcore. After the composer installation, Pimcore installation bat script was ready to be run.
cd ./pimcore-demo ./vendor/bin/pimcore-install
Tip: Make sure you have increased “max_allowed_packet” option in the my.ini configuration to at least 100MB to allow Pimcore maintenance to populate your database.
If everything goes well, you’ll have a new Pimcore project ready to be used.
To see the Pimcore magic, point the document root of your vhost to the newly created/web folder.
In my case, I edited the httpvd-vhosts.conf Apache configuration file by adding another virtual host which points to my /pimcore-demo/web folder location.
Also, I added the desired local domain to my windows hosts file. By doing that, Pimcore was live when navigating to my Pimcore local domain, as well as the Pimcore administration under the /admin route.
Examining the directory structure
After the successful installation, we have a new project generated. First thing I wanted to check was the directory structure to be able to know how to navigate through the code. As Pimcore is based on a Symfony framework, it follows the best practices of the Symfony directory structure. Here’s the summary of the quick project structure overview:
/app/ – contains configuration files shared templates and translations. Here you can also find the main entry point of the Symfony application configuration which is the AppKernel class.
/bin/ – is the place for the executable files (e.g. /bin/console) where you can also store your own custom scripts.
/src/ – is where you will spend most of your time as this the place for your own PHP code (controllers, services, models, event listeners, etc.)
/var/ – contains private generated files (symfony cache, logs, versions, etc.). For example, when you create a data object class through the administration (which we’ll be shown later in the post), the Pimcore will generate the code for the class with getters and setters under the /var/classes folder.
/vendor/ – stores 3rdparty dependencies (like the one installed by the composer).
/web/ – is public document root (statics, assets) on which we pointed our host.
Examining the database
The next thing I was curious about was the database structure. The initial Pimcore installation counts around 200 tables, so I wanted to understand the structure to be able to find the correct data when needed.
Also, having the database knowledge, you will be able to know what is going on under the hood. The structure contained most of the default tables created during the Pimcore installation. Here are some tables that caught my attention:
classes – stores object classes with ID and class name.
objects – is a table for all objects in the system with their metadata like id, class name, parent, etc.
assets – stores assets (e.g., images) with system metadata.
documents – table for documents, folders, links, emails, and snippets of the document area with meta and configuration data.
dependencies – stores dependencies between objects, assets, and documents.
versions – stores versions of objects, assets, and documents while the actual data is serialized and written to disk under the /var/versions directory.
users – contains backend users. Here you will find your user information set in the Pimcore installation process.
cache – table for data, stored in a serialized form, used by the default Pimcore cache. Another table used by the cache to store tags for cache entries is cache_tags.
Furthermore, there are also dynamically created tables which get created and modified during the object data model configuration. For example, when you create a new object class in the Pimcore administration, several tables are added to the database. These tables have a numerical suffix which represents the number (id) of the object class. Some of the created tables/views are:
object_(id) – is actually a database view which joins object_store_(id) and objects table.
object_store_(id) – is the primary storage table of an object class. This table contains all data without any relations or external dependencies.
object_relations_(id) – table contains data of fields with their relations to the objects, assets, or documents.
object_query_(id) – is the table which should be used for retrieving data, including inherited data.
Pimcore works with this table.
Examining cache
Pimcore caches almost everything in order to boost performance.
By the default settings, Pimcore uses the table caching system by reusing the Doctrine connection to write the cache into the cache and cache_tags tables in the database.
Every Pimcore element (document, asset, object) gets cached as a serialized object and written to disk under the /var/cache directory. As stated in the documentation, you can configure your cache to use Redis or implement a custom cache pool. You can read more about the cache configuration here.
Let’s build something (finally)
After going through the Pimcore basics, I was ready to step into the administration and learn more by building something real.
To be able to follow up with me, you should have Pimcore e-commerce skeleton installed. The selected skeleton already comes with an advanced demo shop that showcases the main Pimcore’s e-commerce features.
To demonstrate some Pimcore features mentioned in this article, we will fit in with a simple example that should provide a solid ground for starting your Pimcore development journey.
Let’s say we have a webshop that sells products of multiple brands, the final goal of this example is to:
- display all brands in a menu dropdown
- on a brand selection, render a brand page having the brand products listed.
Let’s begin.
Creating a Brand class in Pimcore
To store Brand information, we need a data object, so the first thing we will do is to create a brand-new Brand class. In the Pimcore administration, do the following:
- Go to the Settings -> Data Objects -> Classes.
- Click “Add” and type the name of the class
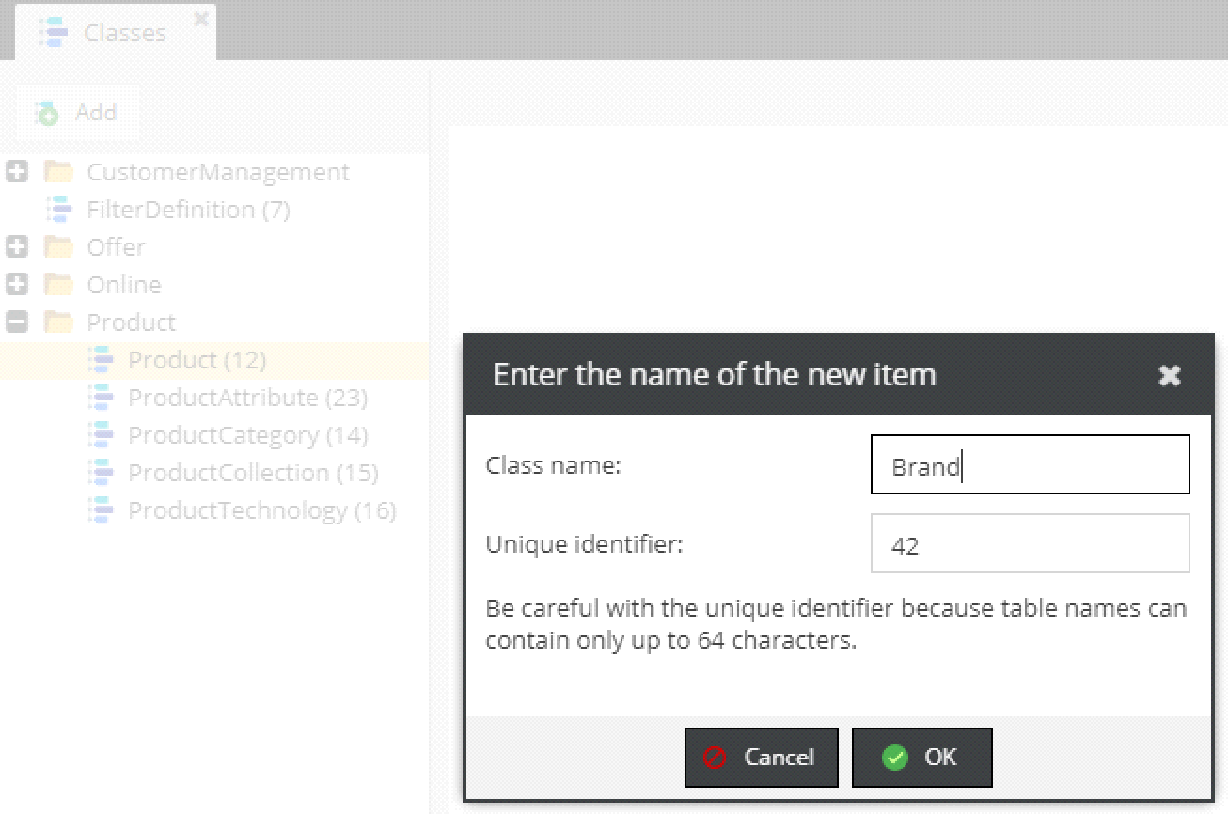
A Brand class we’ll be created with an assigned unique identifier. Under the classes panel, click on the class to add some class properties. In Pimcore, the class structure is organized with panel types and other layout elements used for designing the user interface of object instances view.
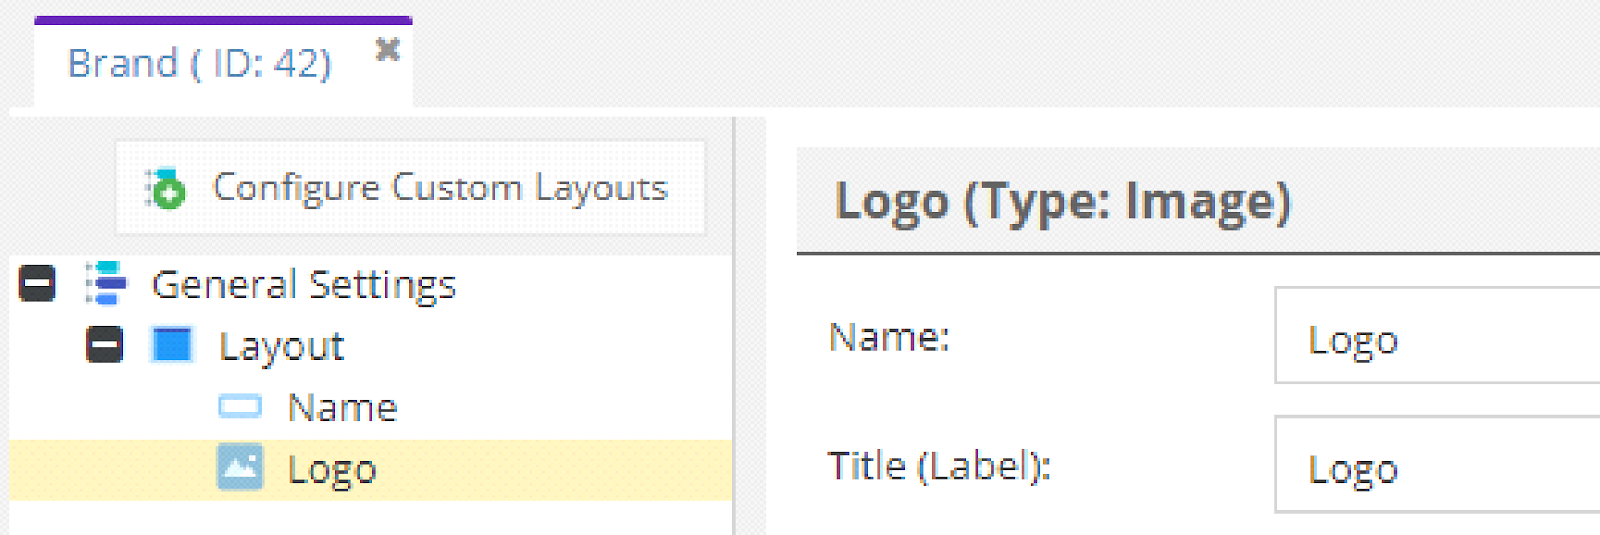
To design our simple class, we will do the following:
- Right-click on the General Settings -> Add Layout Component -> Panel. We’ll call it Layout as default.
- Next, right click on the Layout -> Add Data Component -> Text -> Input to add a first property “Name”.
- Our brand will have a logo, so we’ll add another property “Logo” by right-clicking to Layout -> Add Data Component -> Media -> Image. A simple structure should look like this:
Now that we have the Brand class ready let’s go to the Product class to add a relation to it.
In Pimcore e-commerce skeleton, the Product class already exists and, under the Base data panel, it has a “brand” property on it.
By clicking on the property, we see the following:
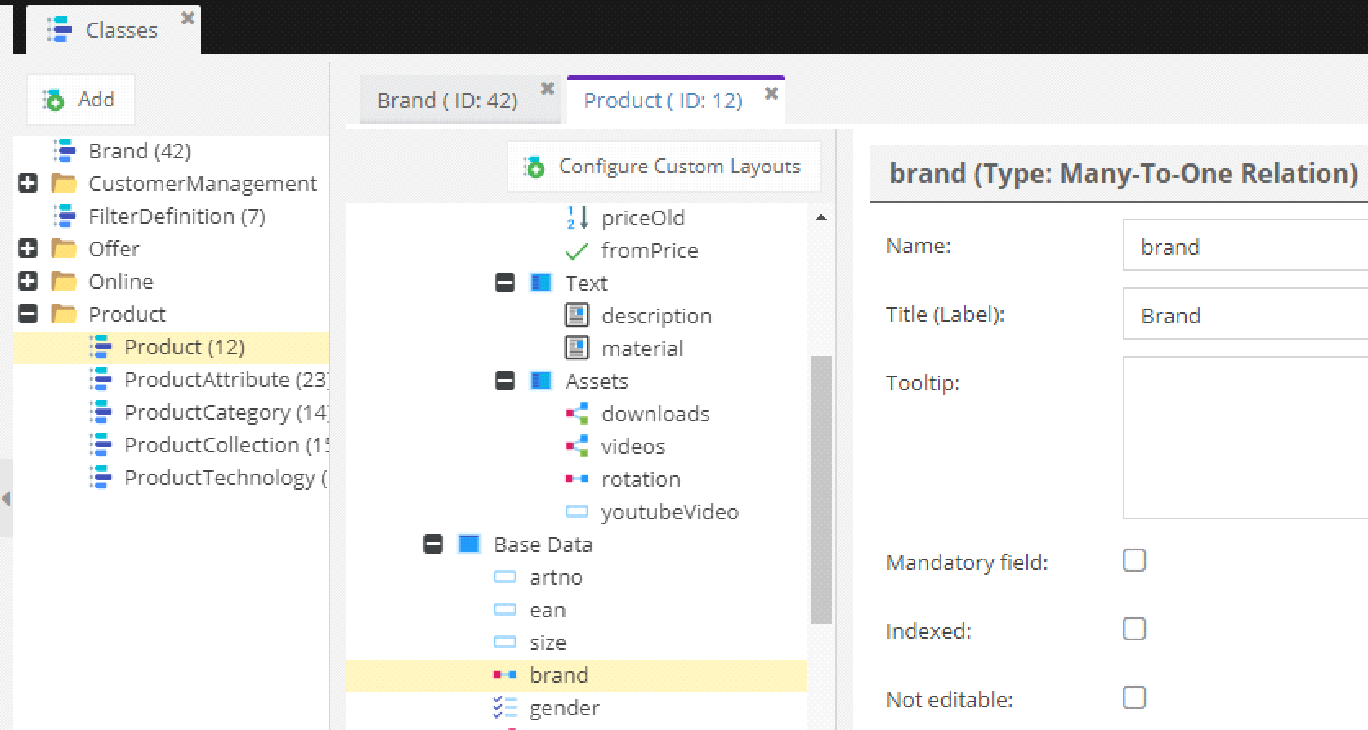
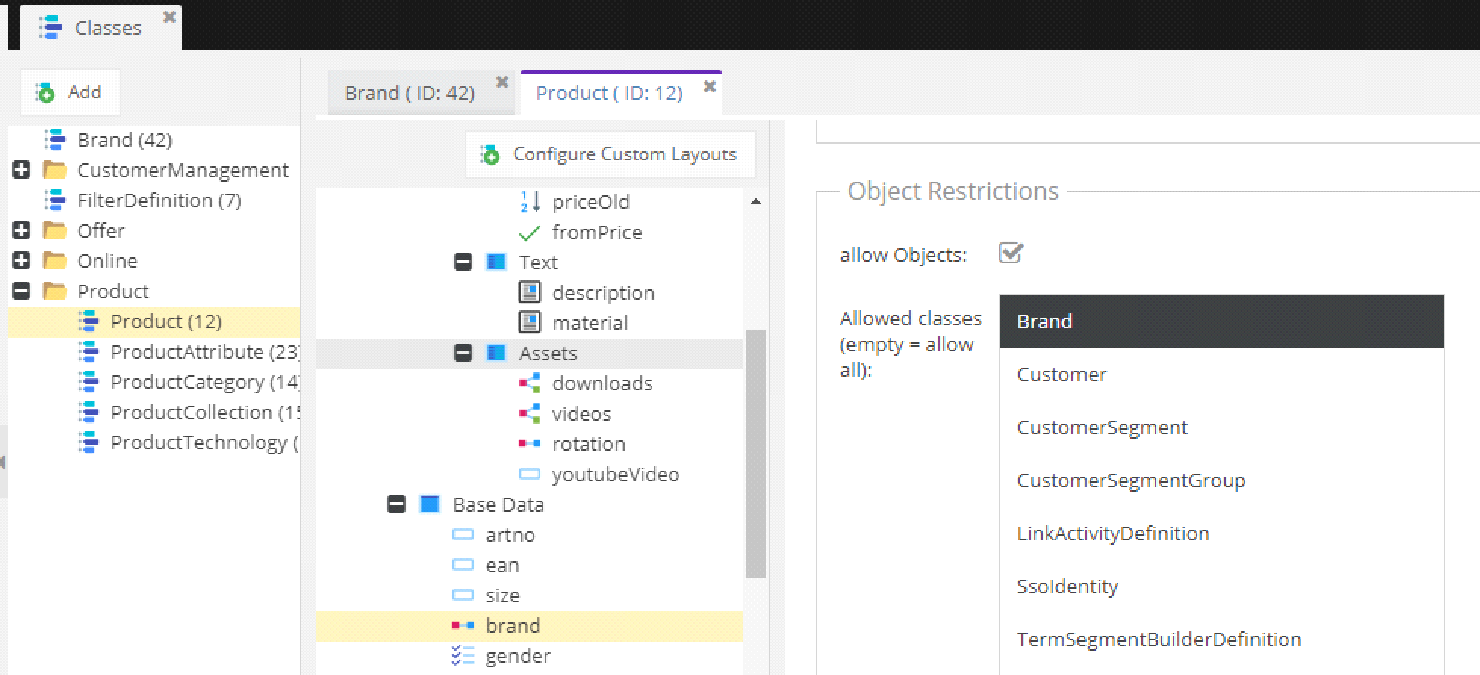
The type of the property is “many-to-one” relation type. If you scroll down, you will see that it allows only objects, but there is no specific object selected.
We will change that as follows:
- Select our previously created Brand class.
- To enable the property to be visible in the administration interface, uncheck the “Invisible” checkbox.
- Save the class.
Our simple class structure is now ready and we can create some brand instances.
First, we will prepare our brand logos by uploading images under the Assets so we will do the following:
- Create “brands” folder by right-clicking on the Assets -> Folder.
- Upload a brand logo by right-clicking to “brands” directory -> Upload Files. For this example, we recommend uploading the image of 250×250 pixels.
Having the logo ready, under the Data Objects section, we can create a brand instance:
- Create “brands” folder by right-clicking on the Home -> Folder.
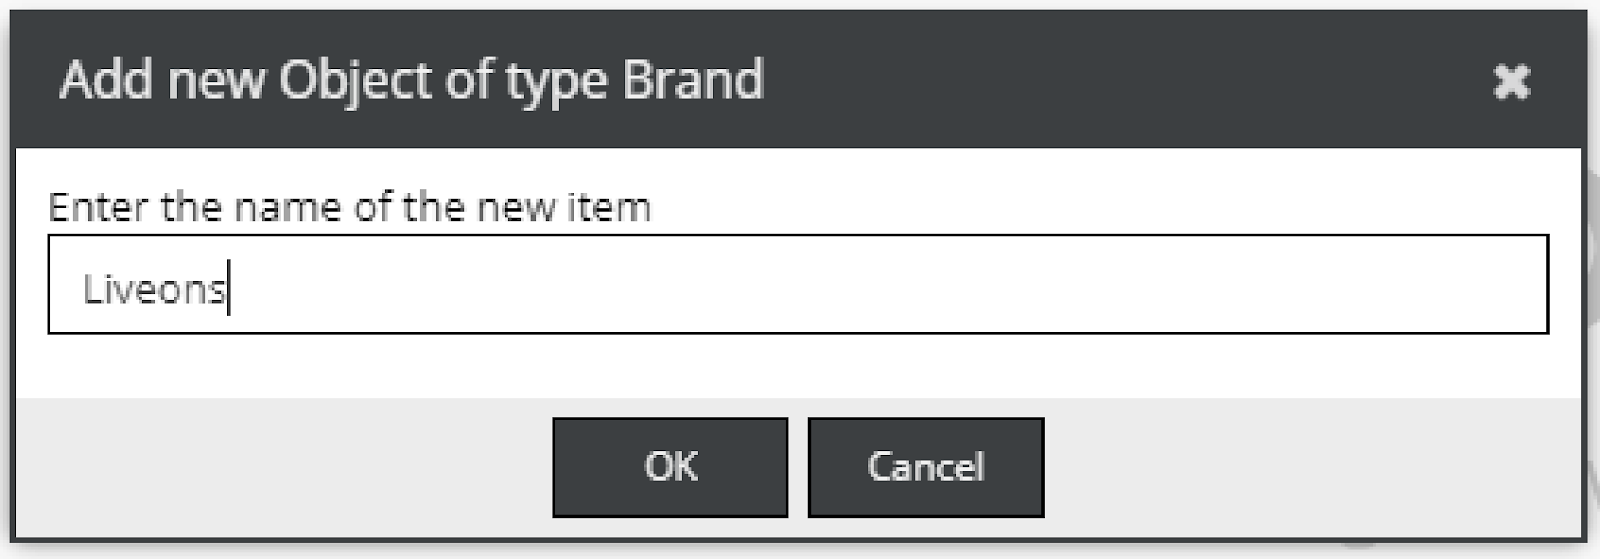
- Create a brand by right-clicking to “brands” directory -> Add Object -> Brand and typing the name of the brand.
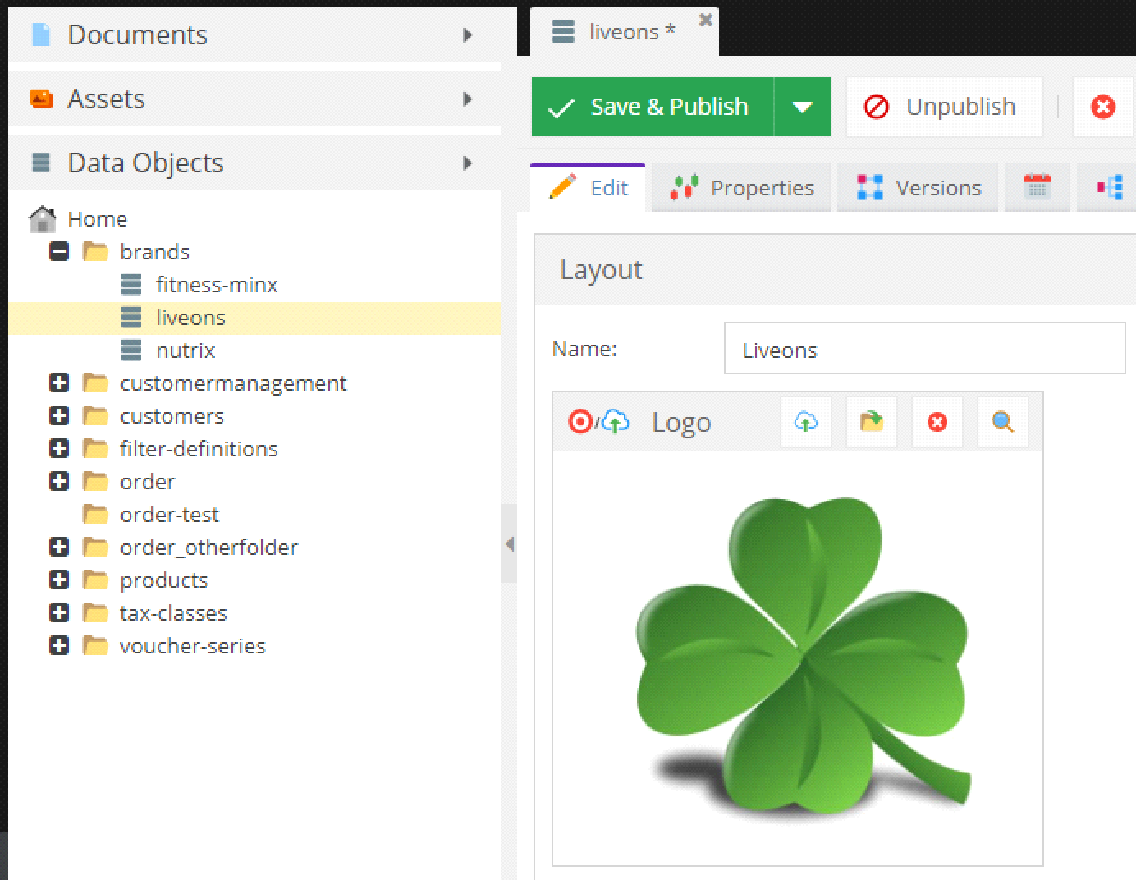
After the creation, we’ll do this:
- Populate the Name and logo properties (you can drag-and-drop the logo from the Assets)
- Save & Publish the brand.
Following the same principle, you can add a couple of more logos and brands, and name them as you wish. When you’re done, you should have something like this:
The last thing to do in the Object section is to assign our brands to the selected products. You can create your own products (like you created brands) or you can reuse some of the existing products that Pimcore e-commerce demo/skeleton already includes.
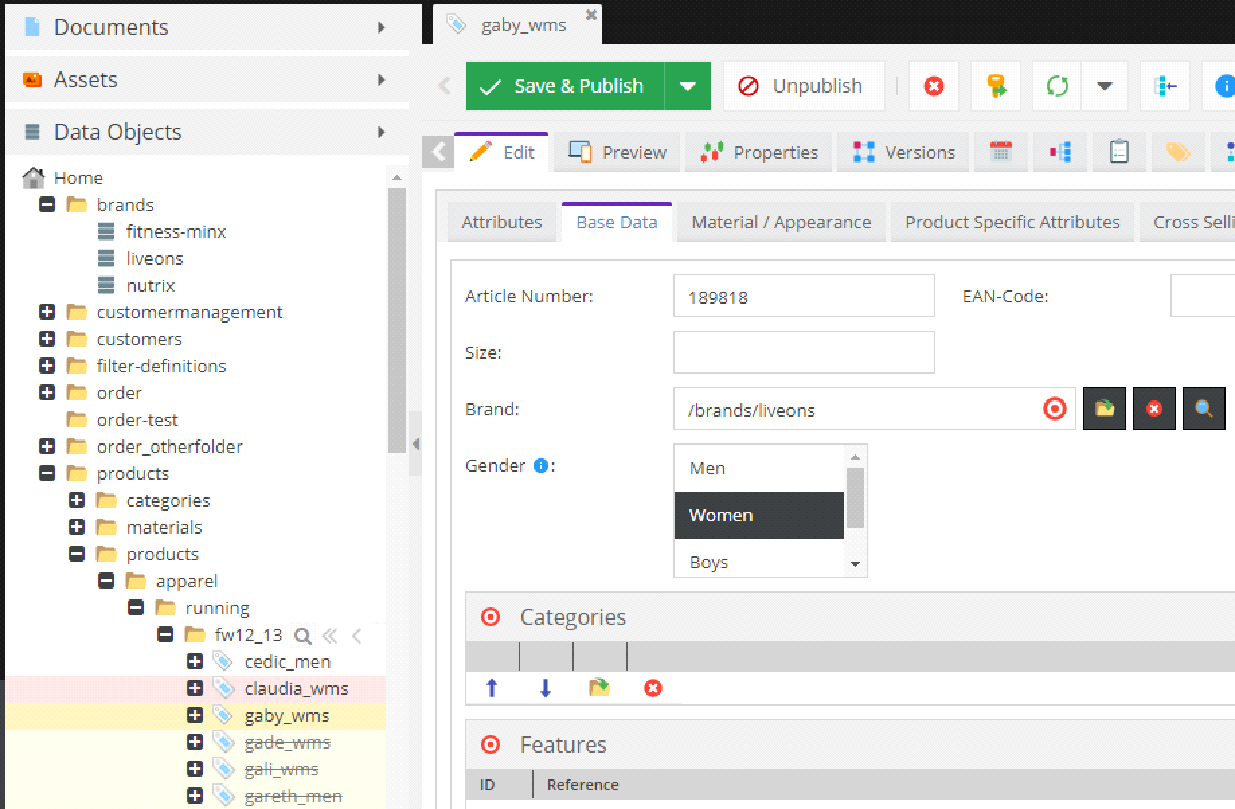
For simplicity, we will select several unpublished products under the /products/products/apparel/running/fw12_13 directory and do the following:
- Assign them a brand by drag-and-drop the desired brand to the brand field.
- Save & Publish them.
Next, we need a document page which will render our brands and products. Under the documents section, you can do this:
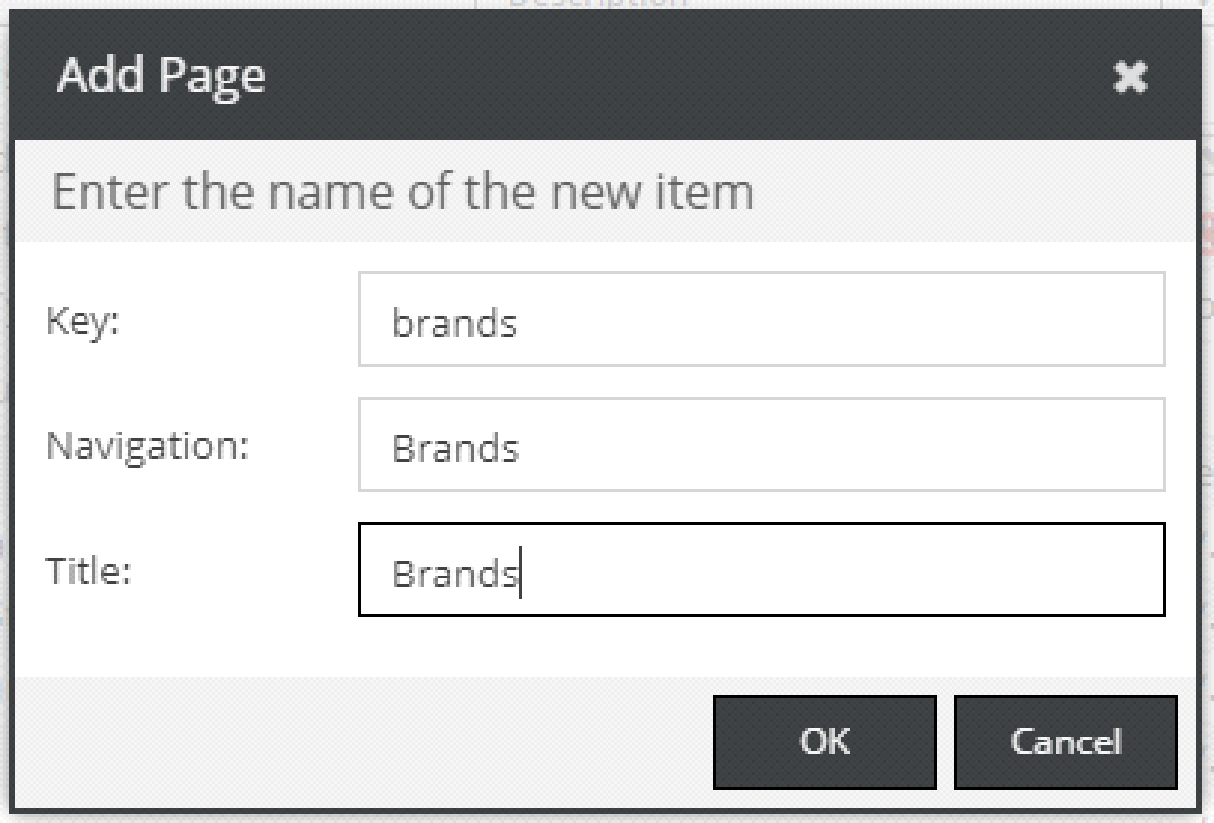
Right click on the “en” document -> Add Page -> Contentpage. In the appearing pop-up, we will name it “Brands”.
Before saving and publishing we will add some document properties which will use us later in our code logic. Under the document Navigation & Properties tab do the following:
- In “Predefined Properties” dropdown, select the “Hide left navigation” option. This will add a “leftNavHide” property of the Boolean type set to true. Since we created our document as a content page, it will use the Pimcore layout which you can find under /app/Resources/views/ directory as the layout.html.php file. By default, the layout displays left side navigation, but for our page, we want to hide it, and we can do it using the leftNavHide property.
- Add a custom property “globalRootBrand” of the type object, and drag-and-drop the “brands” directory from the Object section into the value column.
- Add a custom property “templateType” and call it “brand”.
- Save & Publish the document.
The document properties should look like this:

Now we have the assets, objects, and document ready. The time has come to move to the code and fetch our brands to display them in a menu drop-down.
Under /app/Resources/views/ directory, in the earlier mentioned layout.html.php file, find where the $mainNavigation is rendering and place the following code in its function parameter:
You can see that we are using previously set document properties by checking if the templateType is “brand” and if the globalRootBrand property is set.
Then, we are looping through the “brands” directory children, which are our brands, and we are dynamically creating brand pages while setting the name, identifier and the page uri.
We learned earlier that Pimcore documents follow the MVC pattern. Therefore, to render a brand document, we need to create a brand controller and a view for it. Starting from the controller, you can create a BrandController class under the /src/AppBundle/Controller directory and add the following code:
The BrandController class has detailAction which accepts the brand identifier as a parameter. In the action, we fetch a brand by its identifier and all products which have that specific brand set.
Then, we are passing products and brand to the view by setting them as properties to the $this-view object. Notice that we are using the Symfony to set a dynamic route that will point to our action.
To create a view, under the /app/Resources/views directory create a “Brand” directory and a detail.html.php file in it. Following the Symfony naming convention, the detailAction of the Brand controller will expect the detail view under the Brand folder to render it. Place the following code to the view:
The view extends the layout.html.php where, among other things, the menu navigation is defined. Skipping the HTML and CSS parts, we will focus on explaining the main logic. We are rendering the brand logo by calling getThumbnail method on the asset object $logo.
To render products, we are looping through the products and rendering the product.html.php template which, in Pimcore e-commerce demo/skeleton, exists under the /app/Resources/views/Shop/list/ directory.
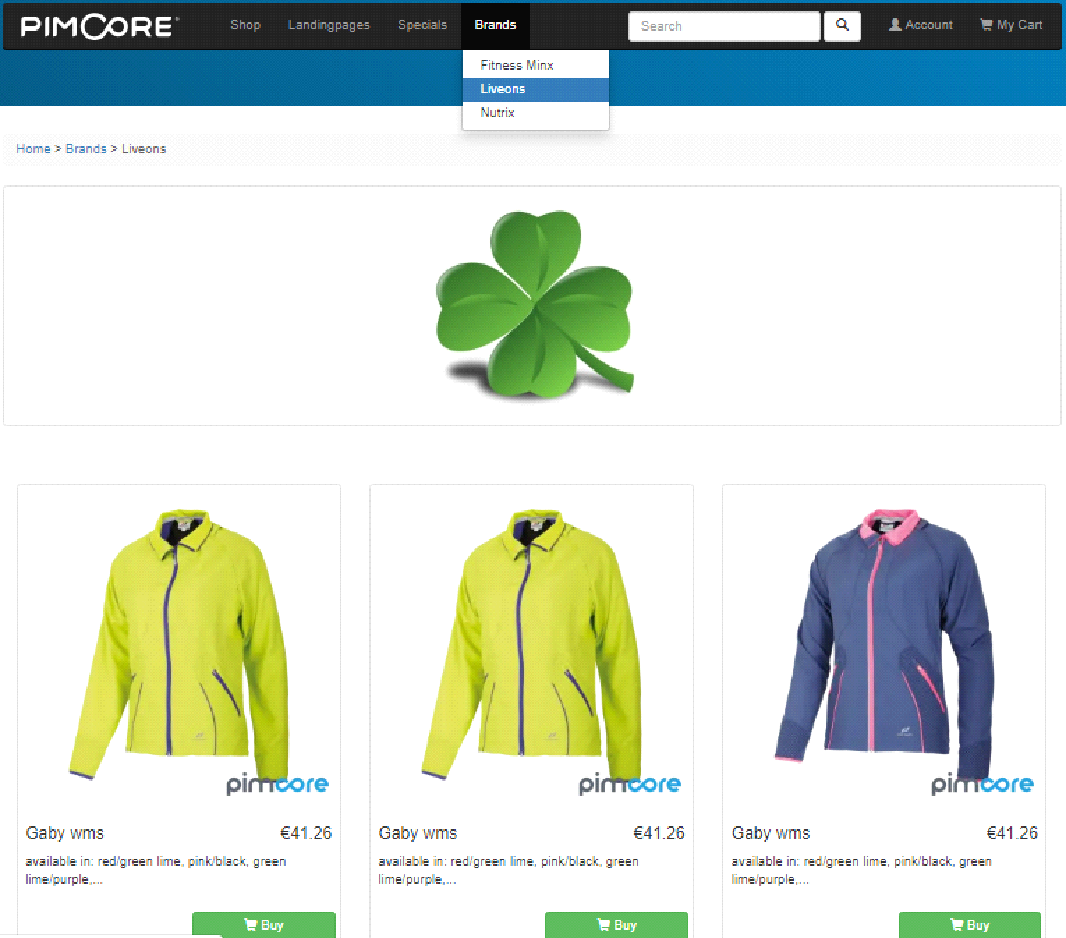
Finally, if you navigate to your Pimcore local domain, you should see a Brands option in the menu. If you hover it, all the brands you created are listed as sub menu options. On brand selection, a brand page is rendered showing your brand logo and the associated products.
The final screen should be similar to this:
Where to learn about Pimcore
In this blog post, we covered some main Pimcore features that Pimcore developer uses on an everyday basis. However, Pimcore is a large platform, and it provides you with a lot more possibilities. If you are interested in learning more about Pimcore, here are some learning source suggestions:
- Official Pimcore documentation – This is the best place to start since the Pimcore crew put the effort to document a lot of Pimcore features. Still, as most documentation, it may not be the most detailed one so you will need other sources, too.
- Pimcore Youtube tutorials – Here you can find some useful Pimcore webinars explaining the Pimcore 5, eCommerce, templating, and more.
- Symfony documentation – since Pimcore is a Symfony application, knowing the Symfony will give you a lot of benefits when using Pimcore.
- Pimcore Knowledge Base – Our Pimcore experts have been continuously publishing new guides, tutorials, and whitepapers on Pimcore. There, you'll find more than you've been looking for!
Hopefully, this article gave you a solid ground for starting to use Pimcore. Now that you are familiar with the main Pimcore elements further developing in Pimcore should be a lot easier.
P.S. Our Frontend developer Alen wrote another great blog post on How to build Vue.js single page with Pimcore!
Feel free to give us feedback about your personal Pimcore experiences and stay tuned for more Pimcore posts we plan for the future.
Author:
Helena Stjepanović
Backend developer