How to test Pimcore applications with Codeception
When developing constant features on Pimcore applications, it can become quite challenging and time-consuming to cover all cases when testing site functionalities and making sure we didn’t break older working code with a new one.
We can use automated tests to test the user’s behavior on frontend, route responses, database checks, and many more.
Every case we mention can be done and tested with Codeception.
So, in this article, we’ll talk more about how to test Pimcore with Codeception and how does it help us.
If you’re in need of professional services of Pimcore development, feel free to schedule a call with us! We’d like to see how we can help your business grow!
And if you’re a Pimcore developer – you’ll find this post highly valuable!
Without further ado, let’s jump in.
What is Codeception?
Codeception is a testing library that enables us to write understandable test cases in different suites quickly.
With Codeception, we can write three types of tests:
- Acceptance tests
- Functional tests
- Unit tests
We’ll go through each type of testing, including setup and implementation.
For more detailed information, you can check Codeceptions documentation.
Note before testing
We highly recommended using a test database so that everything created for and in the testing environment stays there.
We’ll go through how to set up the testing environment down below.
When developing an idea on how to test a particular part of the functionality, it’s best to create it all in a flow so that everything is dynamically created.
For example, don’t hardcode object IDs or test all functionalities on a single account.
Instead, ensure that everything that requires an existing instance in the current setup or database is created for present testing purposes.
In this post, we’ll demonstrate on a few points the best practice to develop so that we cover everything dynamically.
In the following examples below, we’ll be working on a Pimcore demo application.
By default, older Pimcore demo installations came with existing Codeception configuration, but they are excluded in new ones.
We’ll start from scratch by running a command:
vendor/bin/codecept bootstrap
After the command has finished, inside the “tests” folder, the command has generated all required configurations, support files, and folders defined in the “codeception.yml” configuration.
In “codeception.yml,” there should be a configuration that looks something like this:
Let’s go through the above configuration to see what does what:
- paths: Inside it, there are paths to folders that will be used to store generated files.
- tests: location where all our suites will be stored
- output: location where generated templates or output from tests will be stored
- data: location used to store fixture data
- support: location of support code
- envs: location of environment configuration
- actor_suffix: Suffix which will be used when creating a new actor (i.e., when creating a new suite)
- extensions: Here, we define all extensions which are to be used generally in all tests. By default, Codeception will add “Codeception\Extension\RunFailed,” which logs failed tests into tests/log/failed folder to rerun failed tests.
We can add here environment configuration, which we’ll use to store database connection, domain, and other data specific to the testing environment.
To do that, add the extensions parameter:
Since we’re using a testing environment, from “app/config/config_test.yml” we can see that Pimcore uses database DSN for connection.
So we have to add that to “.env.test” in a format PIMCORE_TEST_DB_DSN=mysql://username:password@localhost/db-name in case you’re using MySQL for database setup.
For a start, the current configuration will be sufficient.
Later on, we will add and modify it, so we are ready to start generating and writing tests.
Acceptance tests
We’ll start with acceptance testing. As this is browser testing, we need to run a browser for it.
By default, we can use PhpBrowser, which uses Guzzle and Symfony BrowserKit to interact with applications.
Keep in mind that with PhpBrowser, while it’s the fastest compared to other available options, we cannot run JavaScript while rendering pages.
It just sends a request to route, receives and parses a response for it.
An alternative to PhpBrowser is using a Webdriver which can run requests on real browsers.
Below we’ll cover cases for configuration of PhpBrowser and WebDriver for which we’ll use ChromeDriver.
PhpBrowser
As we mentioned before, PhpBrowser is the simplest to use for Acceptance testing.
So to use it, in acceptance configuration “tests/acceptance.suite.yml”, we need to define and provide it with an URL from which requests will be sent, so it looks something like this:
Inside the PhpBrowser configuration above, we’ve added an URL on which it will send requests to.
From configuration, it’s pulling value with key SITE_URL from environment .env.test, so we’ll have to add that with our application URL.
ChromeDriver
Because ChromeDriver runs an actual browser – Chromium, we’ll have to install it.
There are additional install instructions on their website.
For Linux, we can use the following command to install it:
sudo apt install chromium-chromedriver
After it’s installed, we have to run it so that it can listen to upcoming requests by running:
chromedriver –url-base=/wd/hub
*Note for the command above, if you’re on Windows, you may not need starting “/” in –url-base parameter
With the “–url-base” parameter set to “/wd/hub”, we’re setting a base entry point for all the received commands which WebDriver is sending.
Now in “tests/acceptance.suite.yml” we can add configuration for it:
Notice that we’re also reading URL configuration from .env.testing with key SITE_URL like we’ve mentioned above for PhpBrowser configuration.
After we’ve configured our acceptance suite, we can start writing test cases.
How to test Pimcore with acceptance tests
As we’re running a demo Pimcore application, we can test some of its existing functionalities.
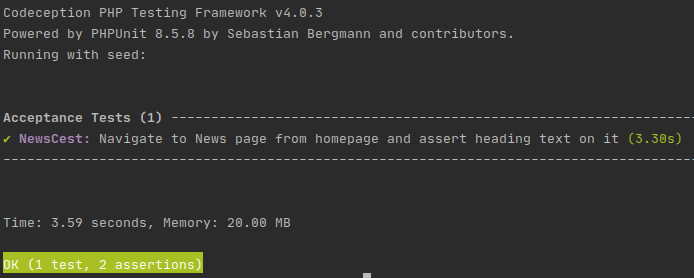
For example, let’s test going from homepage to news page and assert that there is some text.
To do that, start by creating a test for it by running a command in our project folder:
vendor/bin/codecept generate:cest acceptance News
Or in short:
vendor/bin/codecept g:cest acceptance News
This has generated a test file in “tests/acceptance/NewsCest.php” which contains generated methods _before() and tryToTest().
_before() and other methods similar to it i.e., _after() are hooks triggered before the test has started or after it.
It can be useful to prepare data for that test or clean up afterward.
In tryToTest(), we can start writing our test cases.
The Acceptance test which we described above would look something like this:
Now we can run tests with the command:
vendor/bin/codecept run
Or if we want to run only acceptance test:
vendor/bin/codecept run acceptance
If everything is set up correctly, all assertions in that test should pass, and the response should look something like this:
Functional tests
We’re trying to cover with functional tests if our implemented functionality is working correctly.
Here we have to generate all possible cases that can happen to prove that implemented functionality is valid in all scenarios.
For example, we can take customer registration.
In acceptance tests, we can validate that after a user has registered, he has been redirected to his profile page, received an email, etc.
We check if that customer and all fields that he entered in the registration form are correctly stored in the database with functional tests.
While doing so, nothing has crashed or caused unexpected behavior.
How to test Pimcore with functional tests
Before we start writing test cases, we’ll have to add and enable Asserts and Pimcore modules in “tests/functional.suite.yml”, which will provide us with additional assert methods that we can use to test our cases better.
Now “tests/functional.suite.yml” should look something like this:
Because we’ve included the above Pimcore module, but Pimcore isn’t bootstrapped in tests yet, we have to do that now.
In the “tests/” folder, we have to add the “_bootstrap.php” file, which will do that. From Pimcore documentation, we have to add:
Now we have to tell codeception to run that bootstrap file.
To do that, add in main codeception configuration codeception.yml in the main project folder following config:
Because of this bootstrap setting, codeception will look for the bootstrap file in every suite created, so to prevent tests from failing there; we can add a plain php file to:
- tests/acceptance/_bootstrap.php
- tests/functional/_bootstrap.php
- tests/unit/_bootstrap.php
In them, we can define additional settings or connect new services, but for current testing purposes, we’ll leave them empty.
After adding those modules, we have to run a build command, which will bootstrap the added modules into functional tests.
vendor/bin/codecept build
After we’ve configured functional tests, let’s say that we wish to test registration in our Pimcore demo application, which comes with an already installed and configured customer management framework.
For registration, we’ll need some test data. To do that, we’ll add a faker library from fzaninotto/Faker with a composer to our project.
composer require fzaninotto/faker
Once the composer is done adding a faker library, we can implement it for further usage.
For simplicity, we can create a DataGenerator class in “tests/_support/Helper/StaticHelper/DataGenerator.php” which will have a static method for generating registration data.
Now we’re ready to implement a functional registration test case.
To do that, we first have to generate a test for it, similar to acceptance it’s done by running:
vendor/bin/codecept g:cest functional Registration
In it, same as the acceptance test, we’ll start writing a test case which in the end looks something like this:
Again if everything is set up correctly, all tests written above should pass.
Unit tests
With unit tests, we can test smaller parts of code in functionality to make sure it’s working as it’s supposed to.
When we include those smaller parts in larger functionalities, we can rest assured that individual pieces will work.
How to test Pimcore with unit tests
For the test case in our Pimcore demo application, we can check if a certain EventListener is triggered and it is setting correct values.
Since we’re working with Pimcore data objects, we’ll need to enable the Pimcore module as we did in Functional tests.
Since Codeception is built on PHPUnit, we can still generate PHPUnit tests with Codeception hooks.
We’ll do that for the test case mentioned above by running command:
vendor/bin/codecept g:test unit NameSettingListener
After the test is generated, we can write a test case for it:
From the test case above, once the Manufacturer object is saved, EventListener for it will trigger and it will set Name property from it’s key.
Below we check that EventListener is activated.
Over to you!
While we covered basic test cases in the examples above, there’s still much that can be done with Codeception.
So make sure to check Codeceptions full documentation to see a more detailed explanation testing paradigm.
If you’d like more resources on Pimcore development, we’ve got you!
Our experts have covered the topics of Pimcore Tags, building Vue.js single page application on Pimcore, and even the use of admin panel in Pimcore.
And if you’re looking for a reliable partner, we’re experts in Pimcore development and we can make your idea happen.
Reach out to us and let’s schedule a call!
To finish up, Codeception is a great testing framework that enables us to write understandable and practical tests quickly.
This guide shows it’s easy to implement and use it for Pimcore applications.
If you feel we missed out on some information in this article, feel free to reach out to us at [email protected]! We’d like to hear from you!