How to successfully use Pimcore Workflows (Example included)
What you'll learn with this guide
This guide will show you how to use Pimcore's workflows feature.
Workflow is a model of a process an element in Pimcore goes through. In other words, it describes an object's life cycle. Each element in Pimcore can exist in multiple workflows simultaneously. Main features are derived from Symfony workflows.
Workflows are amazing for handling the life cycle of objects. It provides us with a way to manage an object through various states by not dirtying our classes with extra fields. Pimcore Workflows are based on Symfony workflows but there are some extra Pimcore-specific features. It also provides a graph view of the entire workflow and for this feature, Graphviz is needed as an additional system requirement.
Workflow type ‘Workflow’ vs ‘State Machine’
Workflow type workflow is the default type of workflow and allows to model a process of an element and allows it to be in multiple places simultaneously for that element.
State machine type workflow is a subset of a workflow that has the purpose to hold the state of an element. In other words that means that this workflow element can be only in one place.
Some important workflow concepts before we continue
- Place is a step in the workflow that describes the status of an element.
- Marking Store is used for storing current place(s) for each element.
- Transition describes the action to get from one place to another.
- Transition guard defines criteria that define if a transition is currently allowed or not. Depending on the transition guard some transitions can be made only by a certain user or user with a specific role. Also, we can set transition guards that require the user to enter some data into the element before the transition can happen.
- Global Action is similar to transitions but while transitions are only available when an element is in a certain place, global action is available at every place.
Marking stores
There are 5 ways to store elements in places. We chose which way to save the places by adding
to configuration. Marking store types are:
- state_table(default) – Place information is stored in table. This is best suited for assets and documents.
- single_state – Place information is stored in an attribute of the subject. It is used when an element can’t be in more than one place at the same time.
- multiple_state – Place information is also stored in an attribute of the subject. It is used when elements can be in more than one place at the same time.
- data_object_multiple_state – Same as multiple_state but we can use a multi-select field in a data object to save the states.
- data_object_splitted_state – It is similar to and but here we can define multiple attributes to store different places in.
If we are using select or multi-select for storing place information and marking store type is some of , , then we can configure options provider with ease. Just add @pimcore.workflow.place-options-provider as options provider, and your_workflow_name as options provider data and let Pimcore do the magic. It is even formatted to look like you set it up in place configuration.
Support strategies
There are several ways to define which entities are supported by a configured workflow. This configuration is required and can’t be combined so you need to pick just one.
- supports – This is the simplest way to choose which entities are supported by workflow. It can be a single entity or array of entities
- Expression support strategy – This one is used when a workflow should be limited even in the entity class. By defining symfony expression, we can ensure that workflow applies to a certain type of entity. For example, if we have a product entity, we can limit workflow only to “more complex” ones like computers where we need to add all components and all information needed. And for something like a hard drive tray, we don’t want to use workflow because there is little data.
- Custom support strategy – If logic for limiting workflow is more complex, then you can even add the whole service as a strategy. Service needs to implement .
Permissions
Pimcore also lets us configure which users are allowed to modify (save, delete, publish,...) the element based on the place element is.
This example is allowing only admin users to modify the element and everybody else can only see the product. For determining which permission is used Pimcore uses workflow priority if an element is in multiple workflows and satisfies more than one condition. If an element is in multiple places inside one workflow then permission for a place that is first in places section will be used.
Example
Let's make a quick example to see how it works. The first thing is to create a simple class.
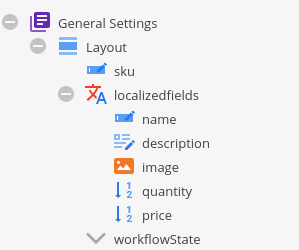
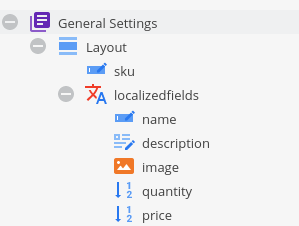
A class contains SKU, localized fields, and workflowState where we store the place of the element. After that, we need to create custom layouts that we will use for elements in certain places.
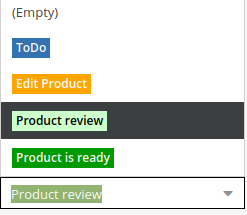
- todo layout is starting layout in workflow

- edit_product is a layout that we will use for editing product data

- product_review is a layout with all information about the product and here we will decide if the product needs some more editing or is done
Next, we need to make workflow declarations.
As you can see, we didn’t declare any places and transitions yet. This workflow is available only for .
Also, we defined that we will use single_state marking store and store elements state into workflowState attribute. After that, we need to declare places for our product.
We start at todo. It is used just to enter or check if the auto-generated SKU is correct. Next, we have which will serve as the place where we edit our product. Here we can edit everything except SKU. The next place is the review in which every field is visible but no modification is available. If we discover that the product is not set correctly then we need to return to . If the product is set correctly then we mark the product as done and for that, we use place.
As you may have already guessed, now we need to define transitions that will follow the logic described above.
First, we have to transition from todo to and set a guard that requires SKU to be filled to be able to move to the next place.
Next, there is the transition to a review of the product. There is no guard for this transition because a review is used as the last step before publishing the product.
Also, maybe we want to fill in product for one locale and the user entered the wrong one. In review, we can choose to go to if the product is not complete or if the product is complete and filled correctly.
Only admin users can approve the product for marking it done. When the transition is fired, the product is automatically being published. In the end, there is a that unpublishes the product.
To fire this transition, the user needs to enter a note so everyone can see why a product is reopened. Global action is used for logging time when working on a product.

This is the workflow we created. You can dump workflow from the terminal into .svg file with the command
Let's see our workflow in action now.
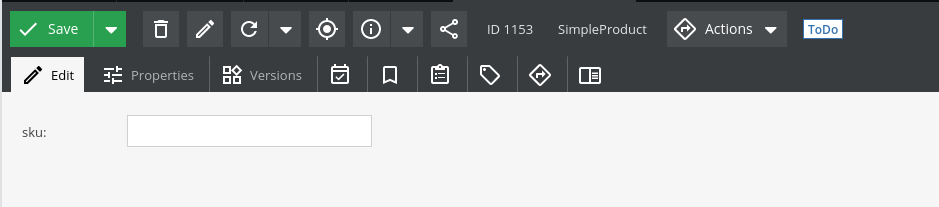
After creating an object we have only field SKU that we need to fill. There is no action available until we save the project SKU. After that, we can edit product data.
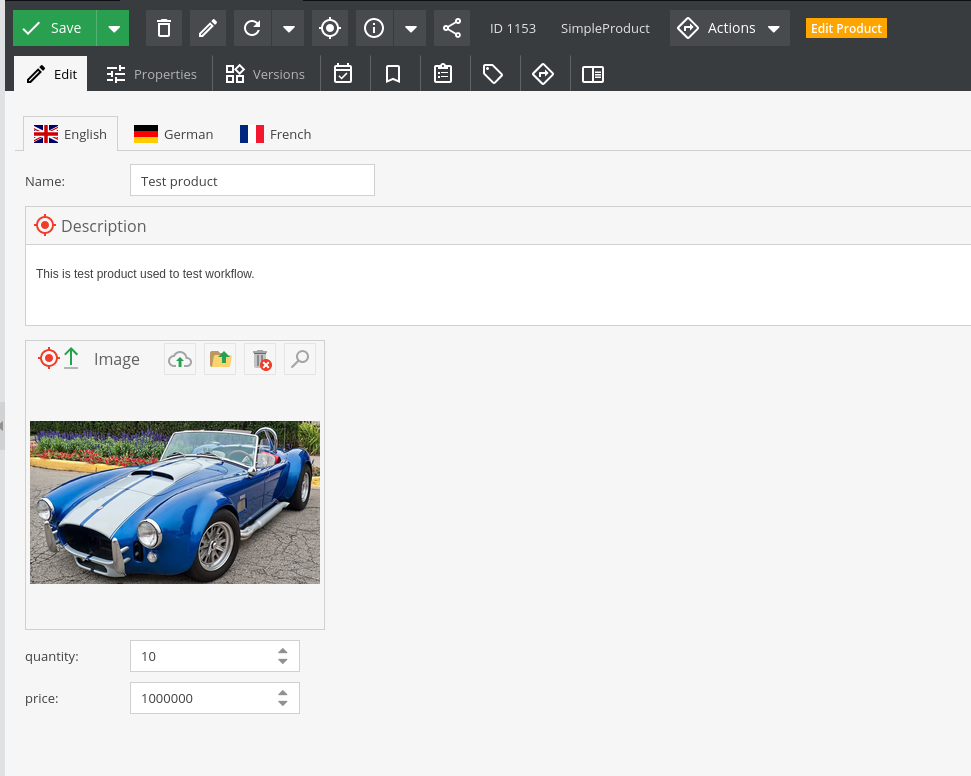
After we edit the product, then the product is going into the review. In review, there is almost an identical view as it serves as the last step to publishing the product. In the end, if the product is correctly filled we publish it by marking it done.
Continue learning about Pimcore
Learning about Pimcore Workflows has put you into a learning frenzy and you're looking for more?
We may have just what you need. Our Pimcore experts have been working hard on bringing you the latest and the most accurate info on Pimcore! Visit our Pimcore Knowledge Base - and take a deep dive into Pimcore.
There are countless Pimcore how-to guides, tutorials, and articles for you to go through. And if you'd like us to help you with something specific - reach out to us!