Personalization in Pimcore - Target groups and Global targeting rules
What you’ll learn with this guide
This guide will show you how to use Pimcore’s personalization engine in order to create target groups and assign visitors to specific target groups with global targeting rules and by assigning a target group to a document.
The first step is to define the target groups
Before we start personalizing content and delivering it to a specific target group, we’ll need to define the target group. To define a target group, you’ll need to:
- Open the Pimcore dashboard and click on “Marketing”
- Click on “Personalization/Targeting”
- Click on “Target Groups”
- Click on “Add” in the top left corner
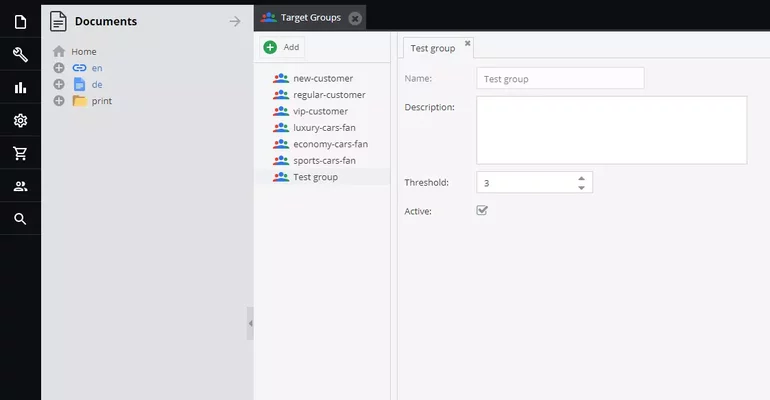
For the purposes of this guide, we’ve created a target group and named it “Test group”. When first creating a target group, you’ll want to define its name, description, threshold, and make sure it’s active.
The term threshold a bit of explanation. We can define the threshold as a quantitative limit for a specific target group. Further use of threshold will be explained later in this guide.
Assigning visitors to target groups using global targeting rules
To start defining global targeting rules, you’ll need to:
- On the left sidebar, click on “Marketing”
- Click on “Personalization/Targeting”
- Click on “Global Targeting Rules”
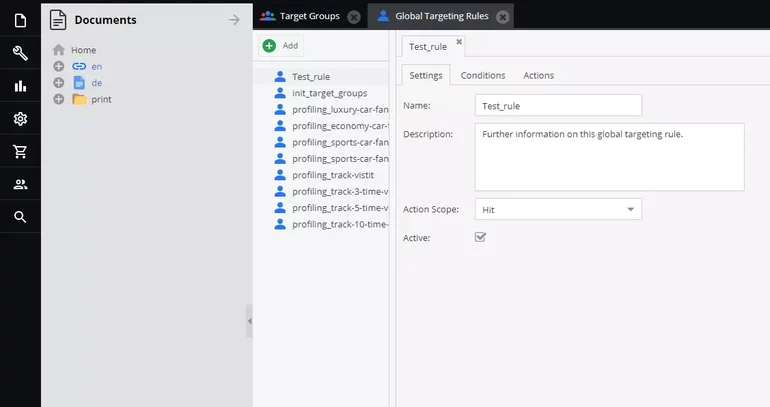
When defining global targeting rules, you can configure settings, conditions, and actions for every specific targeting rule. To successfully define targeting rules, start with settings.
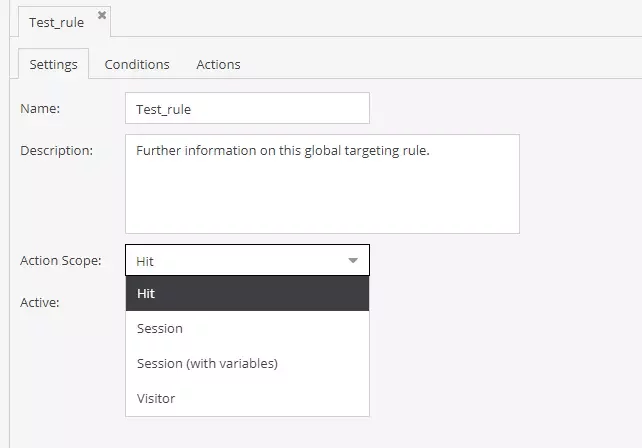
Similarly to target groups, you can define the name and description of a targeting rule, and activate it or deactivate it. Action scope is a new setting that defines how actions are executed. Every action scope is unique and meant for use in specific situations. Here’s a quick explanation of what do they represent:
- Hit – represents actions executed on every request
- Session – represents actions executed per each session
- Session (with variables) – represents actions executed per each session in which visitor information is changed (e.g. if a visitor get assigned to another target group)
- Visitor – represents actions executed once per visitor.
After you’ve successfully defined the settings for a global targeting rule, the next on the schedule are conditions. Conditions define a situation in which a certain action can be executed.
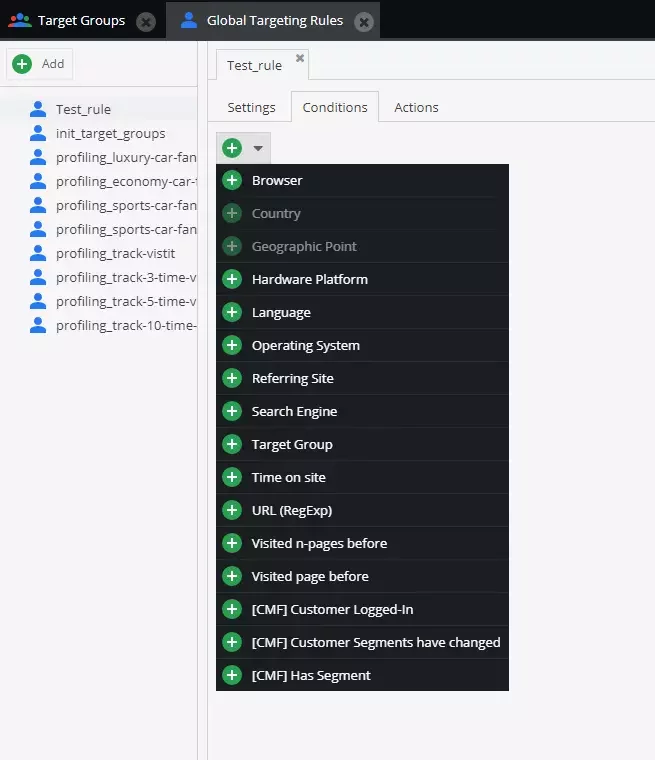
There are 16 different conditions to choose from and all of them can be combined with each other, enabling you to define the most complex situations in which you want a certain action to execute. For the purpose of this guide, we’ve defined a simple combination of conditions for our global targeting rule.
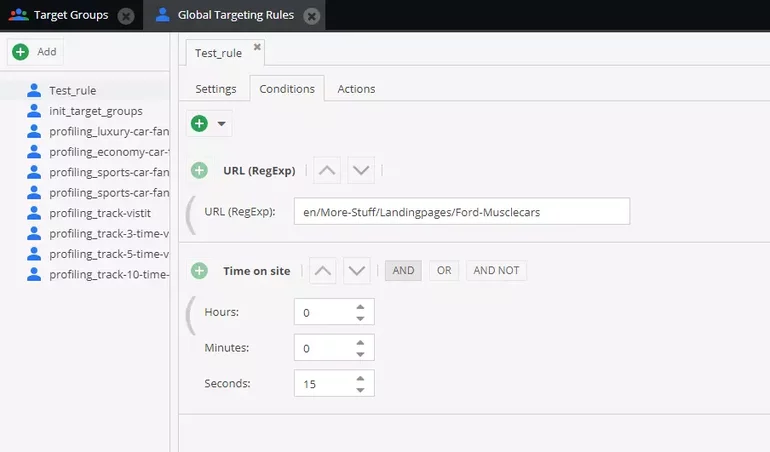
To configure these conditions, we’ve used Pimcore’s demo website. According to the conditions we’ve defined, a certain action will be executed if a visitor stays on the Ford Muscle cars landing page for at least 15 seconds.
After defining conditions for our global targeting rule, we need to define what kind of action is going to be executed upon fulfillment of conditions.
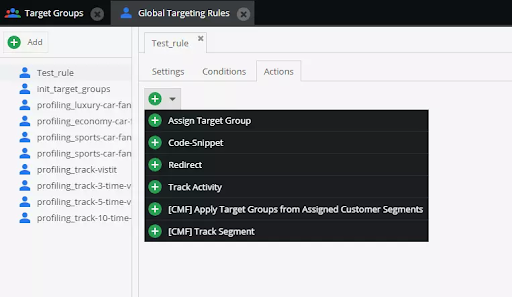
As seen in the image above, we can choose from 6 different actions. All of these actions can be combined in order to create a complex targeting rule. To finish our task of assigning visitors to our “Test group” target group, we’ll use the action “Assign Target Group”.
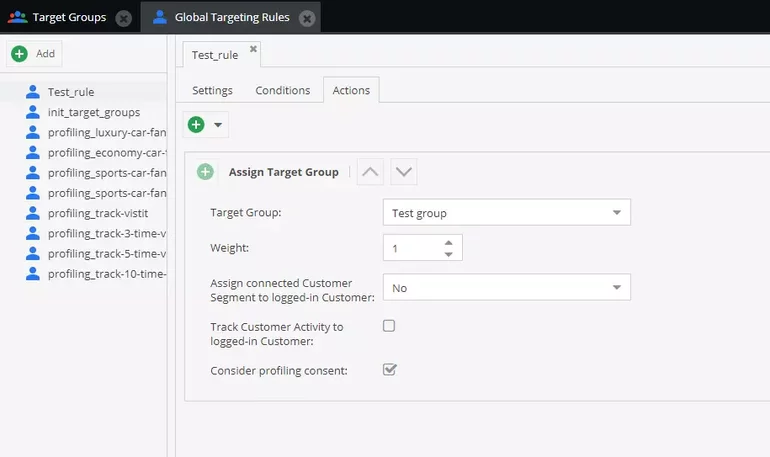
According to the rule we’ve set, after visitors fulfill all of the conditions, they’ll be assigned to a target group.
The “Weight” setting is a novelty, and we’ll explain it further. When defining actions in global targeting rules, you’ll always need to assign a certain number to the “Weight” setting. We can define weight as the quantitative impact of an action defined by a global targeting rule.
Threshold (a setting mentioned at the beginning of this guide) is connected to the “Weight” setting. When creating our “Test group” target group, we’ve defined the threshold to be 3, and when creating our targeting rule, we’ve defined the weight of the action to be 1.
This means that this action needs to be executed 3 times for a visitor to be assigned to our “Test group” target group.
Assigning visitors to target groups by assigning a target group to a document
To assign a target group to a document, we’ll first need to open a document we want to assign the target group to. In our example, we’ve opened a document on Pimcore’s demo website called “Auctions”.
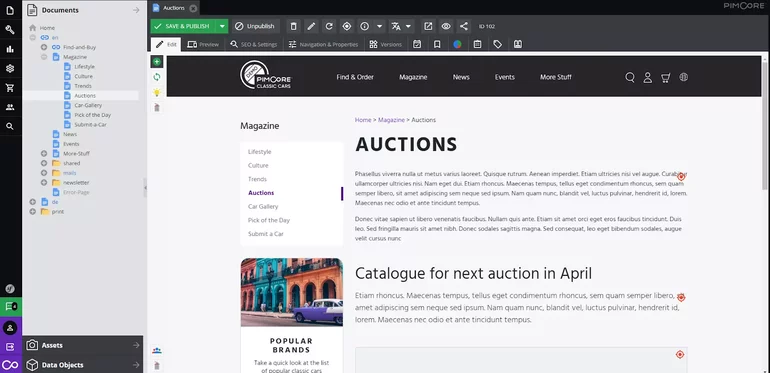
After opening a document, click on “SEO & settings” located on the top toolbar. After you’ve clicked on the “SEO & settings”, you’ll see something like this in the image below.
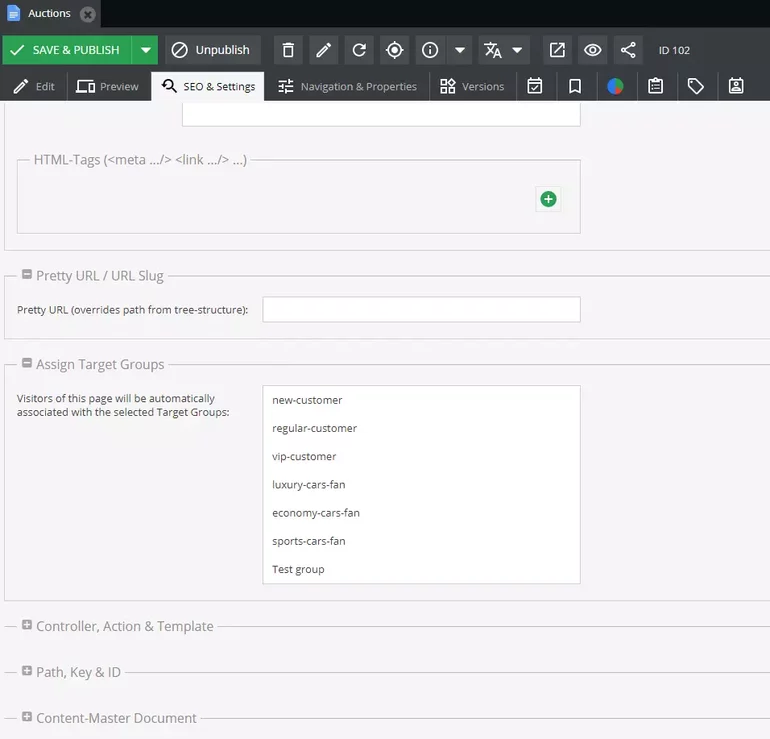
In the 3rd section named “Assign Target Groups”, you can choose any of your already created target groups. You can choose how many target groups you want. For the sake of example, we’ve chosen our Test group we created in the beginning.
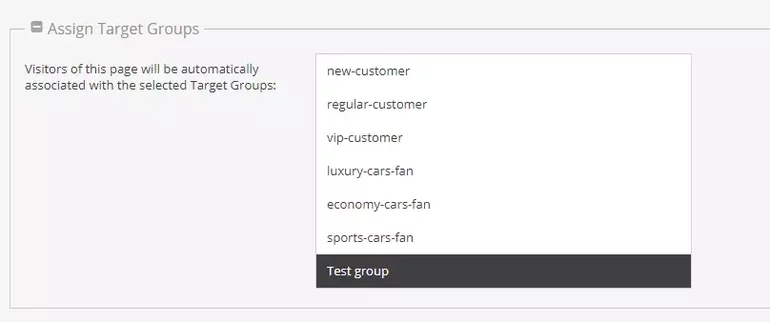
Every time our visitors land on the “Auctions” page, they’ll be assigned to the Test group. By doing that, their assignment count rises up to 1. The next time they open this page, their assignment count is 2, and so on.
We can define the assignment count as the quantity of assigning a target group to a visitor. For example, if we define the threshold for our target group to be 3, our visitors will need to visit the “Auctions” page 3 times before they are assigned to our Test group.
Also to mention, the assignment count is connected to the weight setting we can define when creating a global targeting rule. If we define weight for our targeting rule to be 5 and our visitors fulfill all of the conditions, their assignment count will increase by 5.
Both of these approaches can be combined and make it easy for marketers to prepare their personalization strategies.