Personalization in Pimcore - Customer automation rules
What you’ll learn with this guide
This guide will show you how to use Pimcore’s personalization engine in order to create customer automation rules that’ll help you define customer segments.
Customer automation rules vs. Global targeting rules
Both of these rules function similarly, and yet there are some differences. Global targeting rules are usually used in combination with target groups (you can create global targeting rules for specific customer segments), while customer automation rules are used in combination with customer segments.
Also to point out, we can’t manually remove a user from a target group, but we can remove the user manually from a customer segment, giving us total control over our customer data.
Setting up customer automation rules
First, on the left sidebar on the Pimcore dashboard, look for the “Customer Management Framework” icon. Click on “Customer automation rules”. Your screen should look like this.
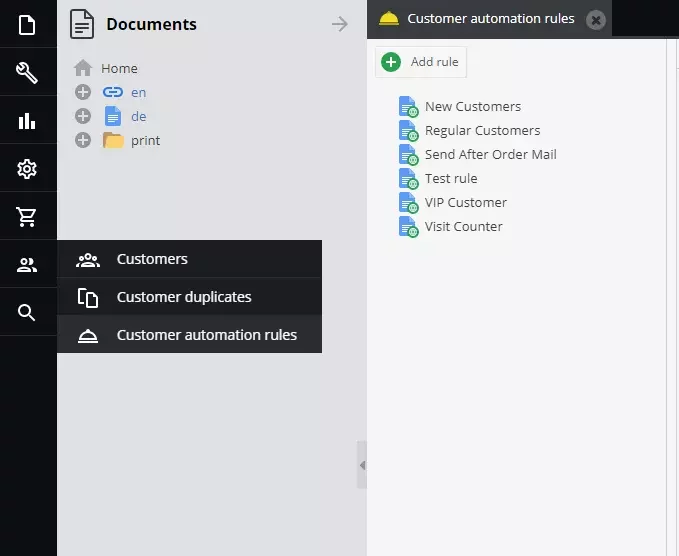
For the sake of example, we’ll create a customer automation rule named “Test rule”.
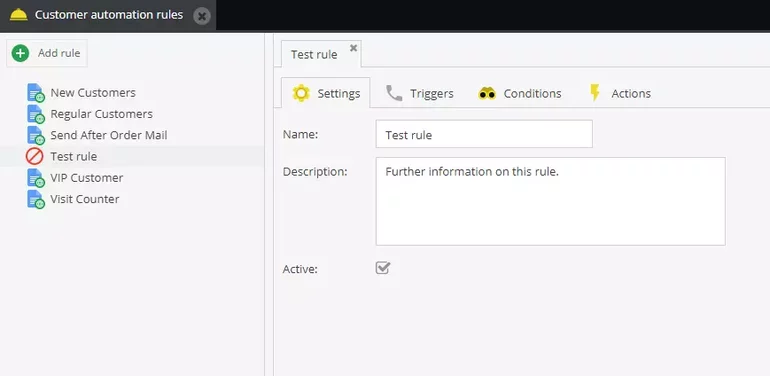
When creating customer automation rules, you’ll have 4 different tabs, looking similarly to global targeting rules. There are some minor differences when setting up these rules.
In your settings tab, you can define the name and description of your customer automation, and activate the rule (or deactivate it). Afterward, switch to the triggers tab.
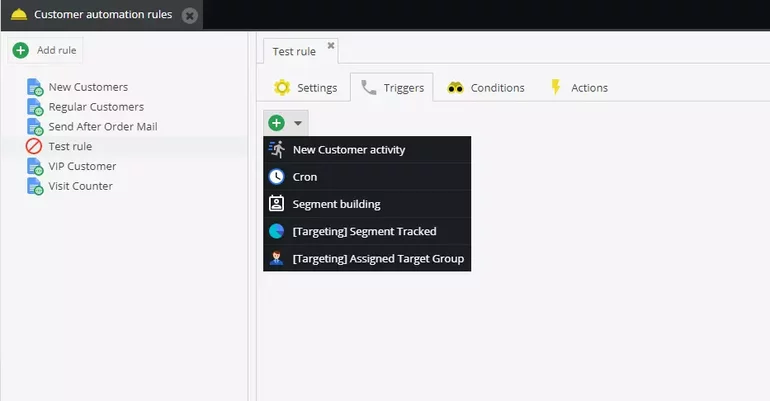
Here we define what kind of activity will serve as a trigger that allows the action to be executed if all of the conditions are fulfilled. Without rule being triggered, there won’t be any action executed, even if all of the conditions are fulfilled.
After defining the triggers for our customer automation rule, the next we need to do is define the conditions. As seen in the image below, we have 6 different conditions at our disposal, and we can combine them however we want.
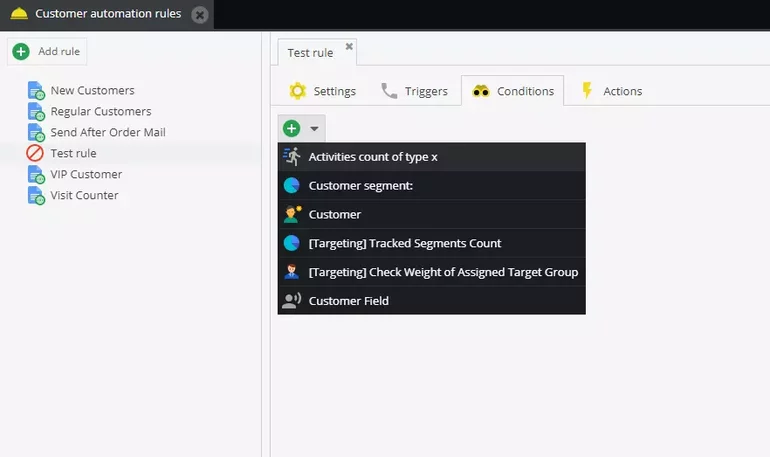
For the sake of this example, we’ve created a simple combination of 2 conditions for our customer automation rule.
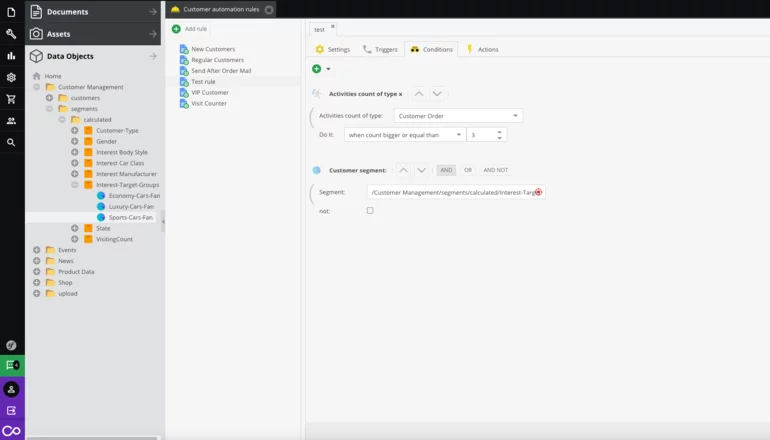
According to these conditions, if one of our customers who are a part of our sports car fan segment completes the order 3 times, the action will be executed.
Finally, after defining the triggers and conditions, we need to define actions for our customer automation rule. There are 5 different actions we can choose from, and we can combine them however we want.
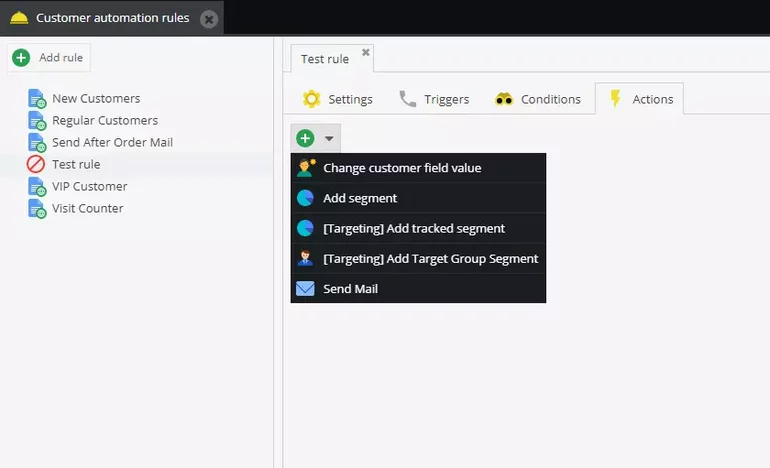
For our test rule, we’ve chosen our action to be “Send Mail”. First, we need to craft the mail we want to send to our customers, and then we’ll easily add it to our customer automation rule.
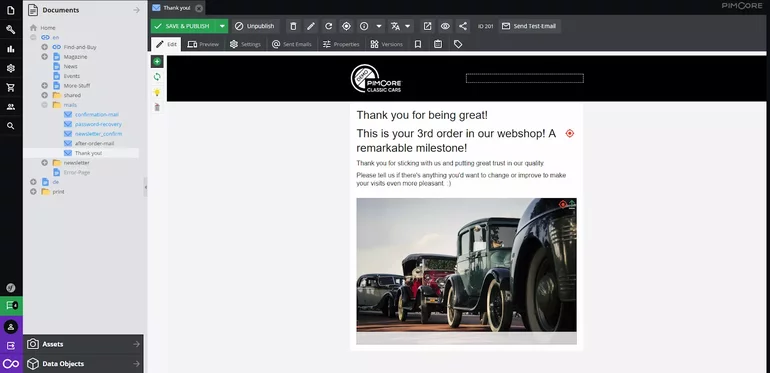
After we’ve crafted our mail, we need to drag-and-drop it into the appropriate input field.
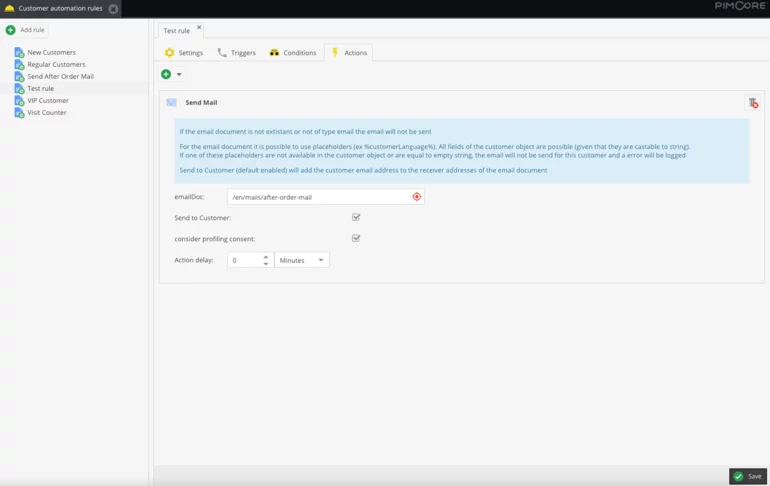
After we’ve done that, we need to click on “Save” in the lower right corner and we’re good to go. Every time some of our sports car fans complete their 3rd order, they’ll automatically receive this email.
For this specific action, we’ve set the “Action delay” to 2 minutes, meaning that they’ll receive the mail 2 minutes after completing the action we defined in our customer automation rule.