How to easily create a landing page in a few moments with Pimcore
Creating landing pages in Pimcore is simple and intuitive, and it also allows for a lot of flexibility and freedom. The imagination stands as the only limit when creating landing pages in Pimcore.
In this article, we will go through the whole process of creating a homepage in Pimcore administration using assets and data available for free from the Pimcore demo project.
With that being said, you can just as easily upload your own assets, customize the existing code or even write your own with the help of Pimcore documentation.
This guide on creating a landing page in Pimcore is also available in video format, so feel free to switch to the video version anytime!
And if you’re looking for a solution provider to help you with your new project, we’ll gladly help! We’re experts in Pimcore development with a proven track record of successful Pimcore projects! Feel free to contact us anytime.
Now, let’s jump into the article.
What we have prepared for you
- The project setup
- Creating the landing page
- The homepage setup
- Header and footer
- Main content
- What’s next?
The project setup
As the basis of this guide, we will use the Pimcore demo project. It can be set up in just a few easy steps, as described in the official Pimcore documentation. Once everything is set up, you will have the Pimcore demo locally, both the website itself and its administration. With that, you will have enough documents and objects already created to get you started with this guide.
Creating the landing page
In this section, we’ll go through all phases of creating a landing page. We’ll divide the whole process into 3 parts – the homepage setup, header and footer, and the main content.
Let’s start from the beginning!
The homepage setup
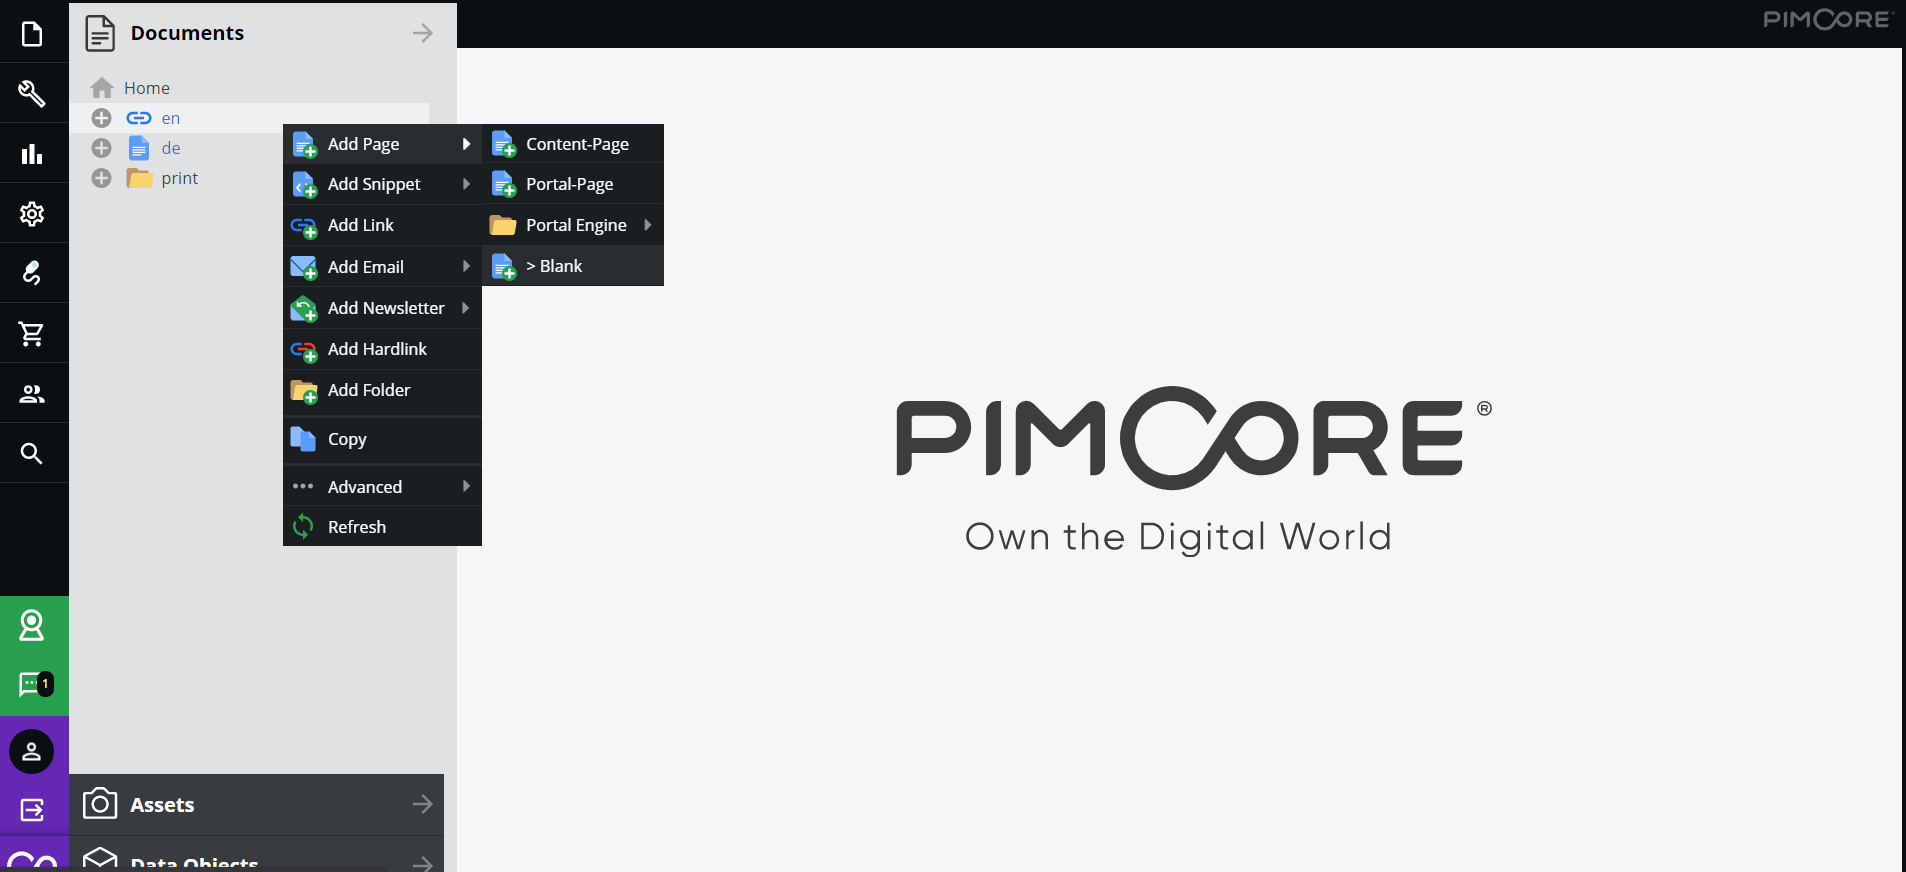
As soon as you open the administration, you will see on the left side under “Documents” that there already exists a homepage called “Home“. It also has documents for both English and German locales, as well as the “print” folder. That will not stop us from creating our own new customized homepage. So let’s create it under the “en” document.
Right-click the “en” document, go to “Add page” and choose “Blank“. We will name it the “home-page“. Immediately you can see that we’ve got some default content, but we will not worry about that since we will make our own configuration.

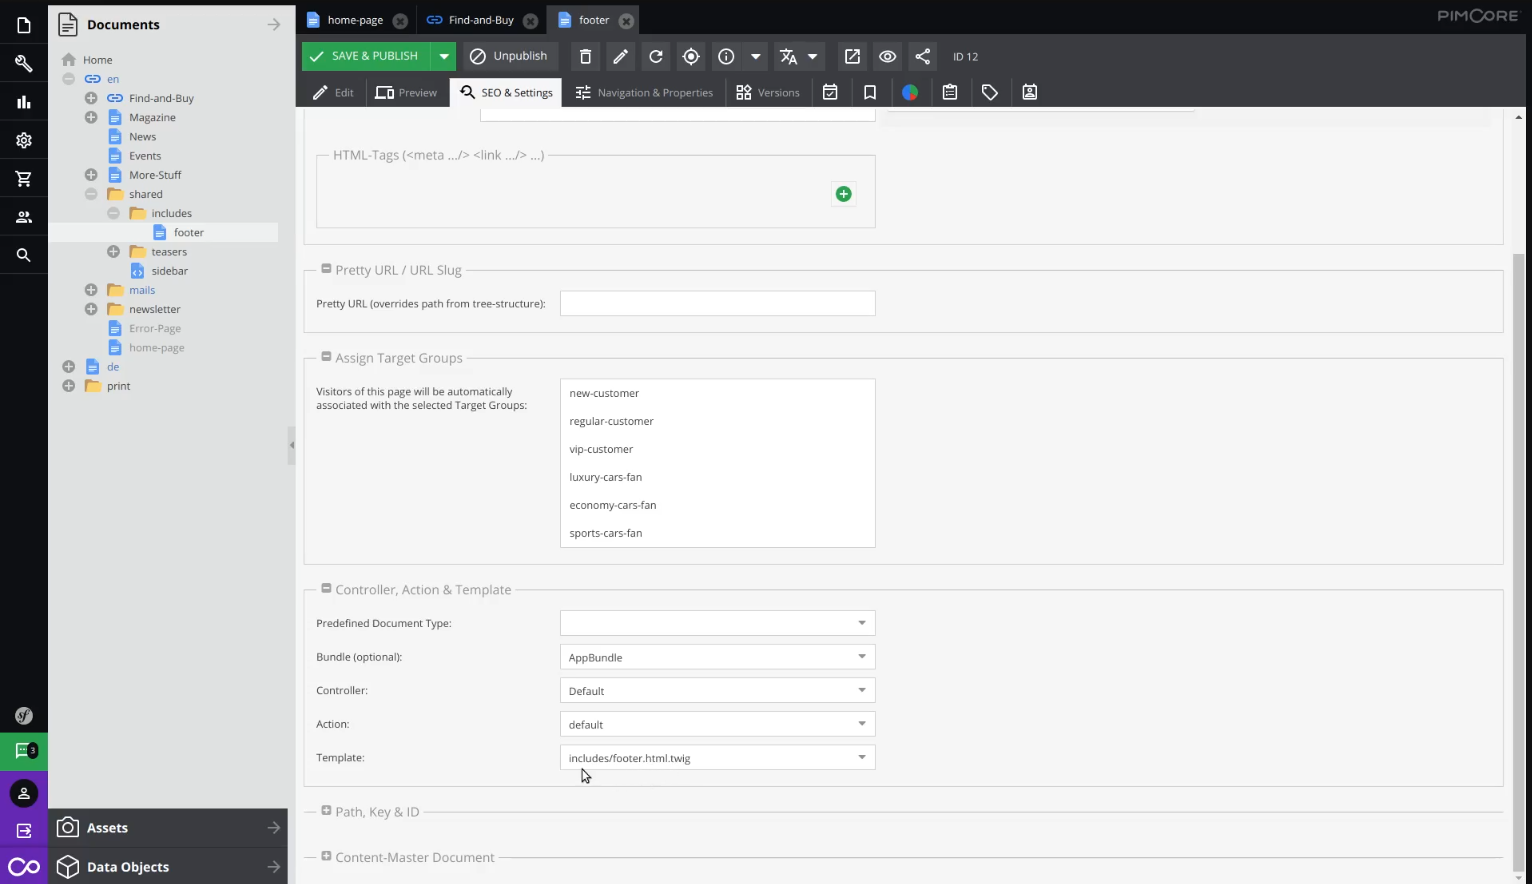
Go to the “SEO & Settings” tab and scroll down to “Controller, Action & Template“. As the name suggests, here we choose our controller, the action inside of it, and its template.
The names you see when you choose the controller will depend on your local code naturally, but here in the Pimcore demo, we will choose the “ContentController” from the AppBundle, and “portal” as the action.
We don’t need to choose the template if its name is the same as the name of the action, and that is exactly the case here, so we are leaving it blank.
After all of that, click on the green “Save & Publish” button at the top, and let’s see what we got. Go back to the “Edit” tab, reload, and now you can see that our page looks a bit different than before.

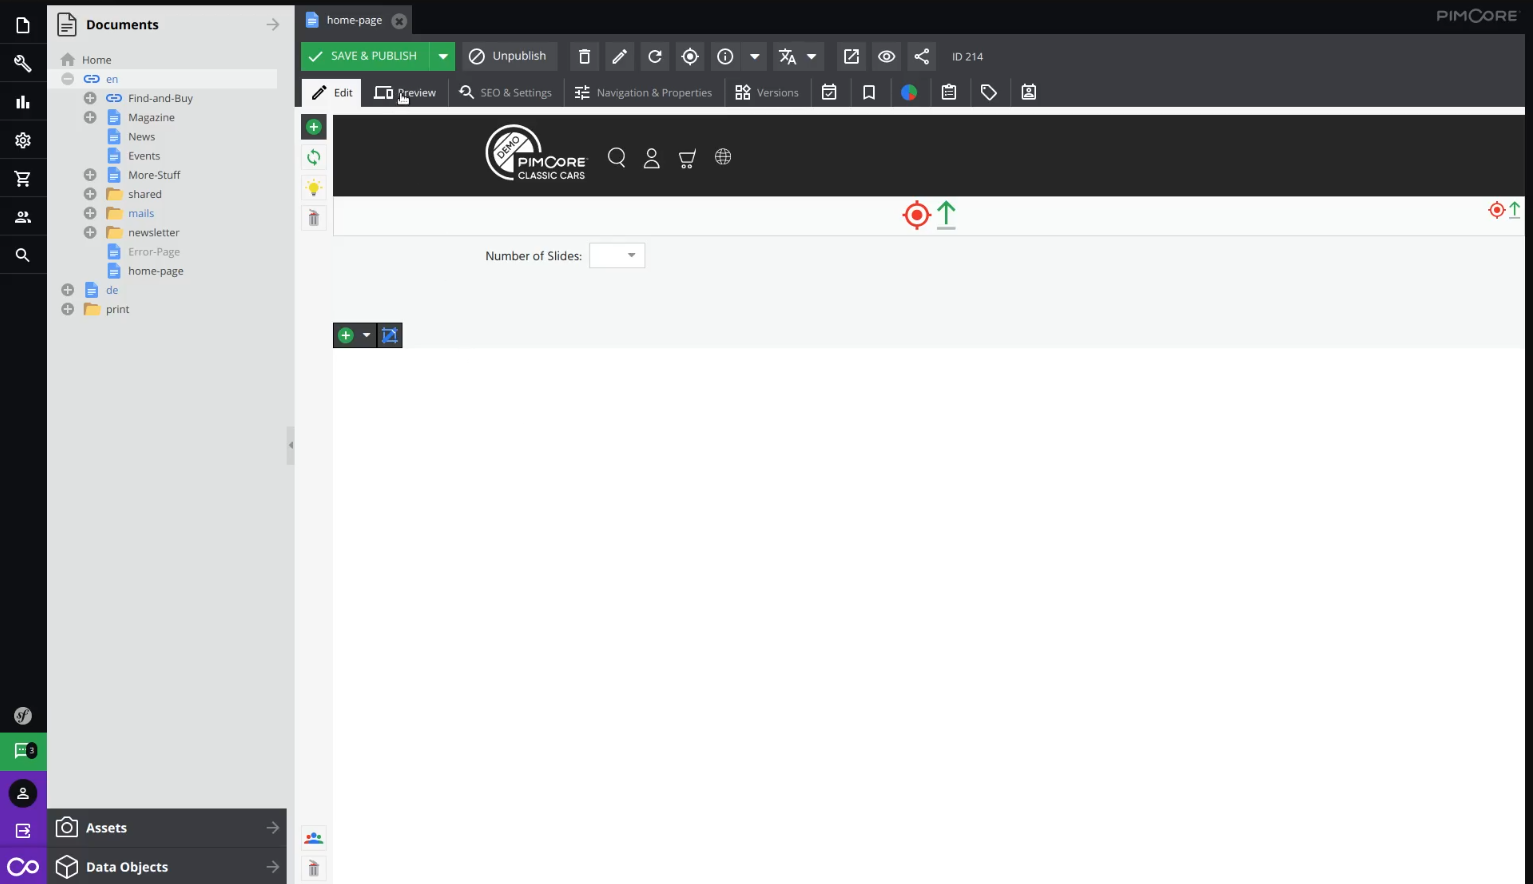
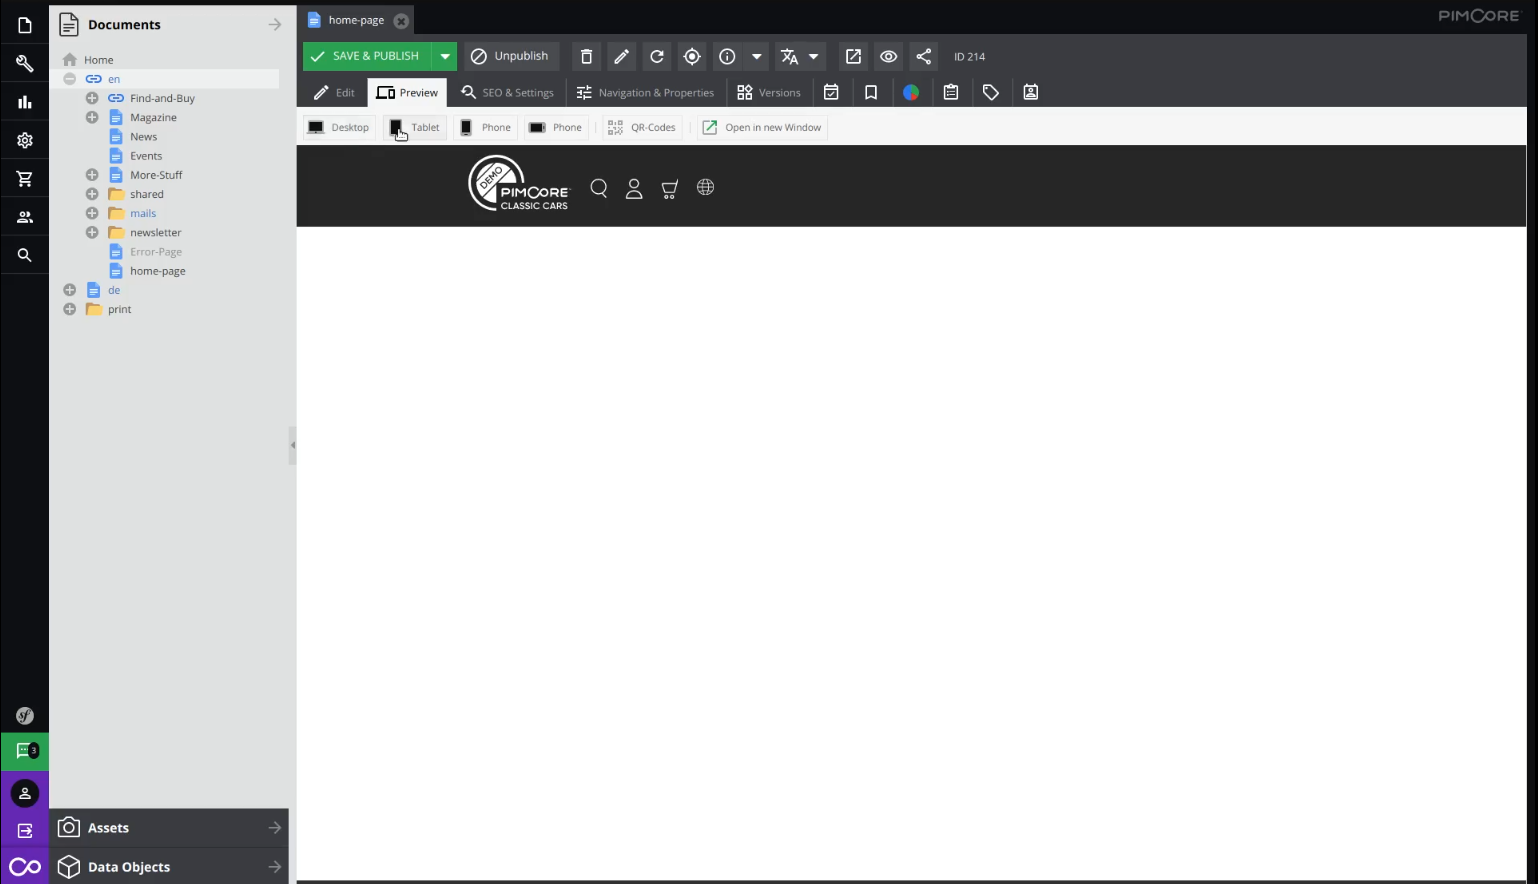
Before we continue with adding more stuff to our page, let’s first check the preview mode, and also how it actually looks in the browser. The preview mode is the tab right next to the “Edit” tab which we are currently on.
If you click on it you can see how the page will look like in the browser, and you can also check how it will look on different devices, like the desktop, tablet, and both orientations of the phone.
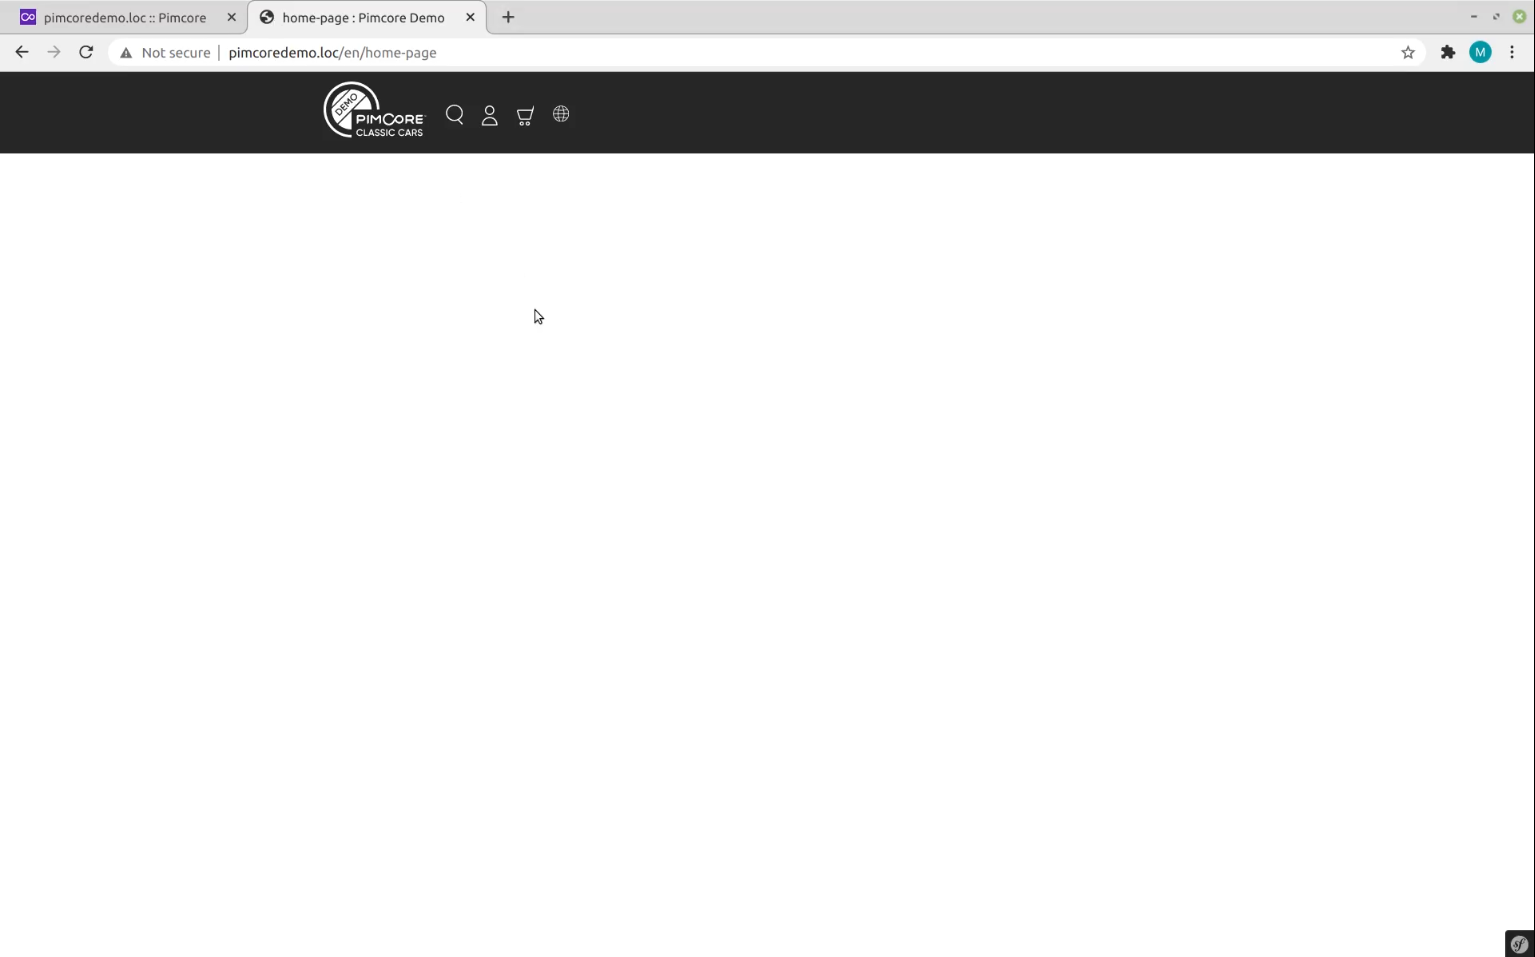
Now, let’s check how our homepage actually looks like in the browser itself.
Our local Pimcore demo setup is on “pimcoredemo.loc“, so in order to access our home page, we just need to append its path visible on the left side in Pimcore documents.
That is under the “en” document, and with the name “home-page“. The result is “pimcoredemo.loc/en/home-page“.
Header and footer
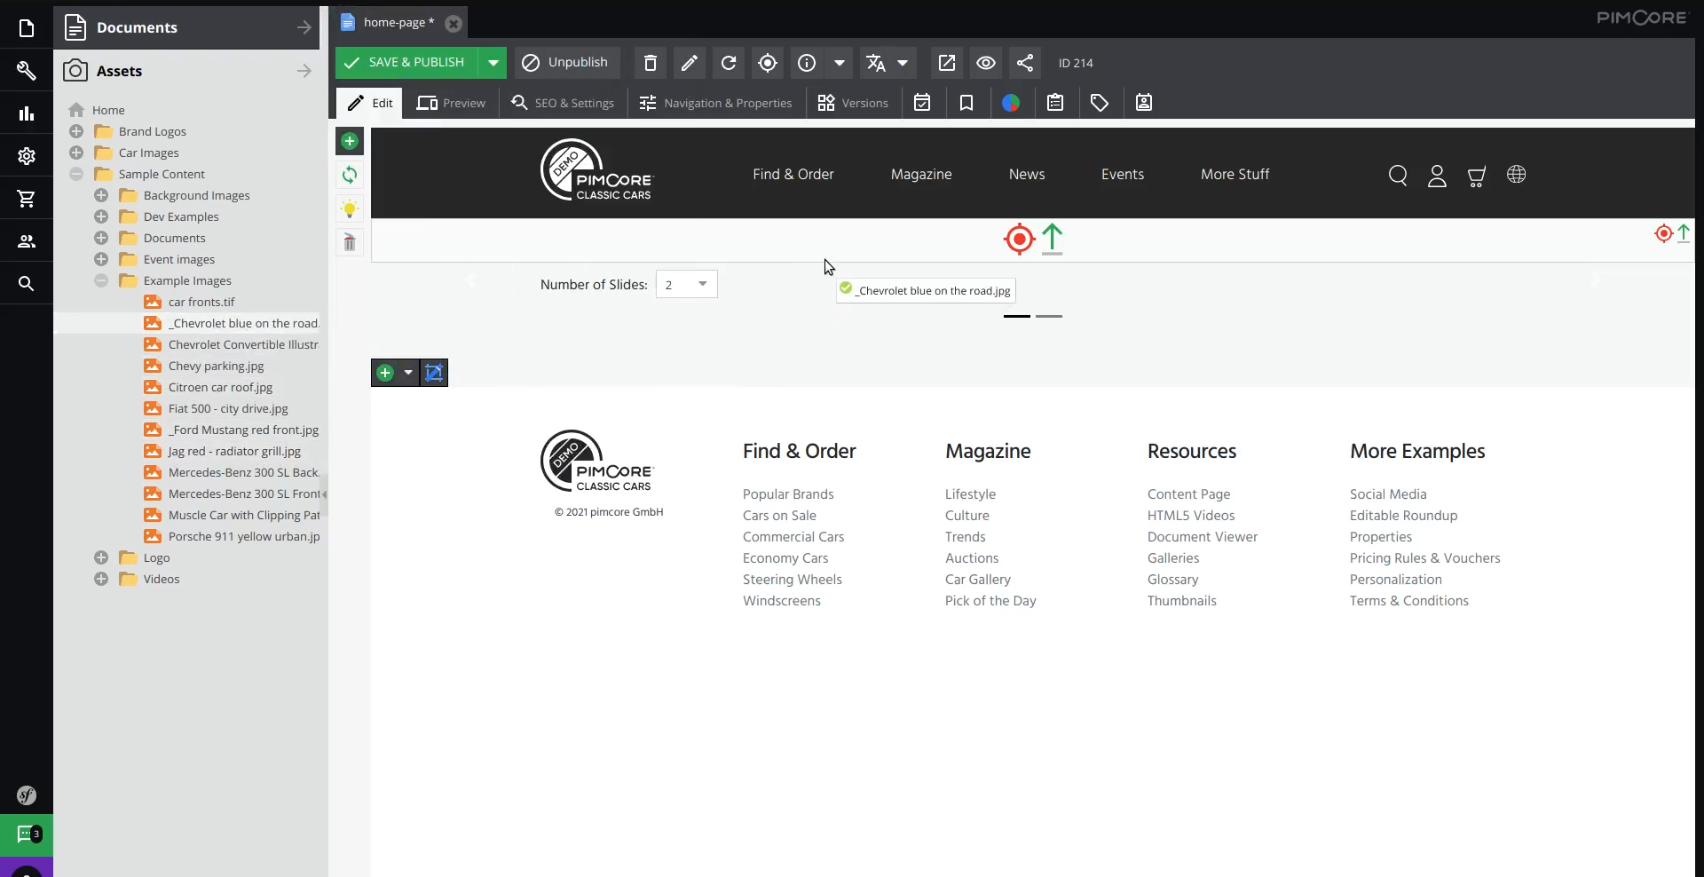
We have seen how our homepage currently looks like in the browser, so let’s go back to editing it. Now, the reason we immediately got some content inside of our blank homepage is that it’s defined in the “portal” template that we chose for it.
At the moment, we have the navigation bar, the dropdown select that asks for the number of slides, and the big white area at the bottom that is actually the space for the footer.
Let’s first fix our navigation and footer before adding any actual content to the page. Go to the “Navigation & Properties” tab, and there you can see that we can add some custom properties to our page.
We need to add the “navigation_root” property and also “footer” since they are required by our “portal” template and its action. Naturally, this configuration will depend on your action and template.
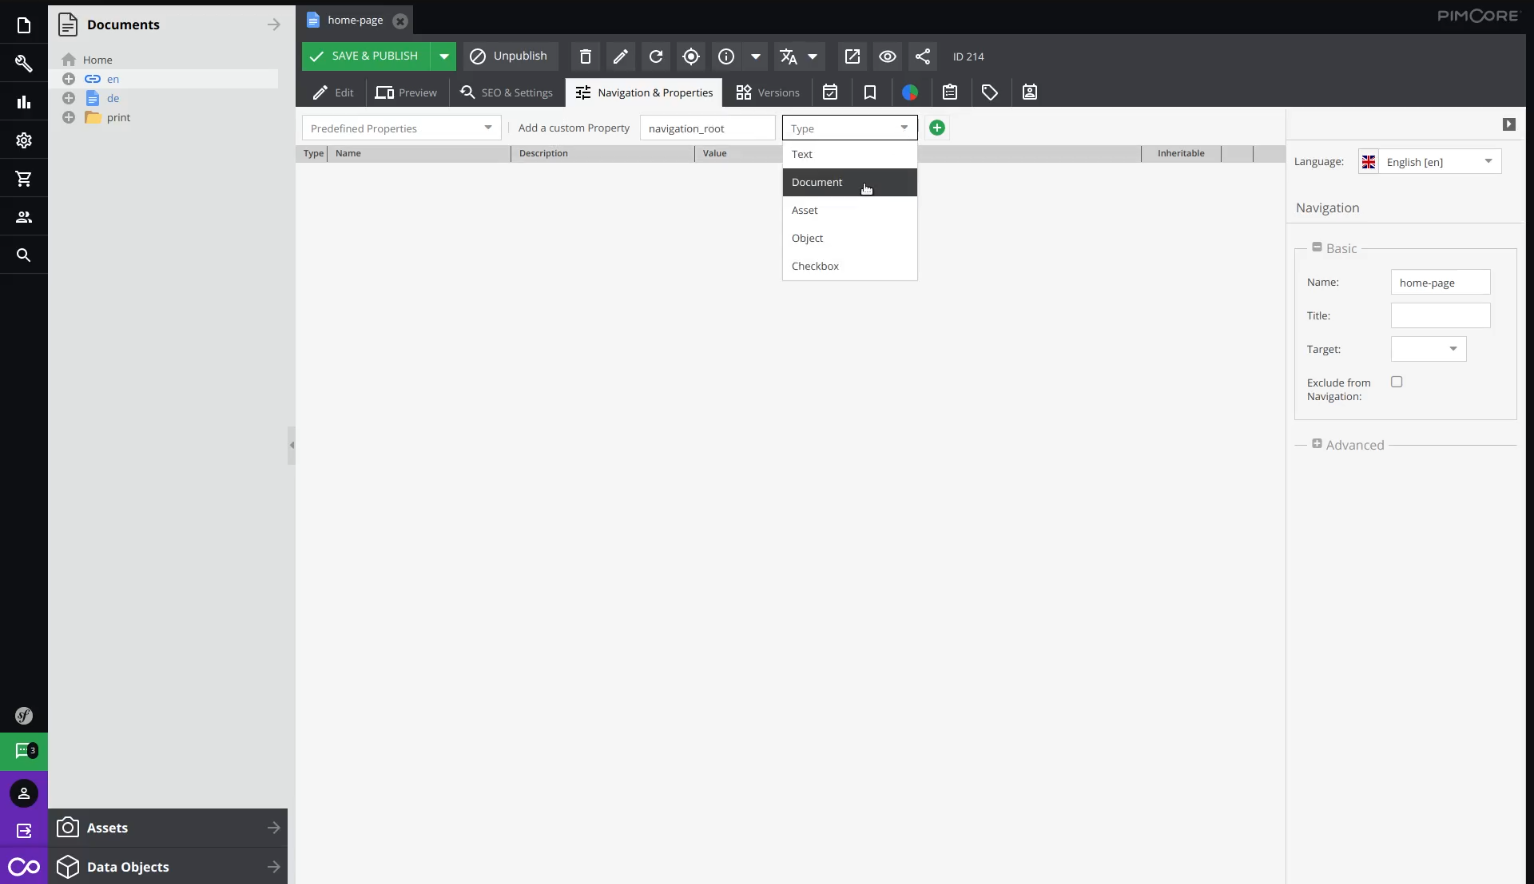
If you use your own controller or action, or even just the template, you can define any property you want and need. In our case, the first property we need is called “navigation_root“. It represents the document that serves as the root of the navigation bar.
Meaning, its children will be displayed in the navigation. Let’s put in its name, the “navigation_root“, choose the type “Document“, and then create it.
What’s left is to drag and drop a document to the “Value” column. We will choose for example the “en” from the left side.
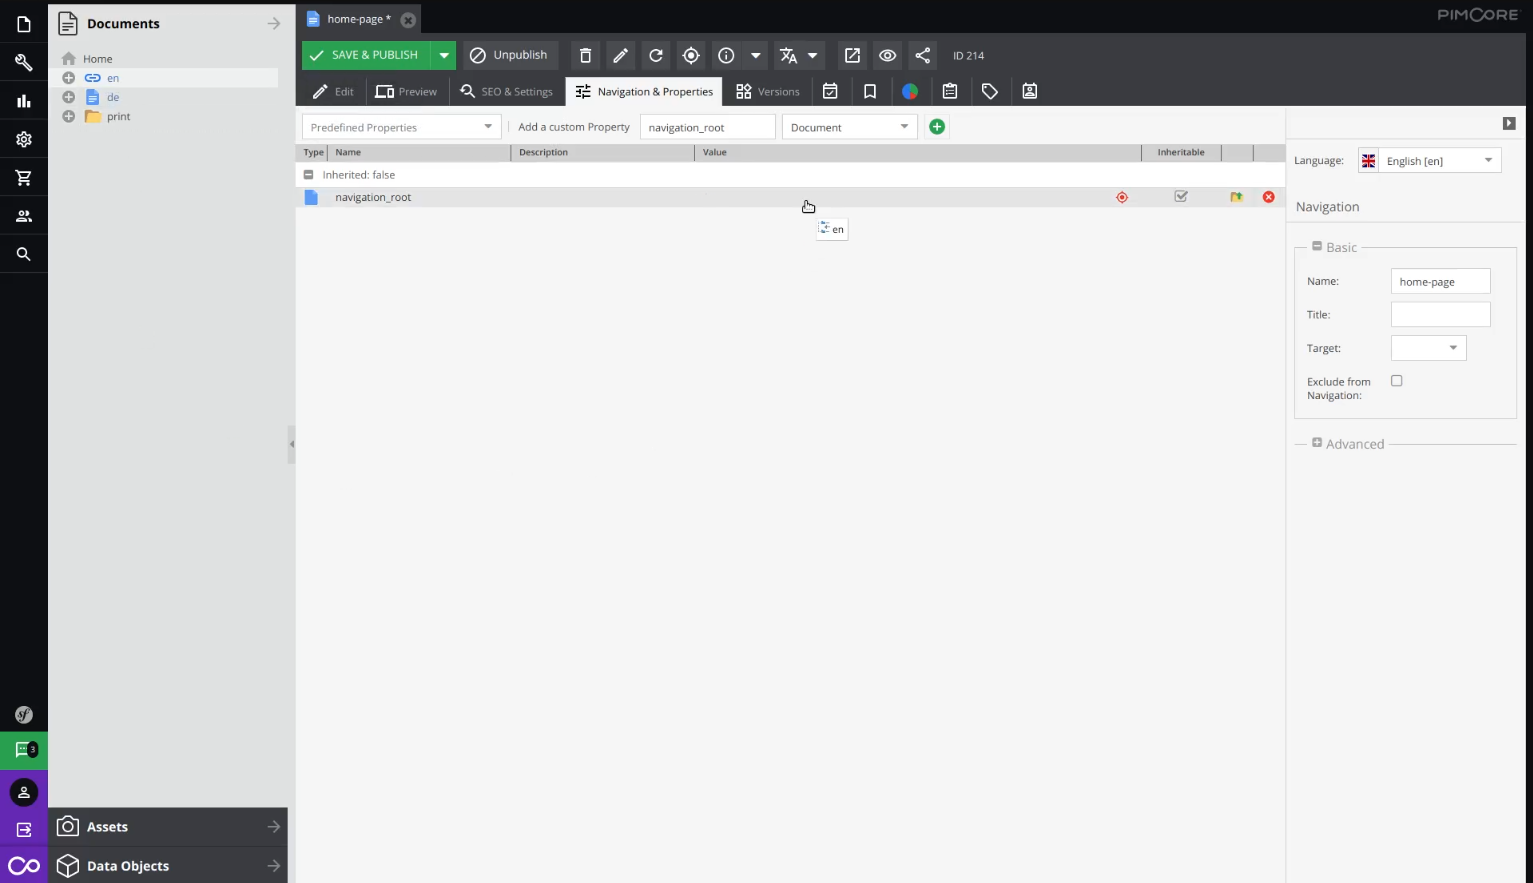
Click on the “Save & Publish“, and now after we reload the page, the navigation should be filled with the children of our chosen document. After we go back to the edit mode, we can see all of them and even our own “home-page“.
If we don’t want that, we can fix it by going back to “Navigation & Properties” and selecting the “Exclude from Navigation” checkbox on the right side.
Again “Save & Publish“, reload, and after that, we won’t see our own “home-page” there. For the content that’s displayed on the navigation bar, as we’ve said, those are the children of the “en” document.
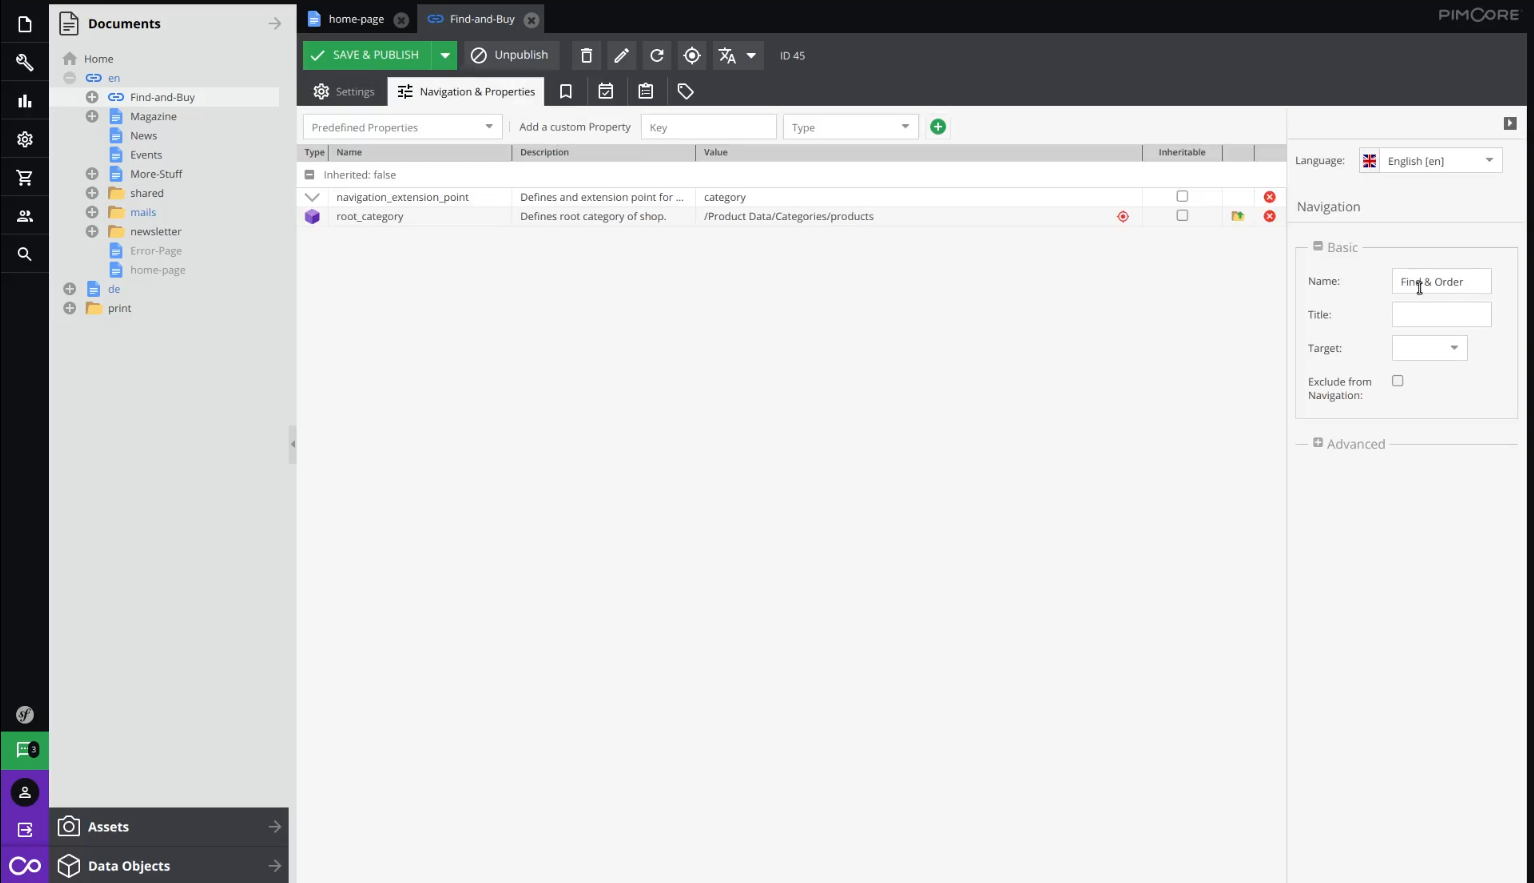
The only difference is that its first child “Find-and-Buy” is actually called “Find & Order” in the navigation, and that’s because on its own “Navigation & Properties“, on the right side, its name is set to “Find & Order“.

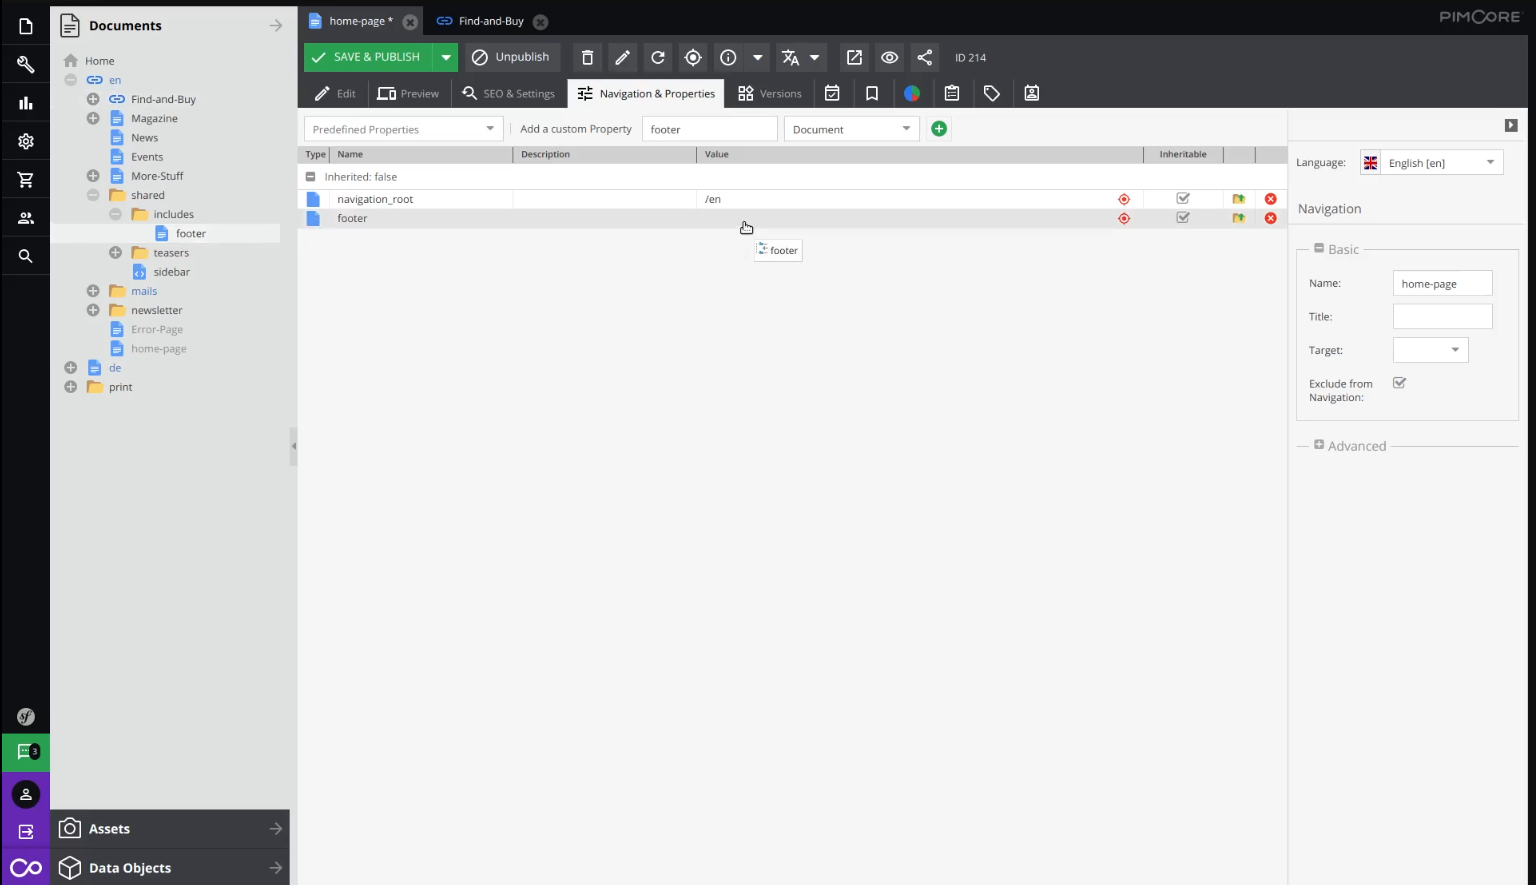
Now let’s also put it in the footer. We need to go back to the “Navigation & Properties” tab and add a new property called “footer“, again with the type “Document“. We need to find the actual footer document we want. Here it is located under “/en/shared/includes/footer“. It’s enough to simply drag and drop it and save.
Go back to the edit mode, reload the page, and now the footer area will be filled with the data from our “footer” document.

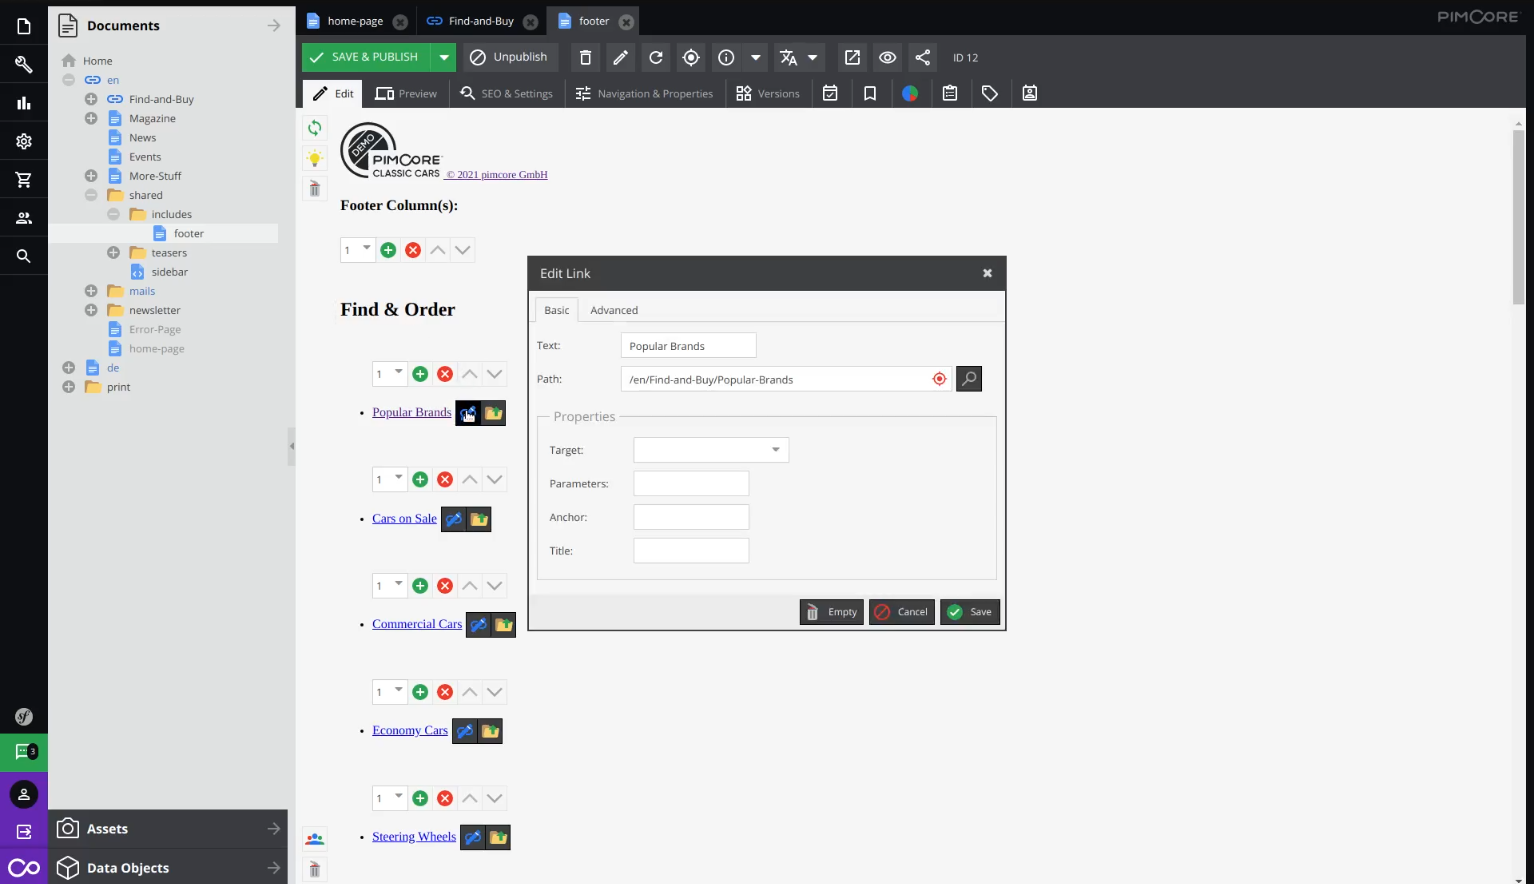
Let’s take a moment to see how the footer document itself is structured. Open it, and under “SEO & Settings” we can see that it has its own template called “footer.html.twig“, and it’s under the “includes” folder.
The footer consists of a fully customizable list of Pimcore links, and each Pimcore link has its text which is displayed, and its path it leads to when we click on it.
For example, if you inspect the first one, you can see that it leads to “/en/Find-and-Buy/Popular-Brands“, and when we click on it, it will lead us to that page.
If we want, we can add a new Pimcore link, anywhere we want, which is just one of the many Pimcore editables. If we go into any of these Pimcore link’s details, we can assign it its name and path, or even delete it.
If we want to see how our home page with the footer and navigation actually looks like at the moment, we can again check that under the “Preview” tab, or directly in the browser after reloading it.
Main content
Let’s go back to the edit mode and start adding content to our page. Right below the navigation, we will start with the slider that we got with our template. First let’s choose the number of slides, for the second example. After that, let’s add a background image for it. We can find one under assets, “Sample Content“, “Example Images“, and simply drag and drop it.
Now let’s fill in the text fields. As their placeholders say, the first one acts as a headline and the second one as a summary.
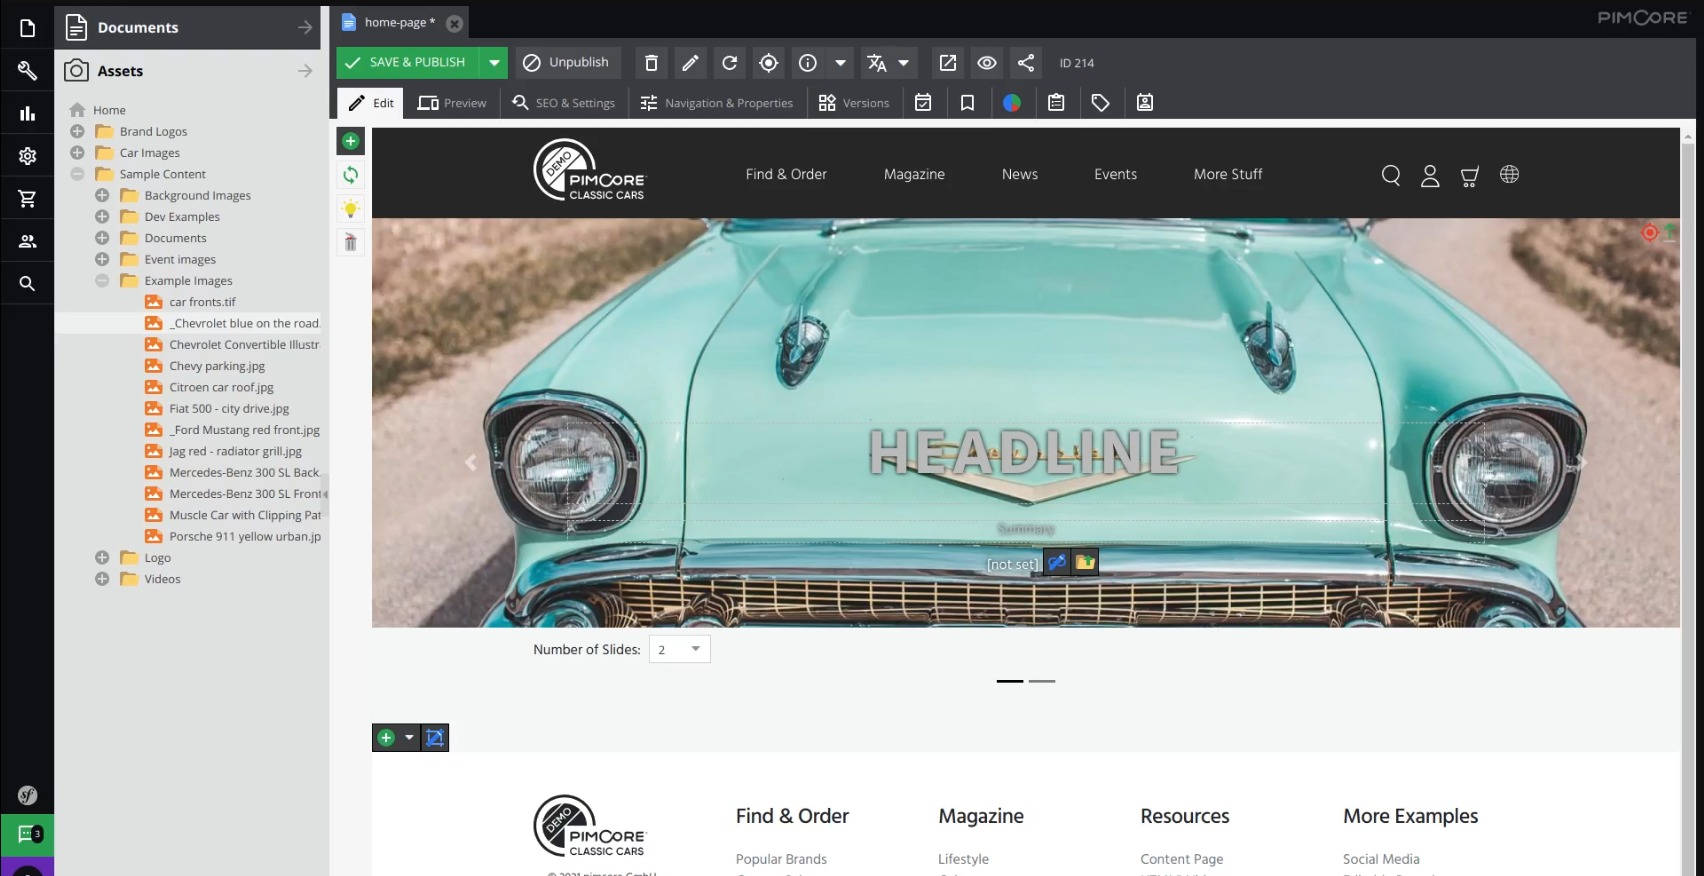
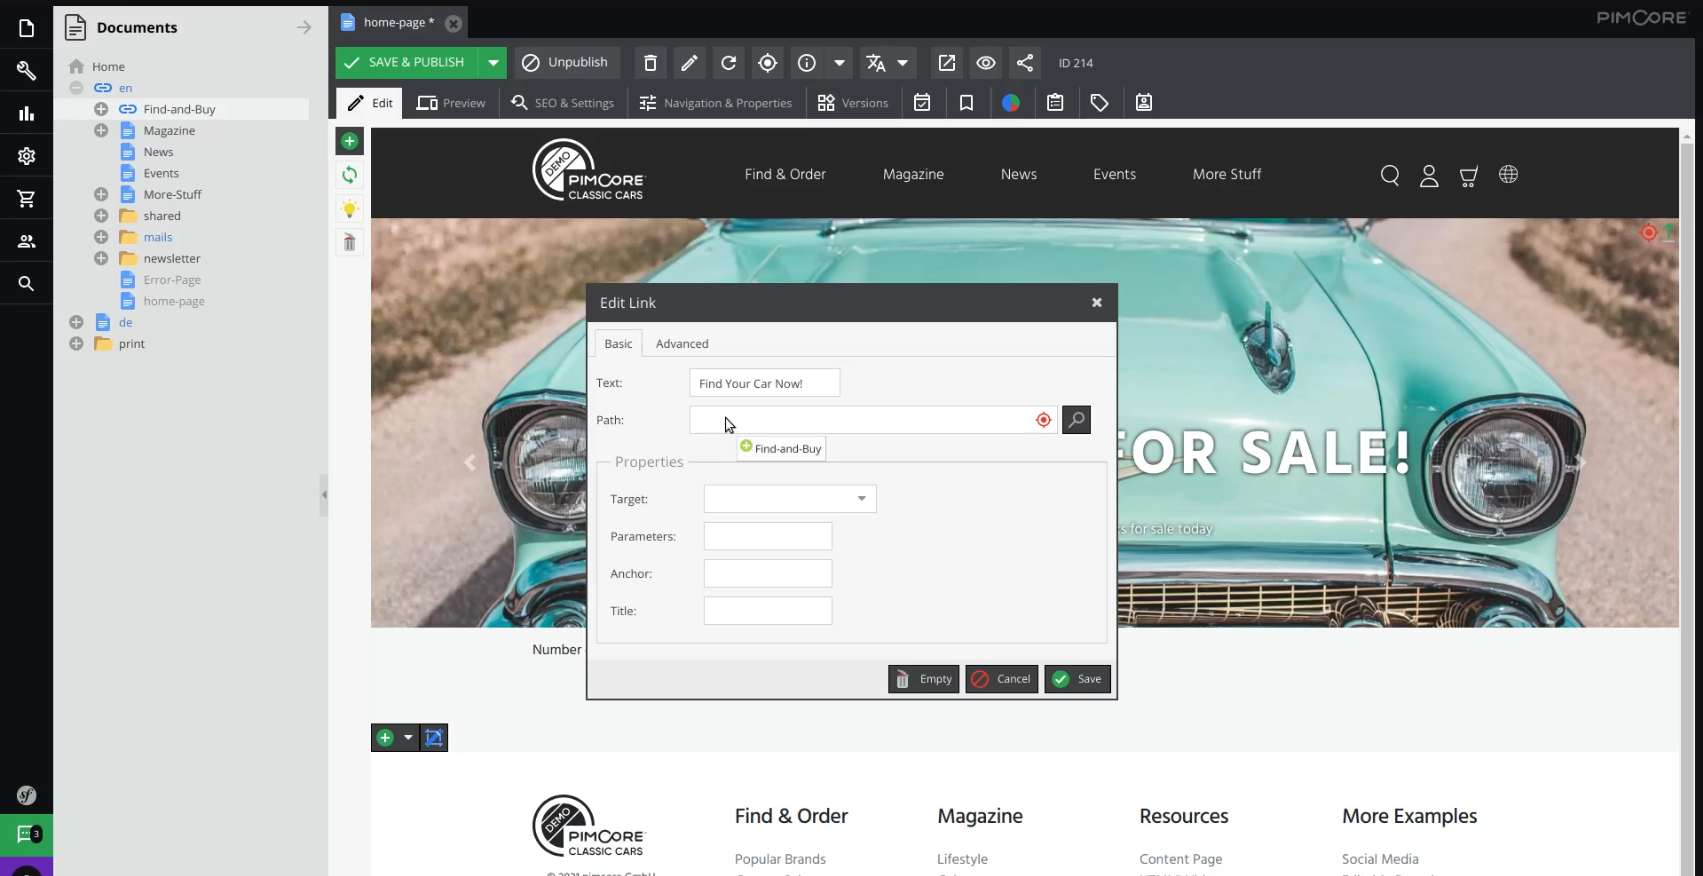
Under the text you can see that we also have a Pimcore link editable waiting to be filled, so let’s do that. For the text, you can write whatever you want, and for the path, we can drag and drop for example the “Find-and-Buy” document.
With this, we’ve created a button on the slider which will be able to take us to the content of the “Find-and-Buy” page.
Now, before we go take a look at how our homepage currently looks like in the browser, let’s quickly fill in the necessary data for the second slide. Again, we need a picture from assets and some text.
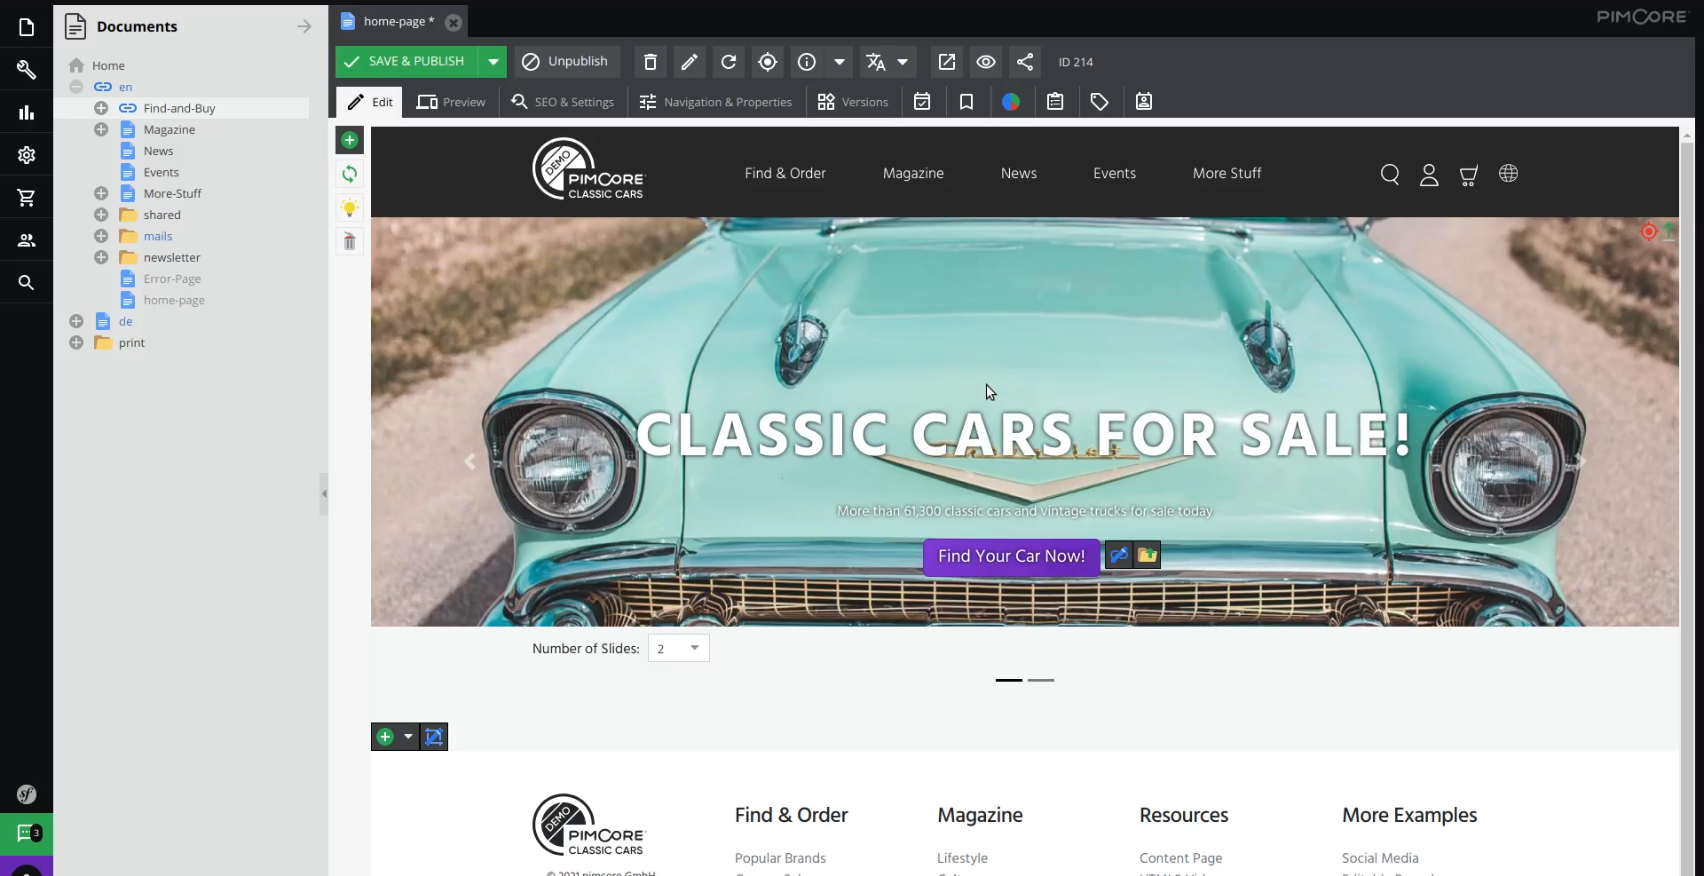
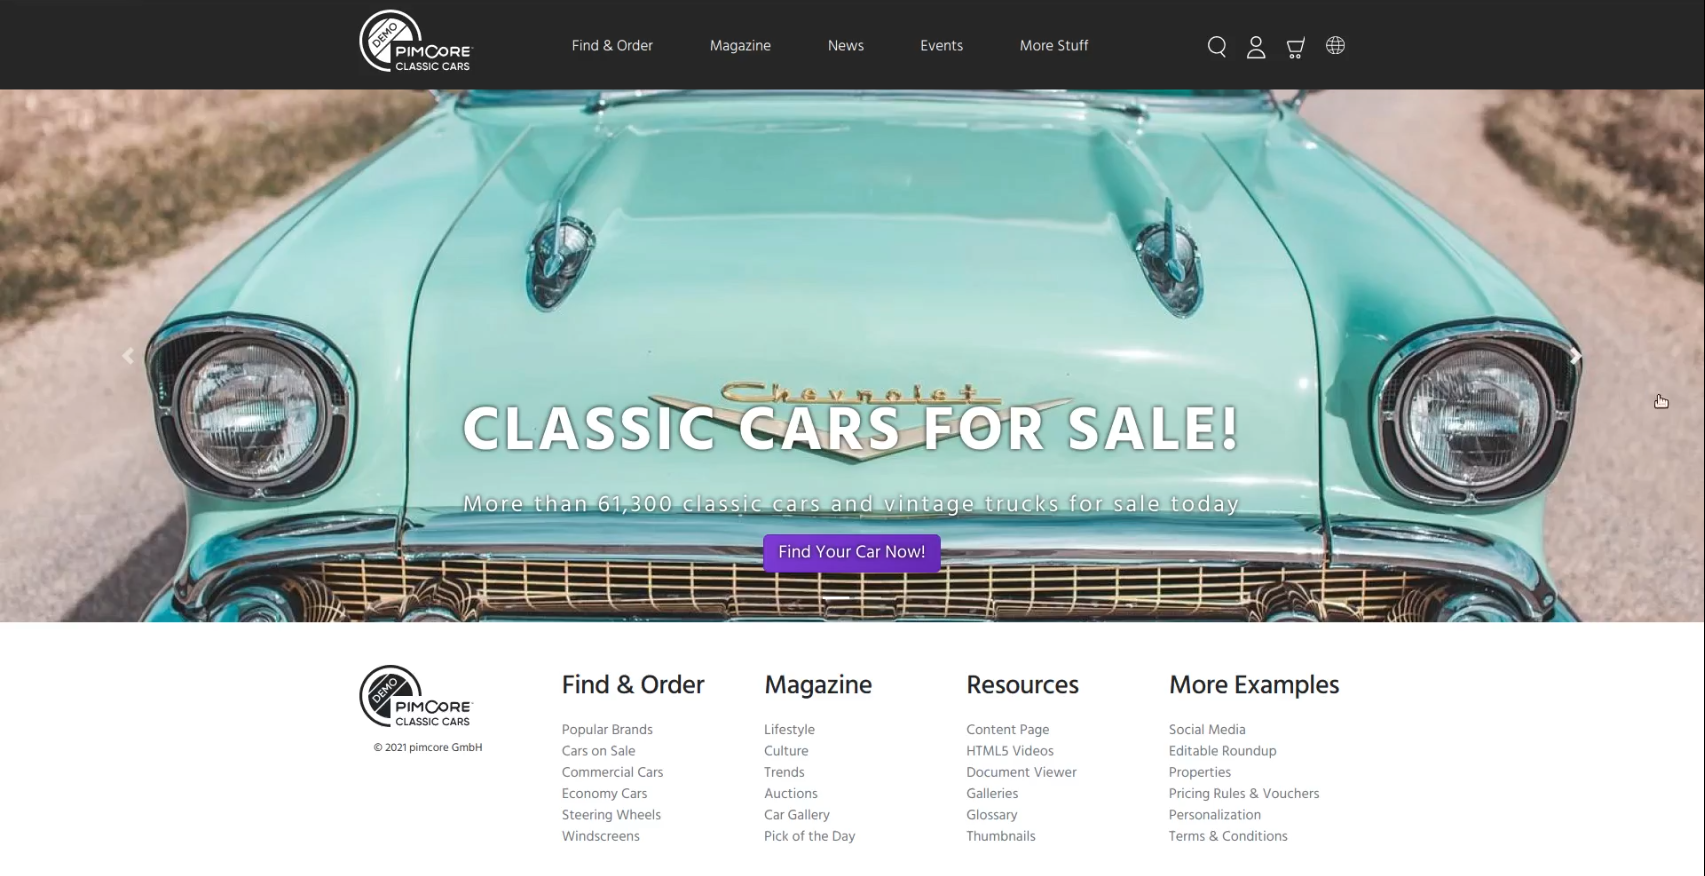
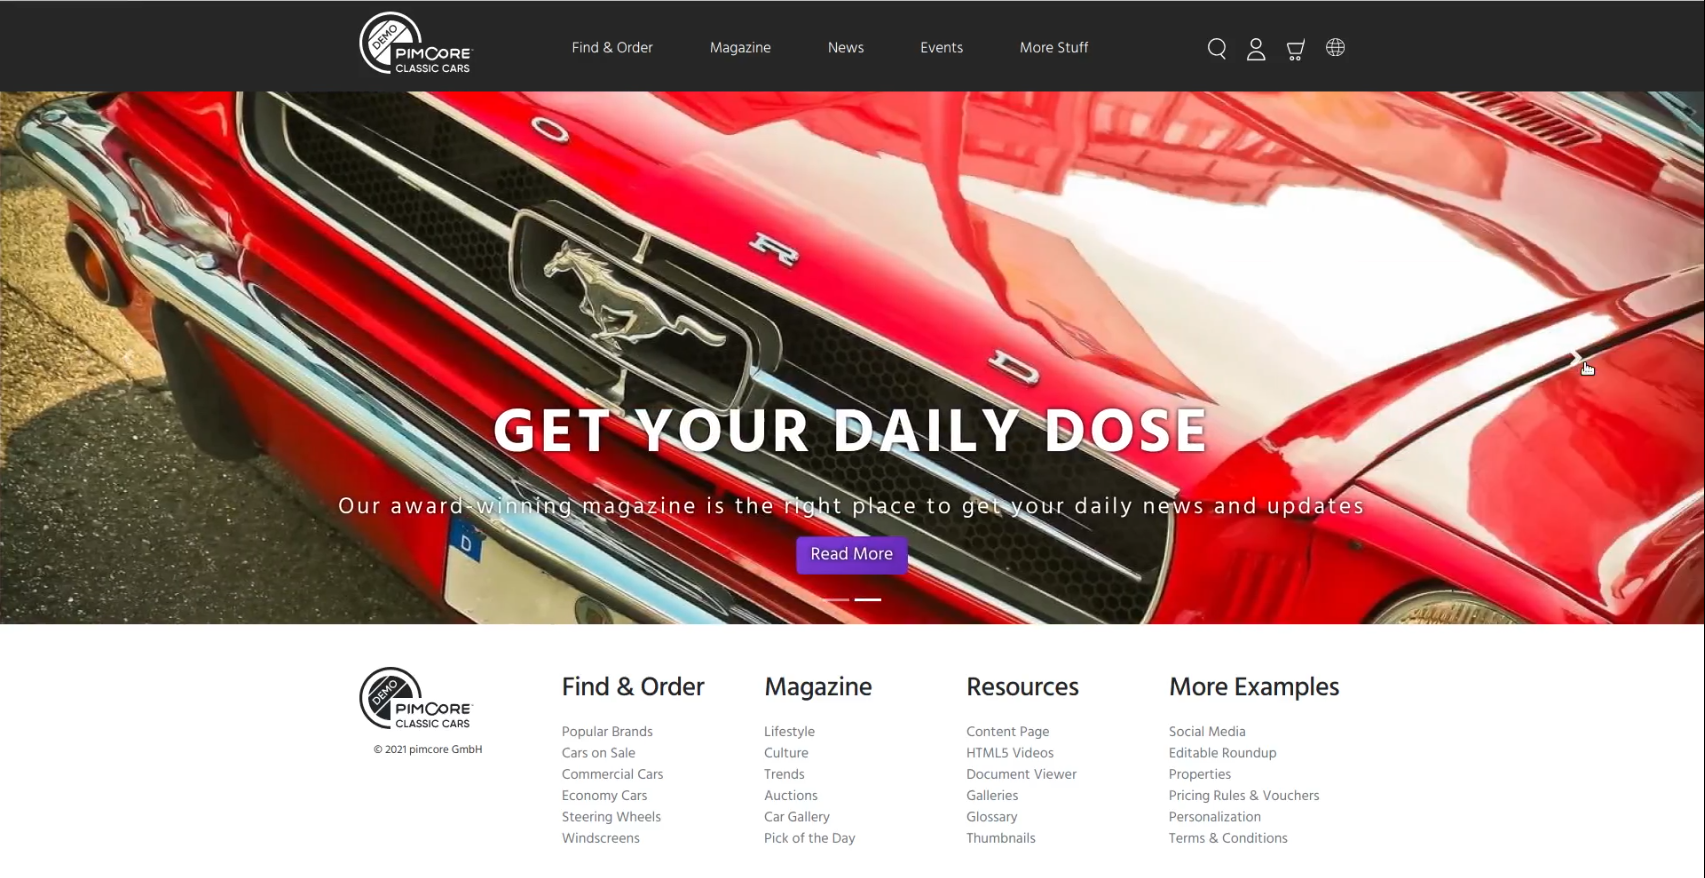
Save and publish, and now we can go back to the browser to see how everything looks like.
We now have our slider, with two slides and the content we filled in in the administration. And we can also click the button so we can see how some other pages look like.
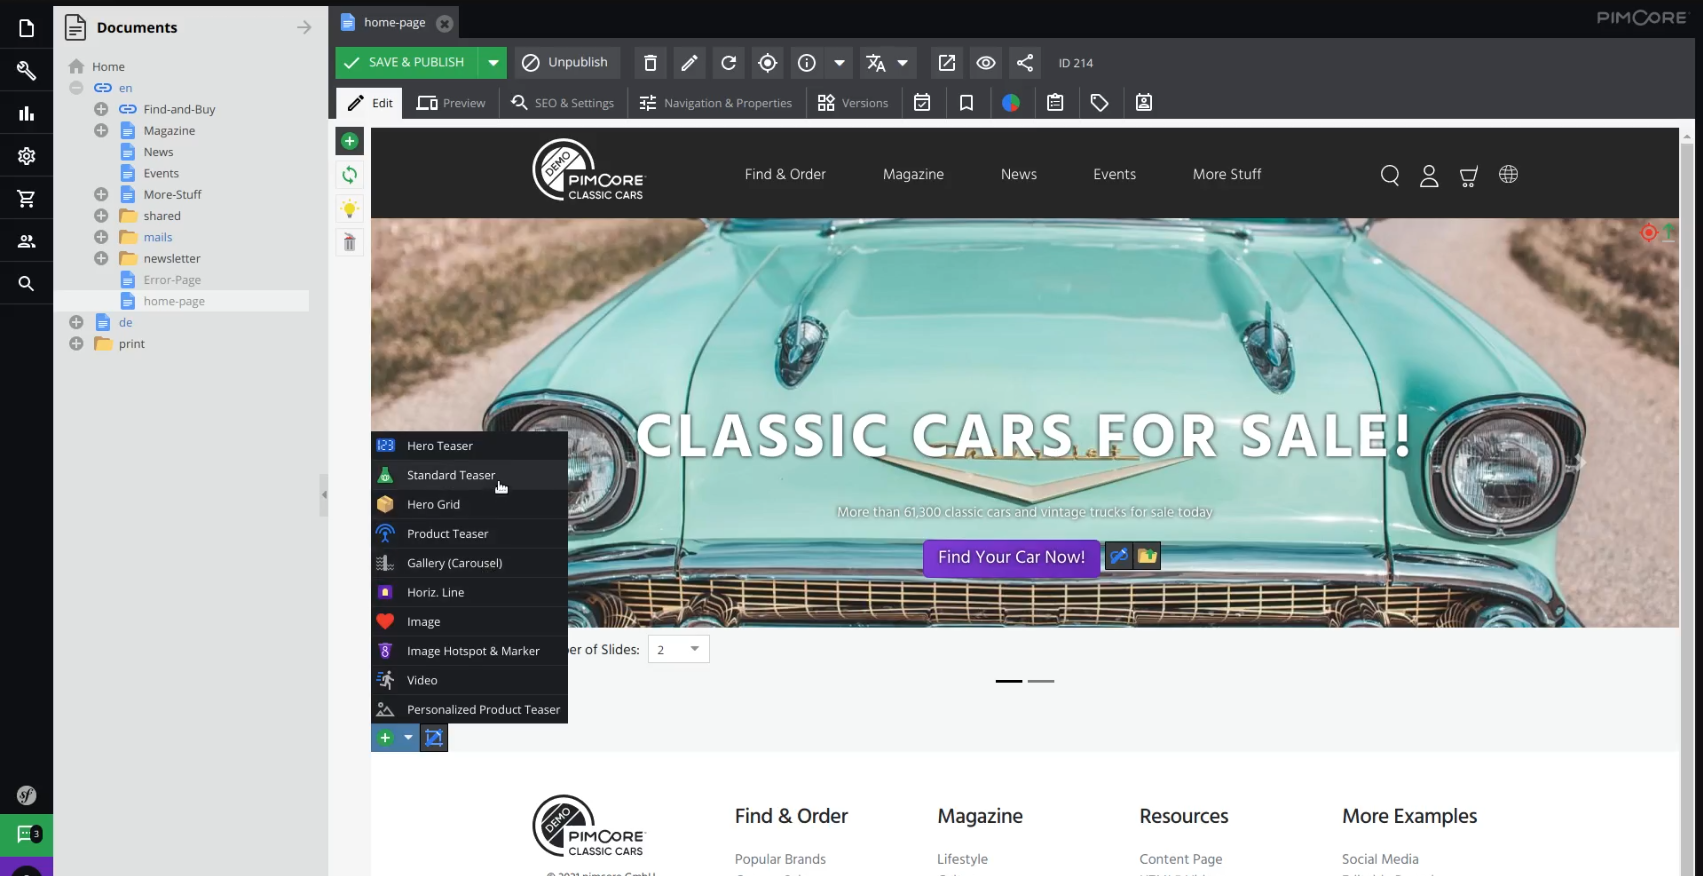
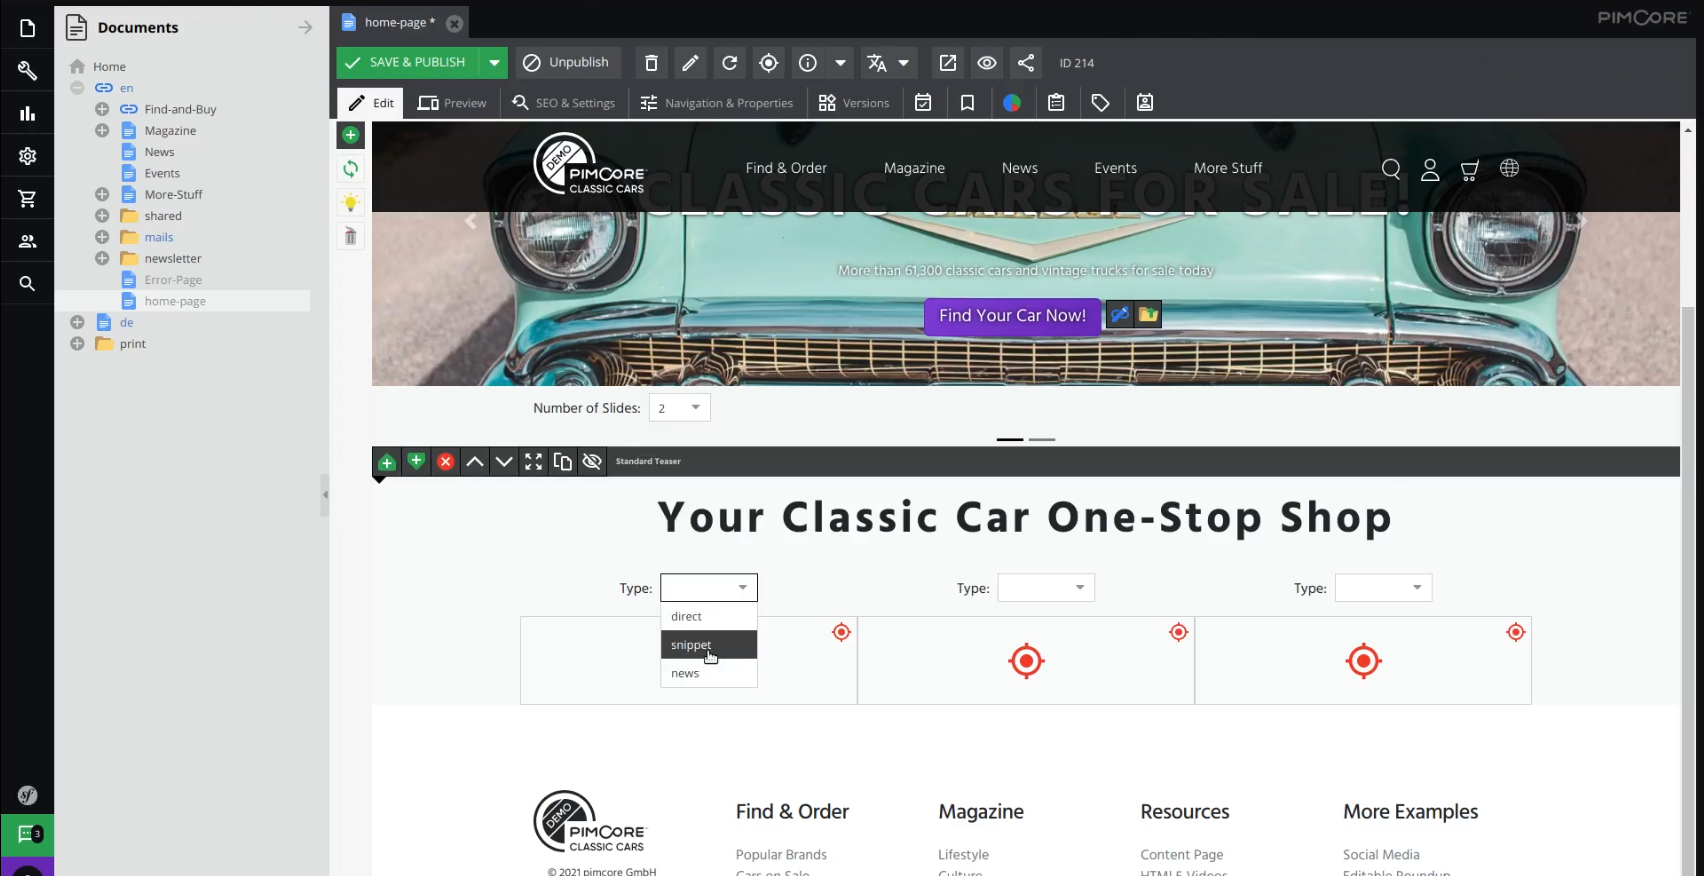
Now let’s go back to the edit mode, and continue adding content to our page. Below the slider, we’ve got an areablock, and by opening it, we can see which bricks we are allowed to place here. Let’s choose the “Standard Teaser” brick.
Here you can see that we have a space for the title, so let’s immediately fill that in.
Next, we have three dropdown selects in which we can choose the type of content we want to put in. Let’s choose the “snippet” for the first one.
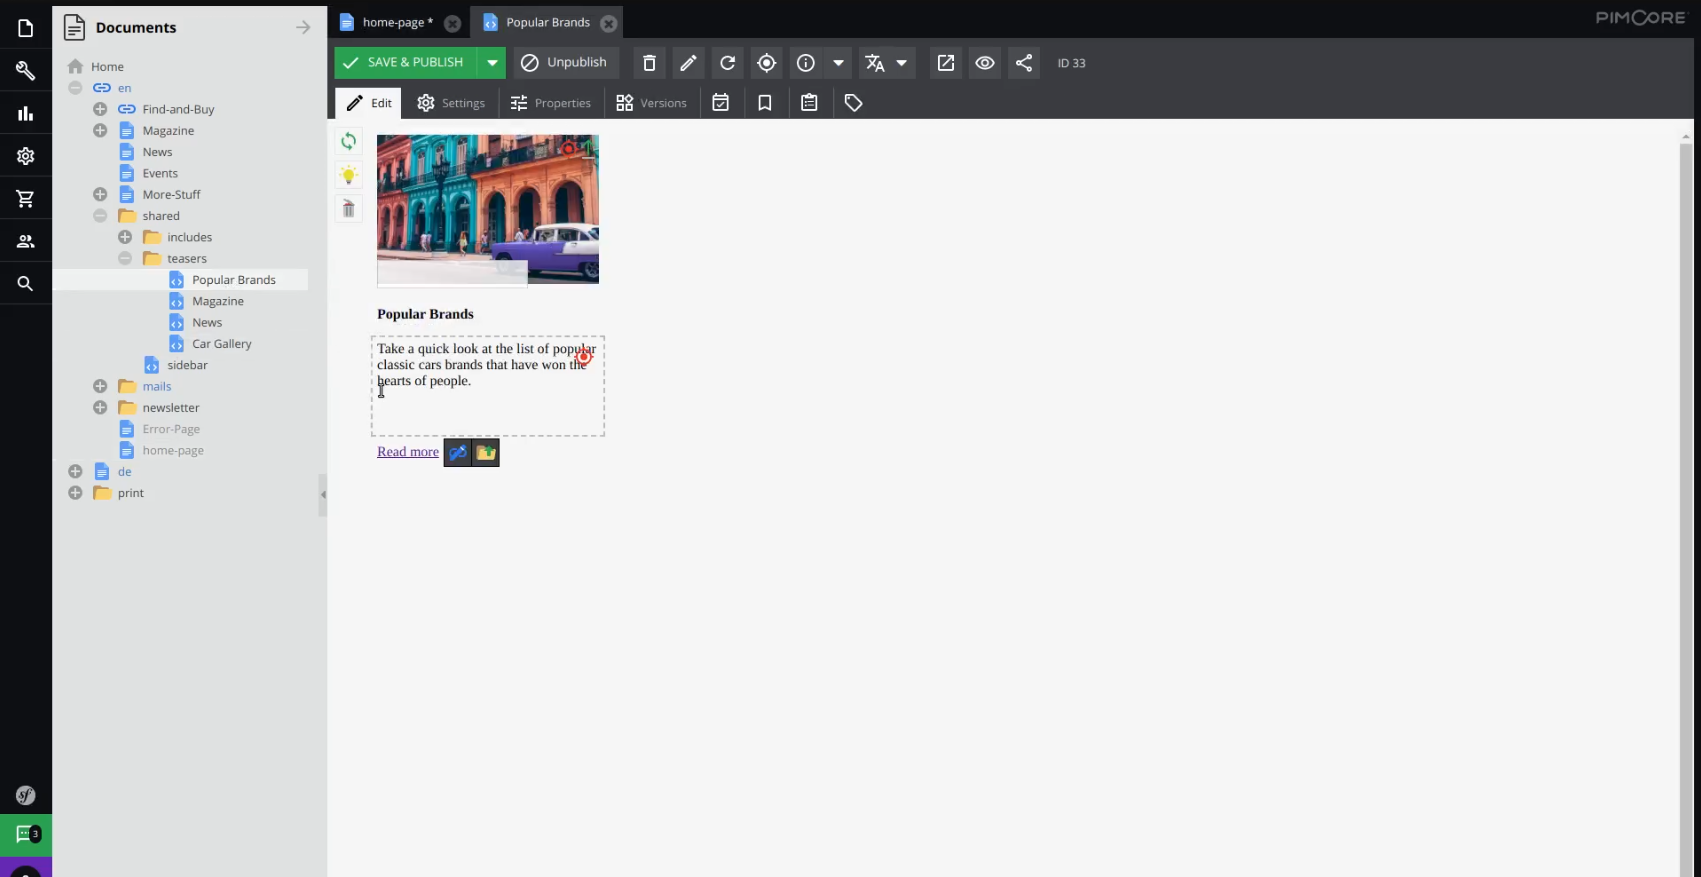
In the Pimcore demo, we already have some snippets created so let’s go find them under “/en/shared/teasers/“. If we hover over one of them, we can see that this document is of type “snippet“, and if we click on it, we can see how it actually looks like.
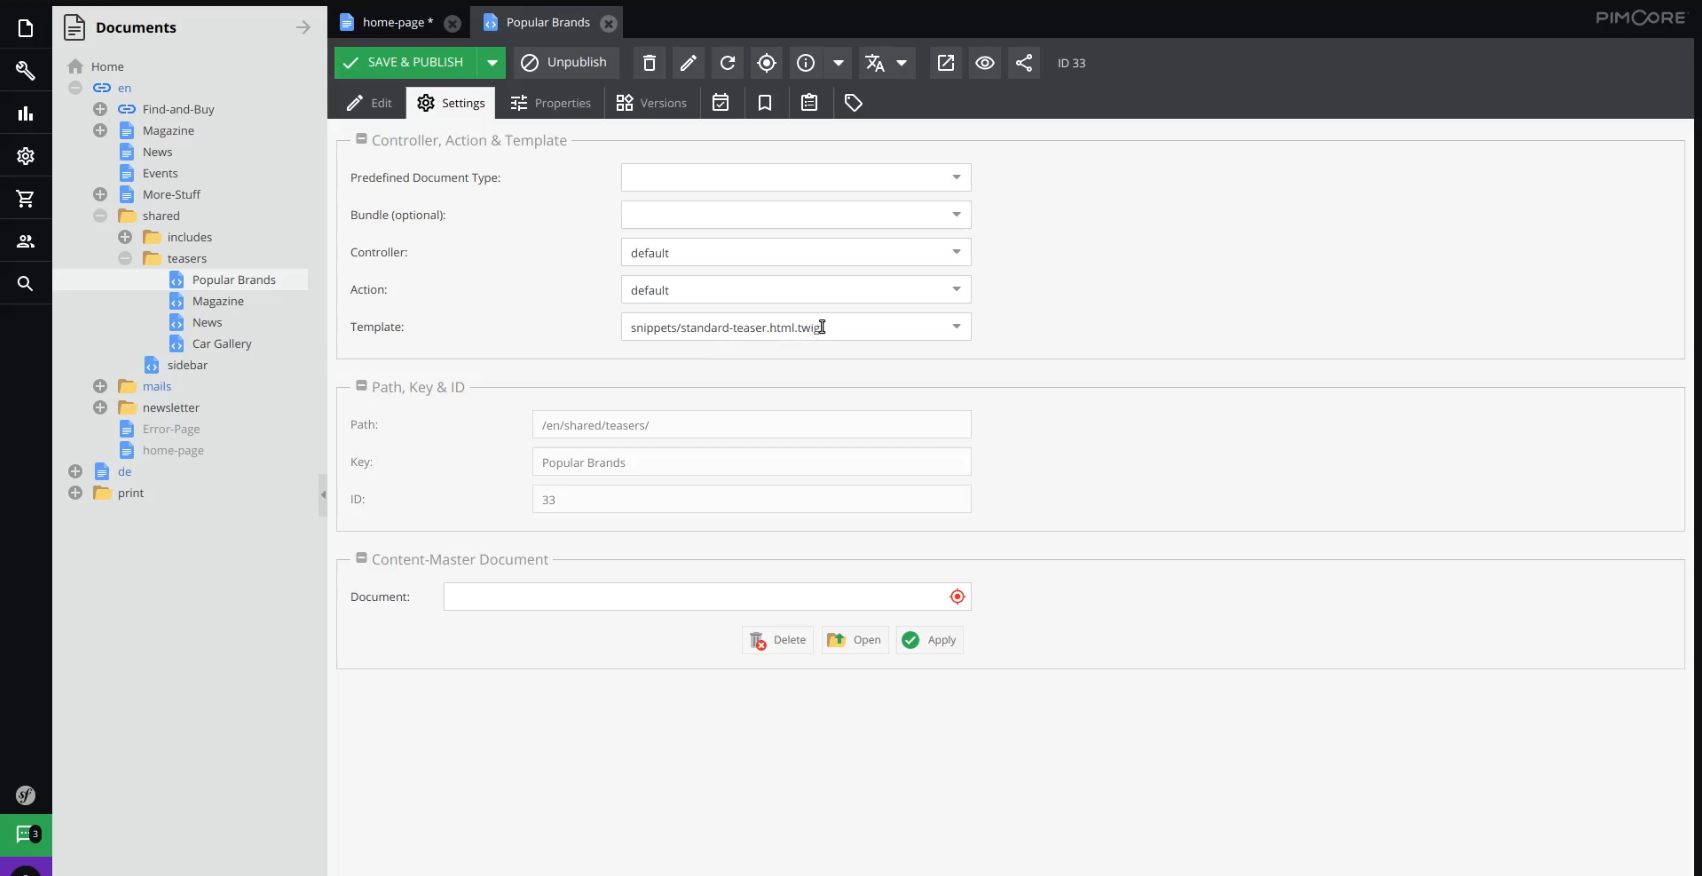
These snippets are made of a picture, a title, a text, and a link, and if go to its settings, we can see that its layout is defined in the “standard-teaser.html.twig” template. Let’s go back to our homepage and simply drag and drop this snippet.
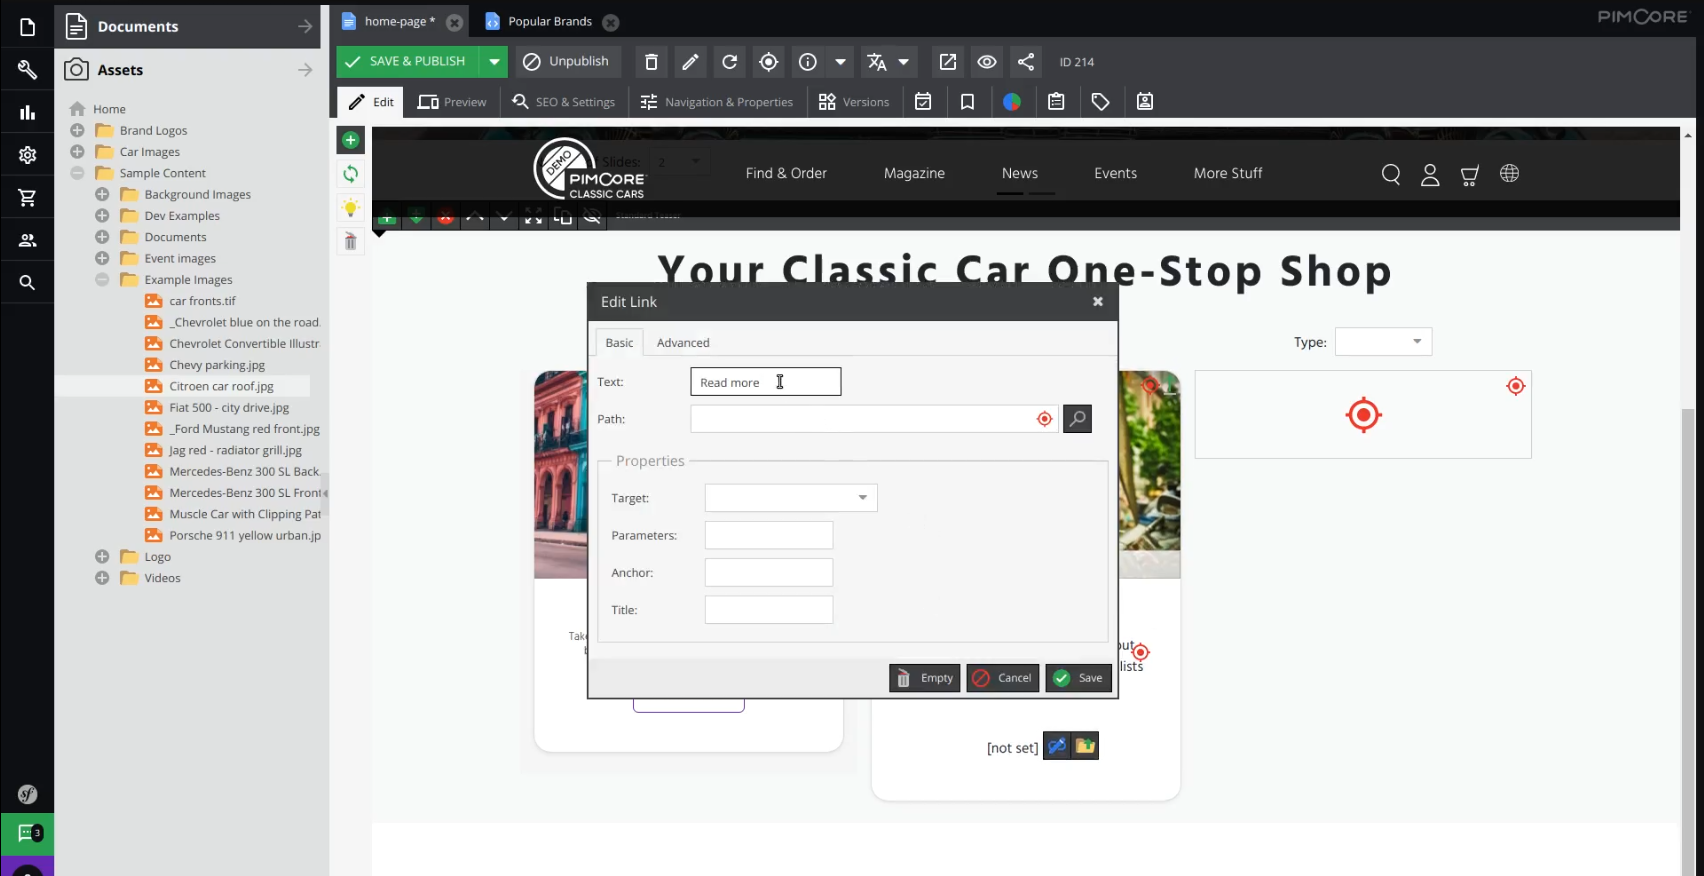
For the type of our middle item, let’s choose “direct“. In this case, we need to directly define the background, all of the text, and the link. The background we can find again in the assets, let’s just take a random image. Same for the text.
With this, we have created a headline, a summary, and a button text which will, on click, lead us to the document we have dropped in.
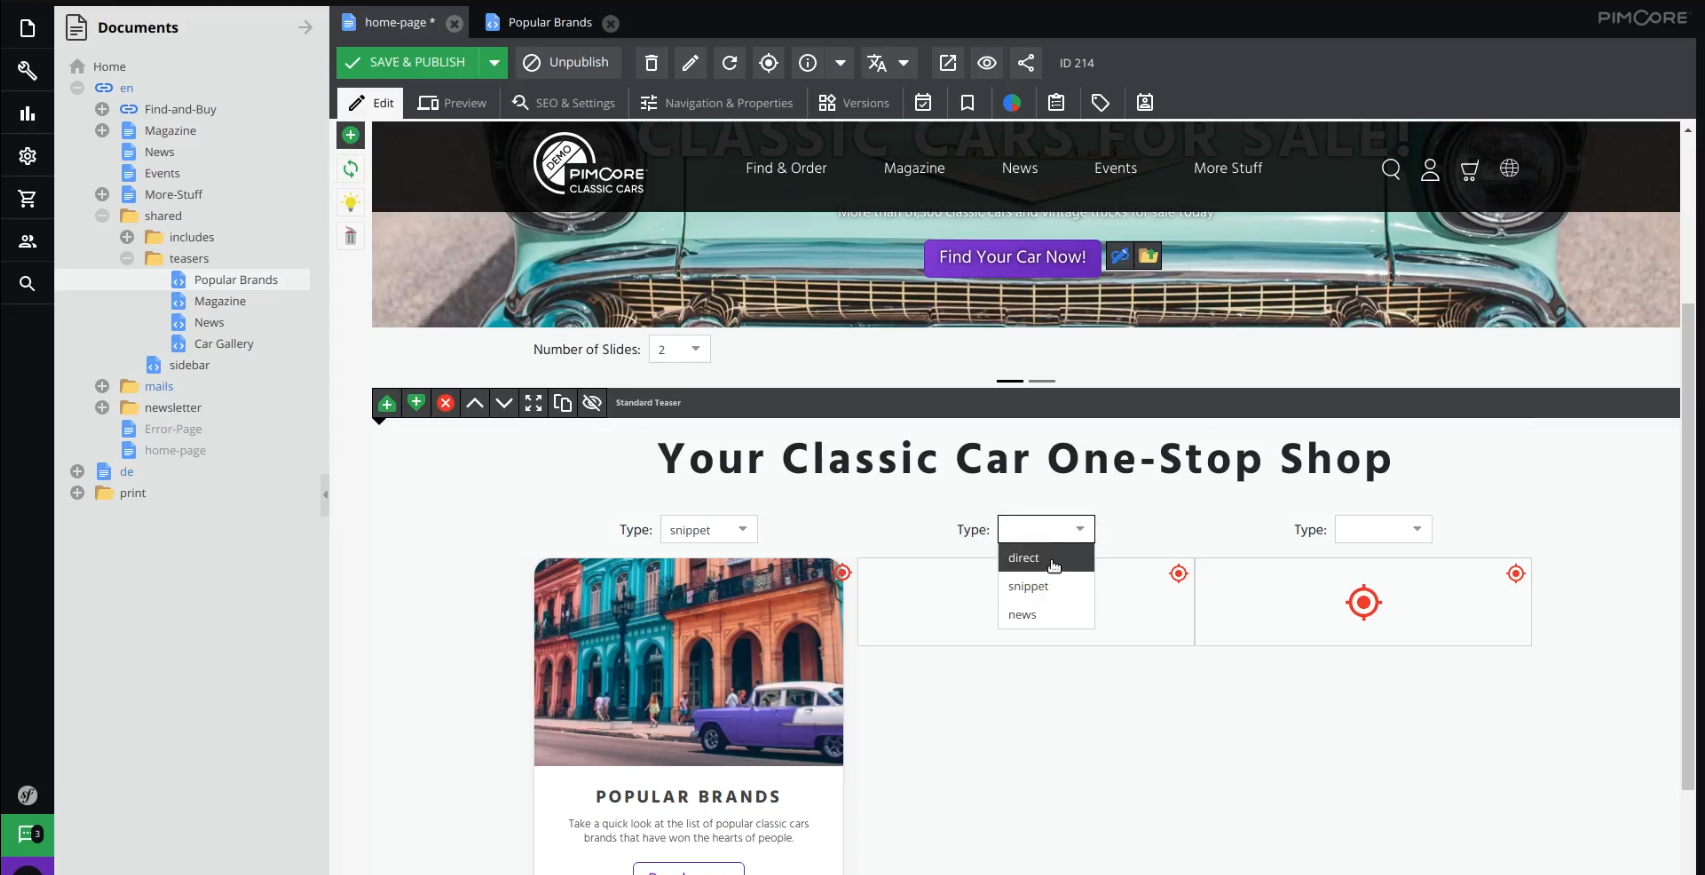
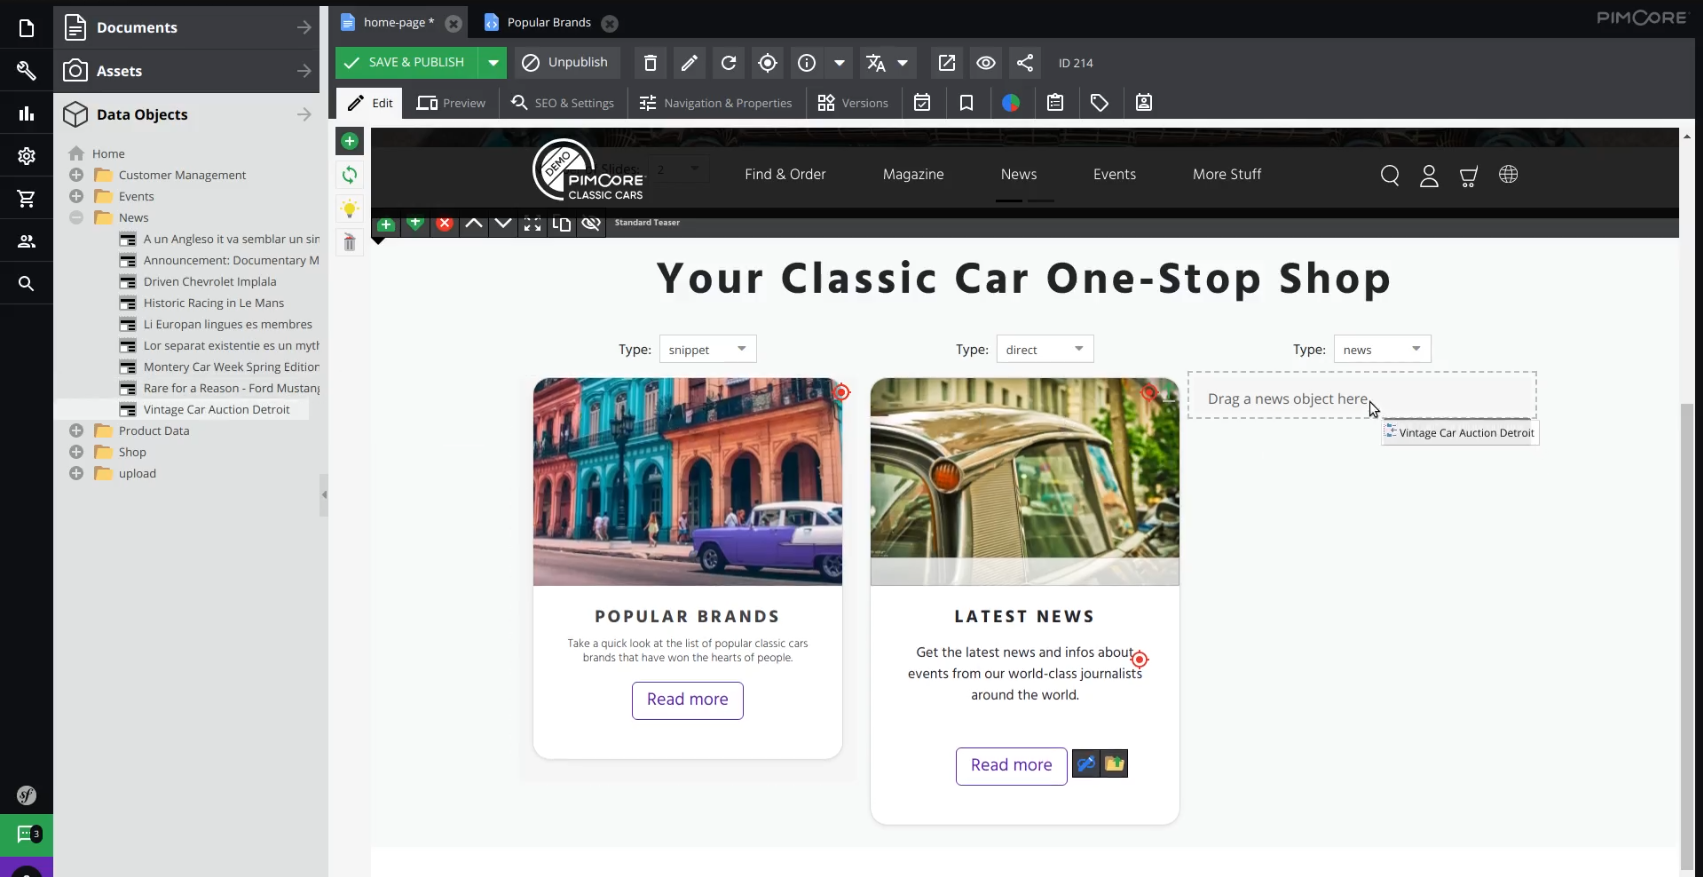
We still have one more item left, so for its type let’s choose “news“. As the placeholder suggests, let’s drag and drop a news object here. We can find one under “Data Objects” in the “News” folder.
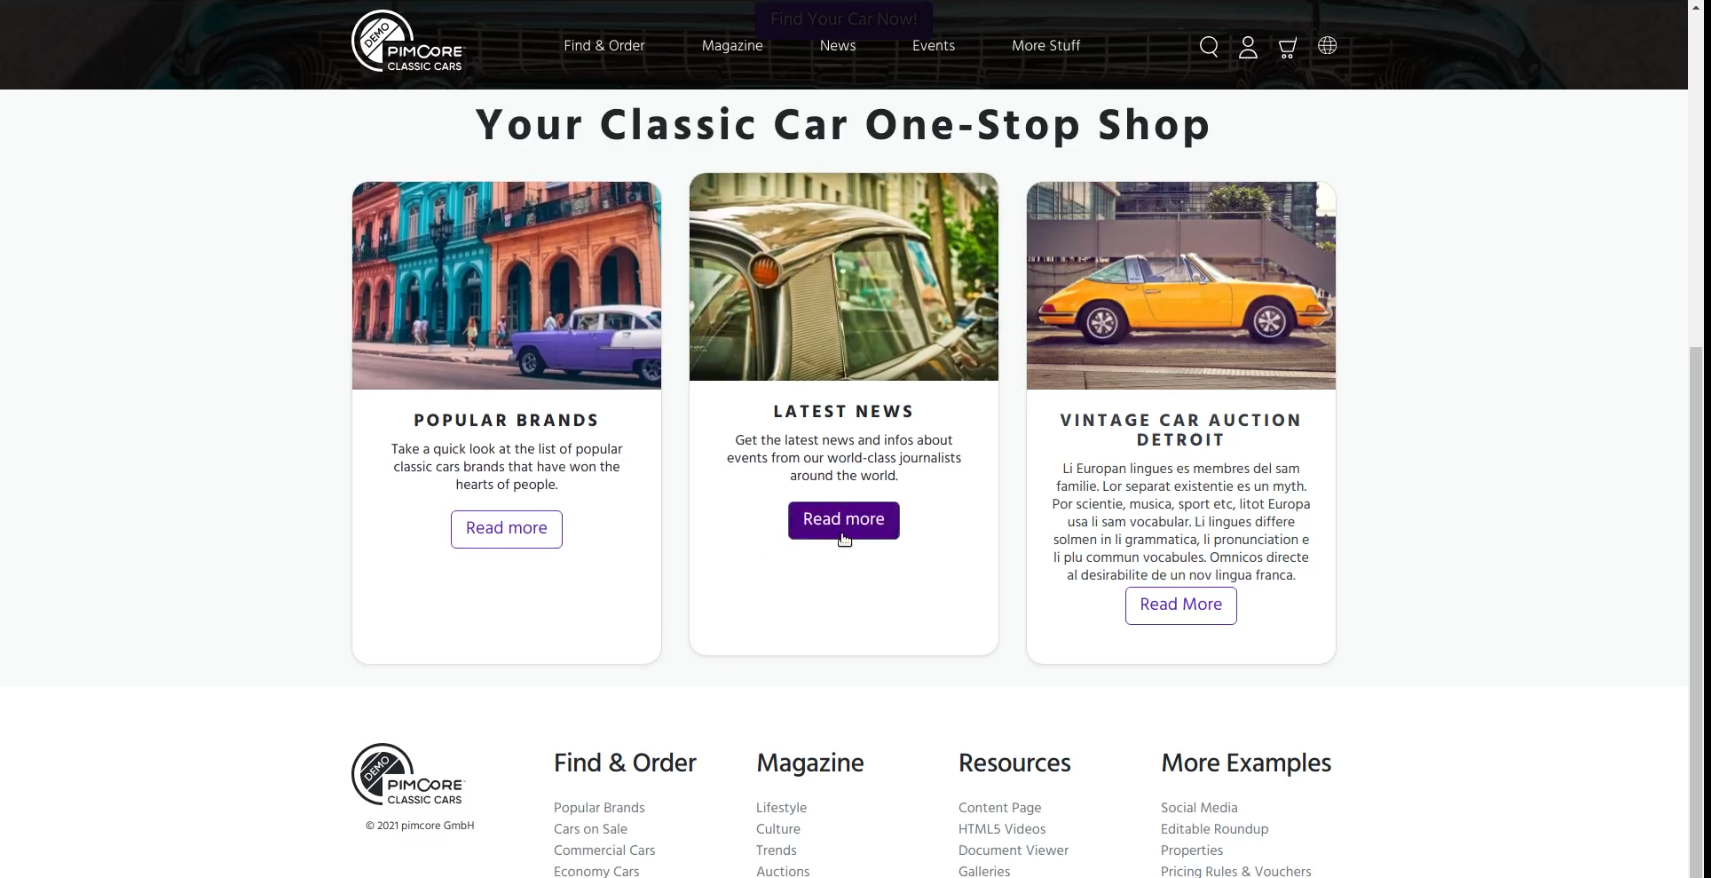
We are done with filling the content of this brick, so let’s save and publish and go check it out in the browser. After reloading you can see our newly added content below the navigation.
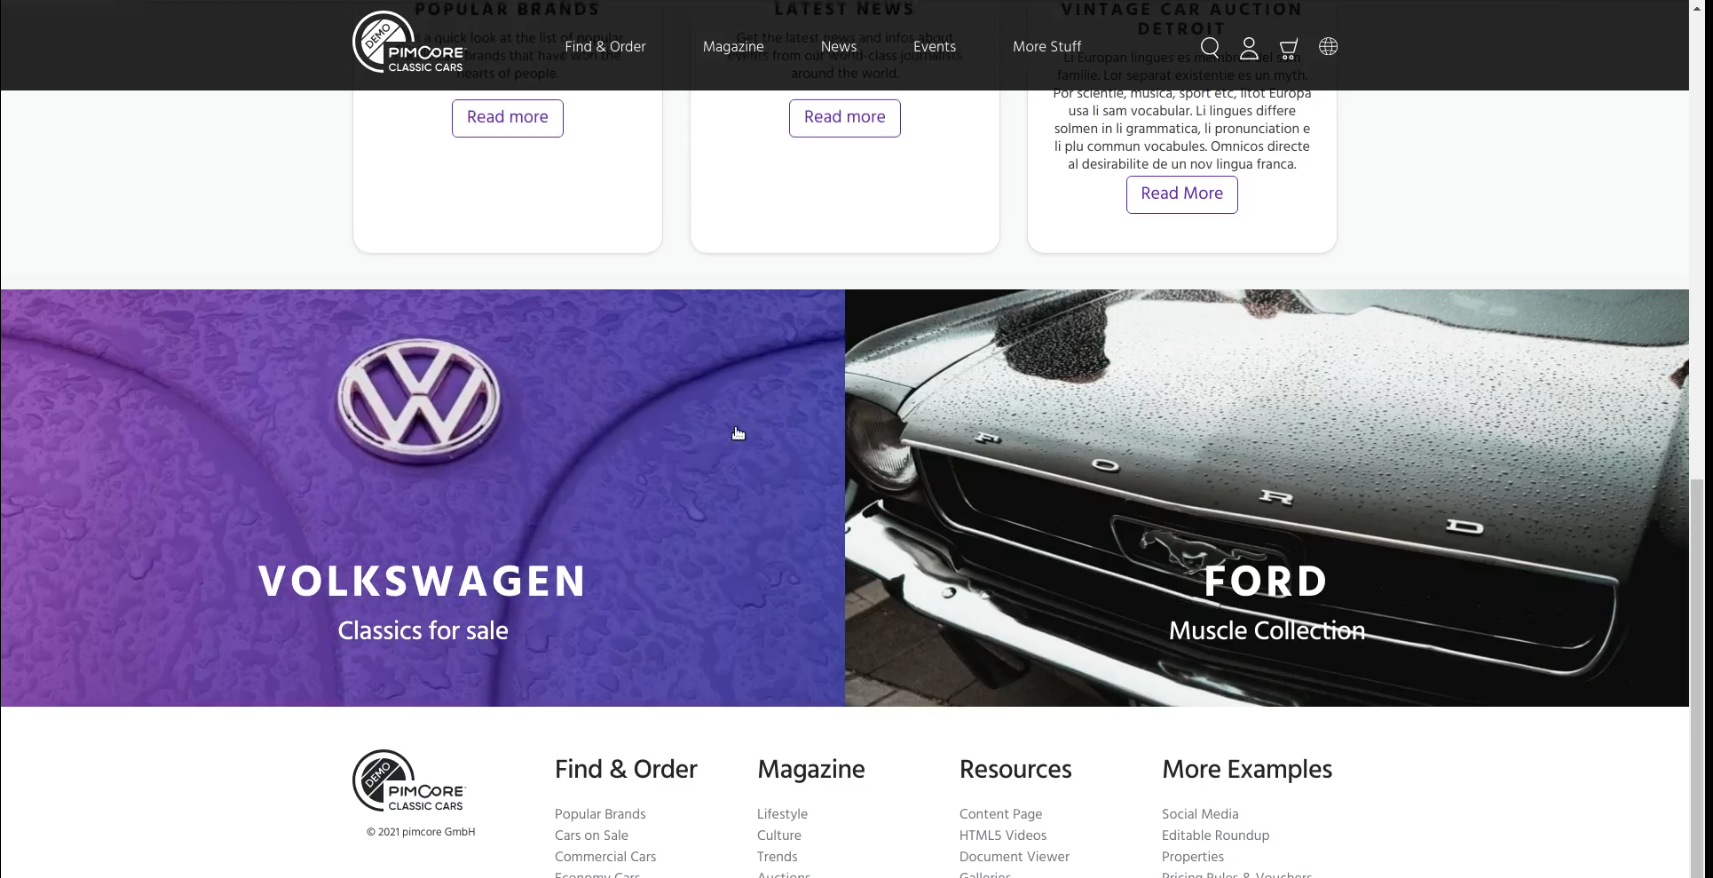
Let’s go back to the edit mode and add one more brick. Go to the top of our current areablock and click on the right green button in order to add another brick below that one. For its type, we will choose “Hero Grid“.
Let’s add space for two items by choosing two as the number of items, and pressing the green plus button. We need to find two images in assets that we would like to display here. Let’s go to “Sample Content“, then “Background Images“, and take anything we like from there.
Now we can also see what these two items in the brick consist of. We again need some text, and a document to drop in.

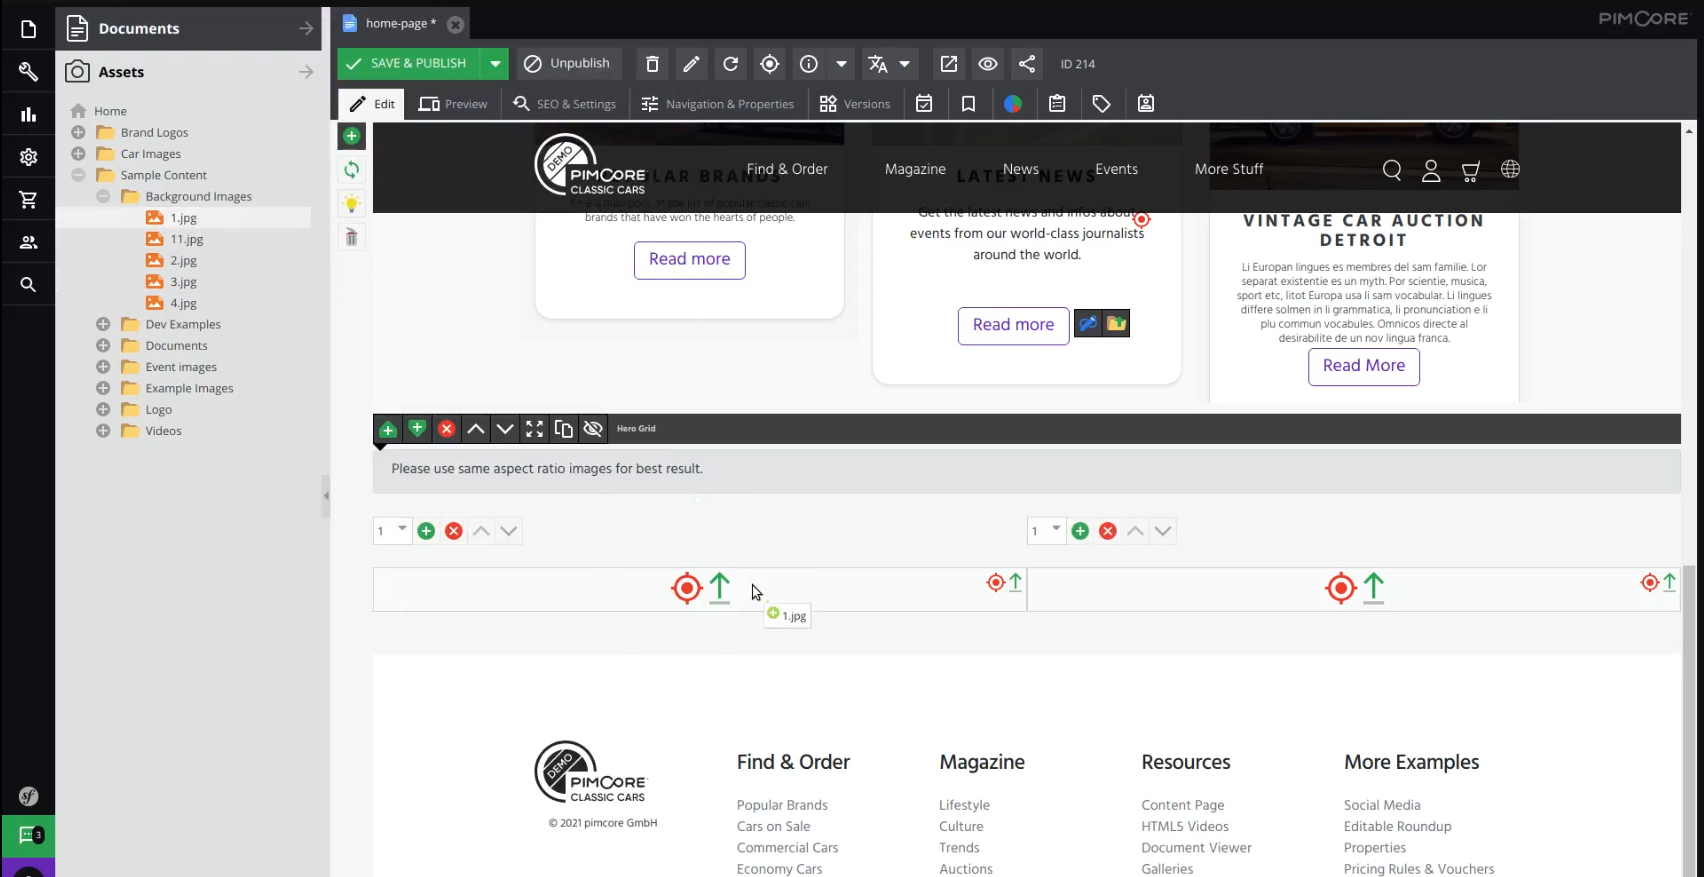
Let’s save and publish, and go and take a look at our homepage.
At the bottom, you can see our newly added content, the “Hero Grid“, and inside of it the whole areas which act as links to other pages. With this, we have finished customizing our home page through Pimcore administration.
What’s next?
This article stops here with the customization of the homepage, but we’re far from covering everything Pimcore has to offer – not even just the Pimcore demo!
You can still find many custom bricks that are created and just waiting to be filled with content and added to pages. There are still many pages with different layouts besides the homepage that we haven’t covered.
In our future guides and articles, we’ll be sure to cover more of Pimcore’s offerings, but until then – visit our Pimcore knowledge base to find more useful content on Pimcore! And if you’re looking for a reliable solution provider, we’ll gladly help! We’re experienced in Pimcore development and we’re one of the Pimcore Gold partners! Whatever app you need – we can build!
Long story short, Pimcore is amazing in all of the features it provides to developers. There is still much more left to be said and explored, and that is also what we highly recommend you to do. Invest into learning Pimcore and feel free to share any findings with us or ask us any questions!
Good luck!
Author: Mitar Cvjetković, Frontend developer