How to use WordPress API and Angular 2 with an example
Need to integrate a quick blog functionality in Angular app?
If you need a quick blog functionality integrated into your Angular 2 app, there’s a great way to do it with WordPress. WordPress is a free and open source PHP based CMS system that offers full blog functionality, and by using its endpoints and REST functionality, you’ll have a JSON machine ready for Angular integration. Angular 2 is a fast and reliable front-end framework, based on Typescript.
We use it when we need to build fast, scalable, focused web apps, since it’s very easy to get started, easy to write code, and syntax errors are almost 100% avoidable. It’s all about setting building blocks the right way.
The goal is to create a simple category template, where each post is linking to a single preview of that particular post. Each blog post will have a title, some content, and a date. Simple header and footer will be included in each template.
Angular 2 setup and AppModule
e pa To get started with Angular you’ll have to have NodeJS and npm installed on your machine. Open your Terminal and install Angular globally
npm install -g @angular/cli
After you’ve had installed Angular, it’s time to navigate to your projects folder and create your first project by typing the following command
ng new my-app
This will create a folder in the directory you’re currently in. Enter that folder and type
ng serve
and you’ll get your first skeleton app running on localhost:4200 by default.
Your folder structure should be looking like this:
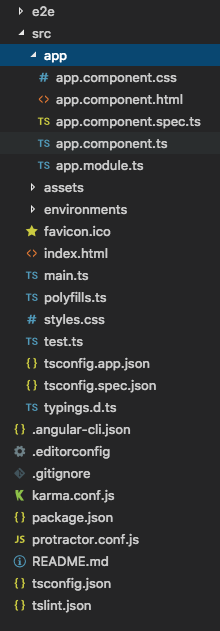
App.component is our root component and it holds all other components. We can say that it represents the <body> tag of our single page applications if thinking in terms of templates. It will be the parent component of all other components for this demo.
app.module is the brain of any angular app (note that advanced applications can have multiple main modules). It also contains declarations of all created components, included modules and declared routes. Since all other components are linked to app.module we can provide different component services to our app from this file.
Generating components and building the backbone of the app
We’ll start building our applications by creating some components with an amazing Angular tool that comes with the official starter kit. Download it from angular.io – it’s called Angular CLI. We need to create 4 components. Those are header and footer component and category and single components, which will hold category and single templates respectfully. We’re going to use Angular CLI to do so.
ng generate component header
ng generate component footer
ng generate component category
ng generate component single
ng generate component will create a folder in which you will find the HTML template of the component, a stylesheet, and the component itself which is nothing else than a typescript class containing the constructor and some default methods. ng generate component will do one additional thing for you, which is to include them in the app.module file, and declare them in the declarations array. If the Angular CLI did its job correctly your app module should look something like this
We should start by setting our application root screen, or the first screen users will see once the app is fully loaded. Note that for the purpose of this blog we’ll skip the details on how to write templates (HTML and CSS).
Another “big” thing which is being introduced at this stage is called Angular Router. The router is yet another component which acts like an old-fashioned still image projector (do you remember those when we were kids?). It reads the URL you type in the browsers URL bar and runs in through an array you declared earlier. If it finds matching pairs and the corresponding component is being displayed (basic filter by unique slugs/URLs). To use it we first must import it in app.module.
Then declare our constant array which holds the path/component pairs
And lastly we need to import our constant appRoutes in the imports array, otherwise, the router module wouldn’t be aware of our routes
Given this configuration, the router will display either Category component or Single component in the <router-outlet></router-outlet> component depending on the URL. Note that we are going to use WordPress slug to fetch unique posts data.
Our app.component.html needs to hold that router-outlet alongside header and footer components.
For a detailed insight into how Angular router works please visit Angular guide/router.
Services, interfaces and observables
We use services in Angular to fetch, modify and distribute data to different components. In our case, we want to fetch all Posts using WP-API. Before we begin explaining how services work, we must have a valid API route that returns a couple of posts in JSON format. In our example we’ll use this JSON object.
This route returns all posts at once, which is fine for the category page, but for the single page, we want to filter out only the post we are looking for using its slug. We can do that by adding a filter parameter. Route with the filter will look something like this:
https://factory.hr/api/wp-json/wp/v2/posts?slug={{my_slug}}
where my_slug will be replaced by the slug value you get with each post.
To generate a service we’ll again use Angular CLI tool. Start by creating a service folder, and type
ng generate service services/posts
This will create an injectable service which is nothing more than a typescript class with public methods that can be accessed from components under the condition that the service is provided to them via the providers array. We can globally provide our service to all components in app.module. We should use services to provide functionality and data modification tools to components. Note that components should be simple in logic, and only receive formatted data from services.
It is considered a good practice to assign a type to any variable in Typescript (something you didn’t do in plain Javascript). With an Interface, you can declare a custom object type. Our Interface would represent the Post object that will be returned in JSON format from the API. Keep in mind that we don’t need all the data that JSON gives us, but think of it in terms of creating a custom object that has an arbitrary type and holds only the data we are going to use in our app. In other words, it contains a title object, content object, and a date string. When creating an array that will hold our posts we can create an array of Post objects and be sure what type of data is in it.
Our post service will have two jobs. One is to provide all posts to category component with a public method getPosts() and other job is getting a singular post value from the array using the filter parameter. We are going to use ReactiveX (has nothing to do with React) Observable pattern in order to handle the asynchronous behavior of the get method. Our component will subscribe to an Observable object type and wait for the data to be emitted.
For more details on how Observables work please visit ReactiveX documentation.
Public function getPosts will return an Observable object in which we have our observer who calls the methods next with the response we got from subscribing to a get function in loadPosts() method.
The other function is getPost which accepts a slug parameter of type string which is then passed to loadPost function and used in forming the correct URL for the API call.
In getPost() method we take the 0 index of our response because I want this observable to be of type Post, and WP-API always returns an array.
Now we have defined our service, and we have to do one more thing before components can use our service. We need to provide it to our app, and we do that by including this Service in the app.module, and including it in the providers array
We made sure that our PostService is visible to all our child components by providing it app.module. Note that it’s recommended that you should provide in app.module only services which have a “global” task, not serving only one component, otherwise you can provide it locally in that particular component by using the same Providers array.
Category post view
Now we are ready for the category component to fetch and display all its posts. We are doing this in the component class.
Start by defining and Array of Post objects.
posts: Array<Post>;
Then in the class constructore declare a private variable postService which will represent a new instance of our Service we created earlier. That postService private variable will have all the public methods from our Service.
ngOnInit is the first function called after the component has been fully initialized. In that function, we call our method loadPosts which subscribes to loadPosts method of PostService we created earlier. Once a response has been emitted we store it in our local variable called posts.
Now we can iterate our posts array in the category template. We do it by using directives. Directives are like HTML attributes which can direct the tag to do something, hence the name. We’re going to use a predefined *ngFor directive, which will loop through all items in posts array.
This is our category template
We can see that we have a list of posts where each item is called post. We use {{}} to output some content. routerLink is another directive which acts like href, basically redirects to a certain and predefined URL. Additionally, we can use a pipe for date formatting, but it’s optional. Pipes are used for data manipulation when outputting something.
This would be a good time to explain that /:slug parameter in the routes array in app.module will load a single template when we click on this link containing /my-slug. Once single preview has been loaded, we must fetch the slug in the URL, and make an additional call to out PostService in order to fetch data for that particular post.
Single post view
Once single view component has been loaded we need to fetch the URL to get the slug of our post. We need ActivatedRoute service for that. We import it:
And make a new instance of it
Now we can fetch our slug in ngOnInit method
We can see that just like with any service we subscribed to a method inside route service which returns the slug from the URL. We can immediately call our loadPost(this.postSlug) method passing the slug in it.
Method loadPost() will subscribe to our getPost(slug) method from PostService. Of course, just like in the category component, we must provide PostService to our Single Component, and initialize it in the component constructor. Naming should be consistent throughout the site, so we decided to stick with postsService.
Once we have our single post stored in the component variable called post, we can easily output the right data in our template.
The only special thing is that we use a directive innerHTML to paste content that has HTML tags ( remember that WordPress outputs HTML from WYSIWYG editor ).
It’s always good to check if a value actually exists (asynchronous nature of Observables) so we use *ngIf directive for that.
*ngIf=”post && post.date”
Was it a long ride? Let’s see what else you can learn…
We learned what it takes to connect WP-API with Angular2. This is just a basic example where we learned how to set up Components and Service to fetch data from WP-API. The great thing about Angular2 is the ease of scalability, so if we need additional functionality from WordPress like custom post types, we just load different routes and continue expanding.
It’s important that we familiarize ourselves with WP-API routes and parameters. There is a great developers handbook for WP-API that describe many things. Keep in mind that the goal of any API is to be easily understood. Find more valuable information like which routes to call to fetch different things, how to implement pagination etc on Developer WordPress – Rest API.
Once we have the route that returns a valid JSON format, we build a service that fetches that JSON using http.get, casts it into an Observable object using a predefined interface, and emits to all subscribers. Components on the other end have methods that initialize once a component is loaded, subscribe to correct services and waiting for the data to be emitted. Once data has arrived, we store it inside a local variable and then display it in the template. It’s that simple. Of course, to navigate between pages we use Angular Router which shows different components in router-outlet based on the URL.
To speed up development further we use Angular CLI. This tool will create everything for us, from the app itself to components and services, as well as interfaces and modules. It will link everything appropriately in the correct places.
I must add that I use Visual Studio Code which has great extension support so you can automatize different things, like importing existing modules.
Angular2 is not a great solution for building large-scale WordPress focused themes since you can greatly optimize modern WordPress using it’s templating functions, achieving great ttfb numbers and still having all the great templating functions that WP offers.
This doesn’t mean that we shouldn’t use Angular2 in custom website development. If you have a solution that isn’t a WP theme, and you need a quick blog functionality, it’s highly effective to implement WordPress backend, use its API, and build a small Angular App that will incorporate all the features you need.