CoreShop and Twig Macros
If you work with Pimcore, you are already familiar with CoreShop — an ecommerce solution based on Pimcore technologies. It offers a broad spectrum of possibilities to make ecommerce development more effortless, so take a look at our guide, where we will focus on one of the advantages that will make your life easier — CoreShop's custom Twig macros.
Back to basics: Twig macros
Before diving deeper into the subject, it's important to remember some basic things about Twig macros.
For starters, macros are comparable with functions in regular programming languages. They are helpful in reuse template fragments to not repeat yourself. Macros are defined in regular Twig templates, and the syntax for defining a macro looks like this:
{% macro macroName(argument1, argument2, ...) %}
{# contents of the macro #}
{% endmacro %}
Arguments of a macro are always optional, and if extra positional arguments are passed to it, they end up in the special 'varargs' variable as a list of values.
Macros don't have access to the current template variables, but the whole context can be passed as an argument to a macro by using the special '\_context' variable.
An important note about all the macros mentioned in this guide is that they are only a basis for you as a developer when using CoreShop. If you find that they are suitable for your project without changing them or making new ones — great, but another purpose of this guide (except for just getting a good understanding of the currently existing macros and CoreShopFrontendBundle in general) is to use that knowledge so you could create new macros and/or modify the current ones to suit your project's needs without a problem.
Messages and Total Quantity
Let's jump right in and look at some simpler CoreShop macros.
All CoreShop macros are located in the "templates/bundles/CoreShopFrontendBundle/Common/Macro" folder, and the first file we'll be looking at is "messages.html.twig".
Messages Macros
(messages.html.twig)
These macros are used for flash messages. The first one, named "default", can receive these three arguments: message, type, and translate.
The first argument — message — is simply the text of the message. Type is the type of the message (e.g., info, error...) used to set different styles for different types of messages, and translate is a boolean value that is used to determine if the message should be translated or not.
Once you understand this, the content of the macro is pretty self-explanatory. Depending on the type, the message has a different class, which is used to set different styles for different types of messages. And depending on the translate argument — it's determined if the message can be translated (if the translate is not null and it's not false) or not.
The other three macros in this file - info, success, and error are all using the first "default" macro (important to note the importing -> {% import _self as messages %} and usage -> messages.default(arguments)).
The arguments they receive are just message and translate, because type is predetermined and passed to the "default" macro depending on the macro being used. So, for example, if you use the "info" macro, the type passed will be info — same with "error" and "success."
The last macro here — "dynamic" — also uses the "default" macro. Still, it doesn't have a predetermined type, which is useful for a message with a dynamic type depending on some other values/logic in the code.
Cart Macro
The second file we'll take a look at is "cart.html.twig". It contains only a single, also very simple macro.
(cart.html.twig)
This "totalQuantity" macro is used for calculating and displaying the total quantity of items in the cart. As an argument, it receives the whole "cart" object (which holds information about a customer's cart contents and all the items in the cart).
Firstly, a totalQuantity variable is defined, and its value is set to 0. Then, a "for" loop is used to loop through all items in the cart, and each item's quantity value is added to totalQuantity. Lastly, that totalQuantity value is displayed.
Product Price Macros
Next, we'll take a look at a number of various macros dealing with product prices and currencies.
CoreShop Product Prices
Before starting, we should clarify some things about CoreShop. Product prices are passed to the frontend as just a number, without information about currency.
For example, if you are working on a single product page and have a product object (with all product information) passed from the backend, and you try to display the product price without using one of CoreShop's macros (or your own logic for converting/formatting) — the price displayed won't mean a lot to the user (e.g., product.price is 1000, 1000 of what?).
So, if you don't want to confuse or scam your customers, you will probably use these macros all the time while building your CoreShop e-commerce solution. Also, for all of this to work, a base currency needs to be set in Pimcore administration. That can be done by going to the CoreShop menu in the leftmost sidebar and selecting "Stores." Different stores can be added here, and various settings can be set.

Additionally, because coreshop.context will be passed as an argument to a lot of these macros — to avoid repeating myself every time it appears in the code — I will clarify right away that it is an array of objects containing base information about the store (pictured on the image above), customer, currency, base_currency, country, and cart.

(coreshop.context)
The last thing to note here is that these macros use many custom CoreShop twig extensions. I will not be explaining each of the extensions in detail because this is a frontend-focused guide, and these extensions use a variety of different PHP functions, which could be a theme for a whole new guide.
Currency Macros
So firstly, we'll go through the "currency.html.twig" file.
Every one of these currency macros uses a Twig extension, so I won't go deep into the logic side of them, but I'll explain their usage.
The first macro here is called "format." The arguments passed are amount — amount of money, currency_code - iso code of the currency (the code the currency is identified by, e.g., EUR, GBP...), and fraction and factor — used to format the amount of the money. It simply formats the price into a value that is readable and understandable to the user. This macro is seldom used on its own, but its usage is important in the other two macros in this file.
"convertAndFormat" is used to convert the amount of money from the base currency to the current currency. After converting, the "format" macro is used for formatting.
It's important to note that neither the currency to, or from, which the amount is converted is not passed as an argument as a custom iso code — it's the dynamic values of the current currency and base currency, and the codes are passed to the "format" macro from the "coreshop.currency" object — an object with information about the current currency, and the "coreshop.store.currency" object — an object with information about the base currency.
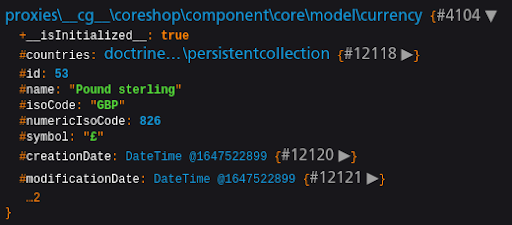
(coreshop.currency)
"convertAndFormatFromCustomCurrency" does the same thing as the "convertAndFormat" macro, but the currency from which the amount is converted is custom, and passed to the macro as the first argument - "fromCurrencyIso."
The next couple of macros are used for getting various price values of the product. While seemingly simple, it's easy to get lost in all of the values, especially with the way different price rules affect them, so I'll clarify what each of the values means precisely and how different price rules change those values.
"getPrice" is used to get the product's current price, after the discount is subtracted, or the original price if there are no discounts or special rules.
"getRetailPrice" macro is used to get the original price of the product — this value is always the same, no matter the discounts (unless you apply a price rule with "Price" and directly change the price that way).
"getDiscount" is used to get the discount amount — the value that is subtracted from the original price.
Lastly, "getDiscountPrice" is used to get the new price after a discount is applied.
Price Rules
The four different price values will significantly depend on the price rules set in CoreShop through Pimcore administration. If there are no price rules set, price and retail price will be the same, and discount and discountPrice will be 0.
So first, let's have a look at different ways you can manipulate prices with different price rules. In the "Actions" tab of a price rule, there are four different price rule types you can add by selecting them in the dropdown.

The first one, "Price," lets you choose the new price and currency. Once you save these values, the price and retail price of the product will be changed to the new value, while the discount and discount price remain 0.
The second one, "Discount Price," lets you set the new discount price. When this is saved, the retail price is still the original price of the product, and its value is not changed; the discount price is the value that's set in administration, price is now equal to the discount price — the current price of the product and discount is still 0.
The third one, "Discount Amount," lets you set the discount amount — the value that will be subtracted from the original price. When this is applied, the retail price is not changed; the price is the new discounted price (retail price minus discount amount), the discount is the value that you set in administration (discount amount), and the discount price is now 0.
The fourth one, "Discount Percent," changes the same values as the "Discount Amount"; the only difference is that in administration, a percentage of the discount is set. The discount amount is dynamically calculated to equal the amount of the percentage subtracted from the original price. So, for example, if the retail price is 60$ and you set the Discount Percent to 20%, the price will now be 48$, and the discount will be 12$ (20% of 60).
You are never limited to choosing only one of these options, they can be combined, and there can be more than one price rule on a product simultaneously.
Product Price Macros
Now, let's go through the "product_price.html.twig". The macros here use the aforementioned currency macros, which are imported as "currency" at the start of the macros.
display_product_price
(product_price.html.twig - display_product_price)
The first macro here, "display_product_price," is used to display a converted and formatted product price, including the discounted price and discount amount (if a discount exists).
It takes two arguments, product and with_tax, product is the product object which contains single product data. The with_tax argument is a boolean value that determines if the price displayed will be with tax included or not. If it's not explicitly specified (if it's null), a Twig extension "coreshop_display_with_tax" is used with coreshop.context passed as an argument.
In store settings in Pimcore admin, a checkbox "Store Prices with VAT" can be checked, which then means that the prices returned are prices with tax included. This information is contained inside the coreshop.context store object as "useGrossPrice." The "coreshop_display_with_tax" extension is used to check if this is true or not, and then the with_tax variable is set accordingly.
After that, product price variables are set. The values are the same as explained in the currency macros (price, retail price, discount, discount amount). For the price, a "coreshop_product_price" filter is used to get the unformatted price of the product - "priceUnformatted," then, currency.convertAndFormat is used to get the converted and formatted value - "price."
For discount, "coreshop_product_discount" filter is used to get the unformatted discount amount, and again, currency.convertAndFormat to get the converted and formatted discount value. The same process is repeated for "discountPrice" (with "coreshop_product_discount_price" filter) and "retailPrice" (with "coreshop_product_retail_price" filter) just with different filters for getting different values.
At last, the prices are displayed. The "price" variable is always displayed with a class "price-new" because that is the current product price. After that, the unformatted price values are compared. If the "priceUnformatted" is less than "discountPriceUnformatted", the "discountPrice" is displayed with the "price-old" class. Else, if "priceUnformatted" is less than "retailPriceUnformatted", the "retailPrice" is displayed with the "price-old" class.
And lastly, if "discountUnformatted" is greater than 0 (remember from the currency macros part, this value will be greater than 0 if a discount is set with "Discount Amount" or "Discount Percentage"), a span with a class "price-discount" is displayed, and the content of the span is "(-{{ discount }})."
display_product_unit_prices
Next macro here is called display_product_unit_prices.
This macro can be used in a specific case where there are special units (of quantity) set for a product. These units are added through Pimcore administration in CoreShop -> Product -> Product Units. A product can have a default unit and additional unit definitions. Additional units must have a conversion rate to the default unit.
So, let's see what exactly is happening in this macro. First, two important variables are set — "defaultUnitDefinition" and "additionalUnitDefinitions". After that, product price and tax are displayed. Then, if additional unit definitions exist (their length is greater than 0), a card is displayed with a list. In that list, additional units are looped through, and for each additional unit, "additionalUnitPrice" is set and displayed as "Price per 'nameOfAdditionalUnit': {{ additionalUnitPrice }}". Next to that text, if the conversion rate is greater than 1, a badge displaying info about the conversion rate is displayed as "including 'conversionRateNumber' 'defaultUnitName'".

So, for example, if we have a default unit named "box" and an additional unit named "packet" with a conversion rate of 10 — the image displayed above will be the result seen on the frontend.
To conclude
As you can see, CoreShop offers a lot of handy macros for frontend developers, and even though they can be used without understanding everything that's happening "under the hood" in the code — having this knowledge will help you understand CoreShop as a whole much better, and make you able to write macros of your own and/or modify the existing ones without any problem whatsoever.